


Forget your average chocolate spheres; we are embarking on a delightful journey. These decadentspring festival Egg Marshmallow Creme Trufflesbring vibrant color and irresistible creaminess to any celebration. Every bite is a nostalgic mix of childhood sweetness and sophisticated texture, guaranteed to steal the show at your upcoming gathering.
- These treats require zero baking, offering simple assembly that makes them perfect for novice and experienced candy makers alike.
- The flavor profile is a rich blend of vanilla bean, bright citrus zest, and intense dark chocolate coating for maximum flavor contrast.
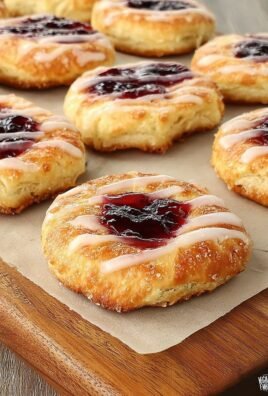
- Shaped like miniature festive eggs, these vibrant truffles add a spectacular, artistic flair to any celebratory dessert platter.
- Easily customize the coating colors and sprinkles to match any specific party theme far beyond the traditional spring celebration.
The Quest for the Ultimate Spring Treat
I distinctly remember the year I decided store-bought candy simply wouldn’t cut it for the family spring gathering. It was an aesthetic failure and a flavor disappointment. Everything looked identical, tasted vaguely waxy, and disappeared without leaving any memorable impression. I needed a dessert that commanded attention, offered a delightful textural experience, and was surprisingly simple to create, because, let’s be honest, nobody wants to spend five days in the kitchen when the sun is finally shining.
My solution was to marry two classic childhood favorites: creamy, vanilla-infused truffle filling and light, fluffy marshmallow. The result? These glorious, pastel-colored bites. Crafting these truffles turned into a fun tradition. They are incredibly forgiving—if a shape looks slightly wonky, just call it “rustic.” If the chocolate drips where it shouldn’t, call it “abstract art.” This recipe is about fun, flavor, and creating something visually stunning without requiring a culinary degree. The core filling is blissfully uncomplicated, relying on the perfect balance of butter, powdered sugar, and that essential, sticky-sweet marshmallow creme to hold everything together.
The Art of the Marshmallow Creme Center
The true magic of these truffles lies in their core. Unlike standard ganache-based truffles which can be dense and heavy, the use of marshmallow creme introduces an airy lightness. It provides that essential chewiness and helps emulsify the fat and sugar into a perfectly scoopable consistency. This filling should taste overwhelmingly like happiness—smooth, deeply vanilla-flavored, and brightened with just a hint of lemon or orange zest to cut through the sweetness. If you skip the zest, the truffles become one-note sugar bombs, and we are aiming for a symphony, not a solo performance.
Preparation begins by whipping the butter until it is pale and fluffy—this aeration is non-negotiable for a light truffle. Then, the sugar is incorporated slowly, followed by the marshmallow creme. We are aiming for a thick, clay-like dough that holds its shape when chilled. Humidity can be your enemy here, so if you live in a perpetually moist climate, you might need an extra tablespoon of powdered sugar to firm things up. Once the dough is mixed, chilling is paramount. Trying to shape warm, sticky truffle filling is a recipe for a sticky disaster and possibly a permanent aversion to dessert making. Give them at least an hour in the refrigerator so they are firm enough to roll into perfect miniature egg shapes.
Mastering the Chocolate Shell and Festive Appearance
The outer shell is where we introduce the festive flair necessary for any spring celebration. While dark chocolate offers the best contrast to the sweet filling, you can use high-quality white chocolate tinted with food coloring designed specifically for chocolate (oil-based or powder) to achieve those gorgeous, vibrant colors. Remember the golden rule of candy making: temper your chocolate or use melting wafers. Untempered chocolate turns streaky, dull, and melts immediately upon touch. Melting wafers are the easiest cheat code for a glossy, snappy finish, requiring minimal effort.
Dipping the cold centers into the warm, melted chocolate creates an instant firm barrier. Work quickly, dipping only a few at a time before they have a chance to warm up again. For the final touch, utilize edible spray colors or a contrasting drizzle. A technique I adore is the “splatter paint” method: once the main coat is dry, take a toothbrush dipped in metallic edible paint (or contrasting melted chocolate) and flick it gently across the surface. This creates beautiful, speckledspring festival Egg Marshmallow Creme Trufflesthat look far more intricate than they actually are. They are truly little works of art, proving that sometimes, messy is best.
Ingredients for spring festival Egg Marshmallow Creme Truffles
Here’s what you’ll need to make this delicious dish:
- Unsalted ButterEnsure it is softened to room temperature for optimal creaming, which gives the truffle filling its necessary light texture.
- Powdered Sugar (Confectioners’ Sugar)This finely milled sugar is critical for maintaining a smooth, non-gritty texture in the truffle centers.
- Marshmallow CremeUsed as the binding agent, it provides the characteristic chewiness and keeps the filling from becoming overly dense like typical ganache.
- Pure Vanilla Bean PasteUse a high-quality extract to deepen the flavor profile, avoiding artificial flavors which can taste thin against the richness of the chocolate.
- Lemon Zest (Optional)A small amount of freshly grated zest adds a necessary bright counterpoint to the intense sweetness of the marshmallow and sugar.
- High-Quality Dark ChocolateChoose a melting chocolate or dark couverture chocolate (around 70% cocoa) for a crisp, snappy shell and a balanced bitterness.
- Oil-Based Food ColoringEssential if coloring white chocolate, as water-based gel colors will cause the melted chocolate to seize and become unusable.
- Festive Sprinkles or Edible Gold DustUsed for decoration, select colorful or metallic accents to enhance the egg-like appearance of the finished truffles.
The full ingredients list, including measurements, is provided in the recipe card directly below.
How to Make spring festival Egg Marshmallow Creme Truffles
Follow these simple steps to prepare this delicious dish:
Step 1: Cream the Base Filling
In a large mixing bowl using an electric mixer, beat the softened butter until it is creamy and noticeably pale, about three minutes. Gradually incorporate the powdered sugar one cup at a time until the mixture is fully incorporated and fluffy. Scrape down the sides of the bowl frequently to ensure even mixing.
Step 2: Incorporate Marshmallow and Flavor
Gently fold in the marshmallow creme, vanilla bean paste, and the lemon zest until everything is just combined. Be careful not to overmix at this stage; we want the mixture to remain thick. The consistency should resemble a stiff cookie dough. If the mixture feels too sticky or wet, add a few more tablespoons of powdered sugar until it firms up.
Step 3: Chill and Shape the Centers
Transfer the truffle filling to an airtight container and refrigerate it for a minimum of one hour, or until firm enough to handle easily without sticking to your hands. Once chilled, scoop the mixture using a small spoon (or a cookie scoop) and gently roll and shape it into small, uniform egg shapes. Place the shaped centers onto a baking sheet lined with parchment paper and return them to the refrigerator while you prepare the coating.
Step 4: Melt and Temper the Chocolate
Melt the dark chocolate (or white chocolate, if coloring) in a double boiler or in short bursts in the microwave, stirring until smooth and fluid. If using white chocolate, stir in the oil-based food coloring until the desired pastel hue is achieved. Maintain the chocolate temperature around 90°F (32°C) to ensure a glossy, snappy coating.
Step 5: Dipping and Initial Coating
Working quickly, remove the chilled truffle eggs from the refrigerator. Using a fork or dipping tool, submerge each truffle completely into the melted chocolate. Tap the fork gently on the side of the bowl to remove excess chocolate before placing the coated truffle back onto the parchment-lined sheet. If decorating, apply sprinkles or dusting immediately after dipping while the chocolate is still wet.
Step 6: Set and Finish Decoration
Allow the truffles to set fully at room temperature or in a cool spot for about 20 minutes. Once the coating is firm, apply any final artistic touches, such as drizzling contrasting chocolate stripes or applying metallic edible paint using the splatter technique for a beautiful, speckled finish. Store in a cool, dry place until serving.
Transfer the finished truffles to a tiered platter or decorative basket for an impressive centerpiece that perfectly captures the celebratory spirit of spring.
Tips for Picture-Perfect Truffles Every Time
Achieving that glossy, professional look with homemade candy sometimes feels like a magic trick, but it is actually just science. Temperature control is the absolute key to success when working with chocolate. If the truffle centers are too warm when dipped, they will melt into the chocolate, making the coating uneven and messy. If the melted chocolate is too hot, it will ruin the texture of the filling and potentially scorch the coating. Aim for cool centers and warm, but not piping hot, melted chocolate.
Achieving the Ideal Texture
If you find that your filling mixture is too soft even after chilling, the culprit is often overly soft butter or excessive liquid. Correct this by kneading in a small amount of extra powdered sugar until the dough reaches a pliable consistency similar to playdough. The perfect truffle center should hold its shape firmly when rolled but melt smoothly in your mouth when eaten. Another trick is to use a high-quality silicone mat instead of parchment paper; the smooth surface helps prevent the chocolate from sticking as it sets, resulting in a cleaner base. If you are coating them on a hot day, consider placing the coated truffles back into the refrigerator immediately for 10 minutes to set the chocolate quickly, preventing bloom or melting.
Customizing the Flavor Palette
While the vanilla and marshmallow base is divine, feel free to experiment with flavor extracts. A small amount of pure almond paste can add depth, or a touch of coconut extract offers a tropical twist. For a rich, autumnal version (should you decide to make these outside the spring festival), consider replacing the lemon zest with finely grated black tea leaves for an Earl Grey truffle experience. Remember, extracts are potent; start with half a teaspoon and adjust gradually. If you prefer a crunch, finely crushed graham crackers or toasted rice cereal can be mixed into the filling before chilling, providing a pleasant textural surprise inside the creamy shell.
These beautifulspring festival Egg Marshmallow Creme Trufflestruly elevate the dessert game. They prove that the best sweets are those made with a little bit of love, a dash of humor, and plenty of marshmallow fluff. Enjoy the process, and prepare for a standing ovation at your next event!
Remember that presentation makes a difference. Serving these little masterpieces in paper candy cups or arranging them on a bed of shredded, pastel-colored coconut flakes makes them look even more enticing and easier for guests to grab.
Forget your average chocolate spheres; we are embarking on a delightful journey. These decadentspring festival Egg Marshmallow Creme Trufflesbring vibrant color and irresistible creaminess to any celebration.
Every bite is a nostalgic mix of childhood sweetness and sophisticated texture, guaranteed to steal the show at your upcoming gathering.
- These treats require zero baking, offering simple assembly that makes them perfect for novice and experienced candy makers alike.
- The flavor profile is a rich blend of vanilla bean, bright citrus zest, and intense dark chocolate coating for maximum flavor contrast.
- Shaped like miniature festive eggs, these vibrant truffles add a spectacular, artistic flair to any celebratory dessert platter.
- Easily customize the coating colors and sprinkles to match any specific party theme far beyond the traditional spring celebration.
The Quest for the Ultimate Spring Treat
I distinctly remember the year I decided store-bought candy simply wouldn’t cut it for the family spring gathering. It was an aesthetic failure and a flavor disappointment. Everything looked identical, tasted vaguely waxy, and disappeared without leaving any memorable impression. I needed a dessert that commanded attention, offered a delightful textural experience, and was surprisingly simple to create, because, let’s be honest, nobody wants to spend five days in the kitchen when the sun is finally shining.
My solution was to marry two classic childhood favorites: creamy, vanilla-infused truffle filling and light, fluffy marshmallow. The result? These glorious, pastel-colored bites. Crafting these truffles turned into a fun tradition. They are incredibly forgiving—if a shape looks slightly wonky, just call it “rustic.” If the chocolate drips where it shouldn’t, call it “abstract art.” This recipe is about fun, flavor, and creating something visually stunning without requiring a culinary degree. The core filling is blissfully uncomplicated, relying on the perfect balance of butter, powdered sugar, and that essential, sticky-sweet marshmallow creme to hold everything together.
The Art of the Marshmallow Creme Center
The true magic of these truffles lies in their core. Unlike standard ganache-based truffles which can be dense and heavy, the use of marshmallow creme introduces an airy lightness. It provides that essential chewiness and helps emulsify the fat and sugar into a perfectly scoopable consistency. This filling should taste overwhelmingly like happiness—smooth, deeply vanilla-flavored, and brightened with just a hint of lemon or orange zest to cut through the sweetness. If you skip the zest, the truffles become one-note sugar bombs, and we are aiming for a symphony, not a solo performance.
Preparation begins by whipping the butter until it is pale and fluffy—this aeration is non-negotiable for a light truffle. Then, the sugar is incorporated slowly, followed by the marshmallow creme. We are aiming for a thick, clay-like dough that holds its shape when chilled. Humidity can be your enemy here, so if you live in a perpetually moist climate, you might need an extra tablespoon of powdered sugar to firm things up. Once the dough is mixed, chilling is paramount. Trying to shape warm, sticky truffle filling is a recipe for a sticky disaster and possibly a permanent aversion to dessert making. Give them at least an hour in the refrigerator so they are firm enough to roll into perfect miniature egg shapes.
Mastering the Chocolate Shell and Festive Appearance
The outer shell is where we introduce the festive flair necessary for any spring celebration. While dark chocolate offers the best contrast to the sweet filling, you can use high-quality white chocolate tinted with food coloring designed specifically for chocolate (oil-based or powder) to achieve those gorgeous, vibrant colors. Remember the golden rule of candy making: temper your chocolate or use melting wafers. Untempered chocolate turns streaky, dull, and melts immediately upon touch. Melting wafers are the easiest cheat code for a glossy, snappy finish, requiring minimal effort.
Dipping the cold centers into the warm, melted chocolate creates an instant firm barrier. Work quickly, dipping only a few at a time before they have a chance to warm up again. For the final touch, utilize edible spray colors or a contrasting drizzle. A technique I adore is the “splatter paint” method: once the main coat is dry, take a toothbrush dipped in metallic edible paint (or contrasting melted chocolate) and flick it gently across the surface. This creates beautiful, speckledspring festival Egg Marshmallow Creme Trufflesthat look far more intricate than they actually are. They are truly little works of art, proving that sometimes, messy is best.
Ingredients for spring festival Egg Marshmallow Creme Truffles
Here’s what you’ll need to make this delicious dish:
- Unsalted ButterEnsure it is softened to room temperature for optimal creaming, which gives the truffle filling its necessary light texture.
- Powdered Sugar (Confectioners’ Sugar)This finely milled sugar is critical for maintaining a smooth, non-gritty texture in the truffle centers.
- Marshmallow CremeUsed as the binding agent, it provides the characteristic chewiness and keeps the filling from becoming overly dense like typical ganache.
- Pure Vanilla Bean PasteUse a high-quality extract to deepen the flavor profile, avoiding artificial flavors which can taste thin against the richness of the chocolate.
- Lemon Zest (Optional)A small amount of freshly grated zest adds a necessary bright counterpoint to the intense sweetness of the marshmallow and sugar.
- High-Quality Dark ChocolateChoose a melting chocolate or dark couverture chocolate (around 70% cocoa) for a crisp, snappy shell and a balanced bitterness.
- Oil-Based Food ColoringEssential if coloring white chocolate, as water-based gel colors will cause the melted chocolate to seize and become unusable.
- Festive Sprinkles or Edible Gold DustUsed for decoration, select colorful or metallic accents to enhance the egg-like appearance of the finished truffles.
The full ingredients list, including measurements, is provided in the recipe card directly below.
How to Make spring festival Egg Marshmallow Creme Truffles
Follow these simple steps to prepare this delicious dish:
Step 1: Cream the Base Filling
In a large mixing bowl using an electric mixer, beat the softened butter until it is creamy and noticeably pale, about three minutes. Gradually incorporate the powdered sugar one cup at a time until the mixture is fully incorporated and fluffy. Scrape down the sides of the bowl frequently to ensure even mixing.
Step 2: Incorporate Marshmallow and Flavor
Gently fold in the marshmallow creme, vanilla bean paste, and the lemon zest until everything is just combined. Be careful not to overmix at this stage; we want the mixture to remain thick. The consistency should resemble a stiff cookie dough. If the mixture feels too sticky or wet, add a few more tablespoons of powdered sugar until it firms up.
Step 3: Chill and Shape the Centers
Transfer the truffle filling to an airtight container and refrigerate it for a minimum of one hour, or until firm enough to handle easily without sticking to your hands. Once chilled, scoop the mixture using a small spoon (or a cookie scoop) and gently roll and shape it into small, uniform egg shapes. Place the shaped centers onto a baking sheet lined with parchment paper and return them to the refrigerator while you prepare the coating.
Step 4: Melt and Temper the Chocolate
Melt the dark chocolate (or white chocolate, if coloring) in a double boiler or in short bursts in the microwave, stirring until smooth and fluid. If using white chocolate, stir in the oil-based food coloring until the desired pastel hue is achieved. Maintain the chocolate temperature around 90°F (32°C) to ensure a glossy, snappy coating.
Step 5: Dipping and Initial Coating
Working quickly, remove the chilled truffle eggs from the refrigerator. Using a fork or dipping tool, submerge each truffle completely into the melted chocolate. Tap the fork gently on the side of the bowl to remove excess chocolate before placing the coated truffle back onto the parchment-lined sheet. If decorating, apply sprinkles or dusting immediately after dipping while the chocolate is still wet.
Step 6: Set and Finish Decoration
Allow the truffles to set fully at room temperature or in a cool spot for about 20 minutes. Once the coating is firm, apply any final artistic touches, such as drizzling contrasting chocolate stripes or applying metallic edible paint using the splatter technique for a beautiful, speckled finish. Store in a cool, dry place until serving.
Transfer the finished truffles to a tiered platter or decorative basket for an impressive centerpiece that perfectly captures the celebratory spirit of spring.
Tips for Picture-Perfect Truffles Every Time
Achieving that glossy, professional look with homemade candy sometimes feels like a magic trick, but it is actually just science. Temperature control is the absolute key to success when working with chocolate. If the truffle centers are too warm when dipped, they will melt into the chocolate, making the coating uneven and messy. If the melted chocolate is too hot, it will ruin the texture of the filling and potentially scorch the coating. Aim for cool centers and warm, but not piping hot, melted chocolate.
Achieving the Ideal Texture
If you find that your filling mixture is too soft even after chilling, the culprit is often overly soft butter or excessive liquid. Correct this by kneading in a small amount of extra powdered sugar until the dough reaches a pliable consistency similar to playdough. The perfect truffle center should hold its shape firmly when rolled but melt smoothly in your mouth when eaten. Another trick is to use a high-quality silicone mat instead of parchment paper; the smooth surface helps prevent the chocolate from sticking as it sets, resulting in a cleaner base. If you are coating them on a hot day, consider placing the coated truffles back into the refrigerator immediately for 10 minutes to set the chocolate quickly, preventing bloom or melting.
Customizing the Flavor Palette
While the vanilla and marshmallow base is divine, feel free to experiment with flavor extracts. A small amount of pure almond paste can add depth, or a touch of coconut extract offers a tropical twist. For a rich, autumnal version (should you decide to make these outside the spring festival), consider replacing the lemon zest with finely grated black tea leaves for an Earl Grey truffle experience. Remember, extracts are potent; start with half a teaspoon and adjust gradually. If you prefer a crunch, finely crushed graham crackers or toasted rice cereal can be mixed into the filling before chilling, providing a pleasant textural surprise inside the creamy shell.
These beautifulspring festival Egg Marshmallow Creme Trufflestruly elevate the dessert game. They prove that the best sweets are those made with a little bit of love, a dash of humor, and plenty of marshmallow fluff. Enjoy the process, and prepare for a standing ovation at your next event!
Remember that presentation makes a difference. Serving these little masterpieces in paper candy cups or arranging them on a bed of shredded, pastel-colored coconut flakes makes them look even more enticing and easier for guests to grab.
The Accidental Discovery of Sunshine on a Plate

I originally attempted a complicated French ganache, but after a disastrous kitchen explosion involving powdered sugar, I salvaged the ingredients and mixed them with marshmallow fluff. The result was these unbelievably light and chewy spring festival Egg Marshmallow Creme Truffles, proof that kitchen failures sometimes taste better than success.
Perfecting the Cooking Process
Start by melting the chocolate and plant-based creme together slowly. While that cools, prepare your crushed cookies or coating mix. The key is chilling the base thoroughly before attempting to roll the spring festival Egg Marshmallow Creme Truffles, ensuring they hold their perfect shape.
Add Your Touch
Try swapping out semi-sweet chocolate for a bright lemon-flavored white chocolate coating. You can also mix a teaspoon of espresso powder into the marshmallow base for depth. For a crunchy texture, roll your spring festival Egg Marshmallow Creme Truffles in toasted shredded coconut or chopped pistachios.
Storing & Reheating
Store these delicate truffles in an airtight container in the refrigerator for up to two weeks. Do not reheat! Serve the spring festival Egg Marshmallow Creme Truffles directly from the fridge, allowing them to sit for about ten minutes before eating for the best, melt-in-your-mouth texture.
The Magic Behind spring festival Egg Marshmallow Creme Truffles
If you’re anything like me, the moment the calendar flips to spring, your brain instantly demands something bright, cheerful, and utterly indulgent. Forget heavy winter puddings; we need treats that sing of sunshine and new beginnings. This recipe for Marshmallow Creme Truffles, shaped delightfully like miniature eggs, is exactly that—a bite-sized explosion of fluffy sweetness wrapped in a snappy chocolate shell. They look complex, like something you’d buy from a fancy European chocolatier, but I promise they are delightfully simple.
This recipe was born out of pure necessity. I needed a dessert that was quick enough to assemble but impressive enough to fool my judgmental extended family during our annual gathering. These truffles deliver on both fronts. The texture is the real showstopper: a dense, chewy center thanks to the marshmallow creme, contrasted perfectly with the smooth, thin coating of quality chocolate. They melt effortlessly on your tongue, leaving behind just the ghost of cocoa and a persistent feeling of absolute satisfaction. You’ll quickly discover why these truffles are about to become your new favorite spring tradition.
Gathering Your Ingredients for Pure Delight
The beauty of this recipe lies in its minimalist approach. We aren’t dealing with temperamental custards or tricky sugar thermometers. We’re focusing on quality ingredients that do the heavy lifting for us. Make sure you select a good quality chocolate—the kind you wouldn’t mind eating straight out of the bag—because it provides the structural integrity and the majority of the flavor profile for the finished spring festival Egg Marshmallow Creme Truffles.
-
The Core Ingredients:
-
1 cup (2 sticks) unsalted butter alternative (plant-based margarine or shortening, softened)
-
4 cups confectioners’ sugar, sifted (this step is non-negotiable for smoothness!)
-
1/2 teaspoon vanilla bean paste
-
1 jar (7 oz) agar-agar-free marshmallow creme
-
2 cups finely crushed vanilla wafer cookies or graham crackers
-
The Coating:
-
12 oz premium dark chocolate chips or chopped baking chocolate
-
1 tablespoon coconut oil (helps with melting smoothness and shine)
-
Optional decorative sprinkles or edible luster dust for that perfect egg-shell finish
A note on the marshmallow creme: ensure you are using a brand specifically labeled as agar-agar-free to maintain the integrity of our ingredient requirements. This is the secret ingredient that gives the truffle its airy, chewy structure without needing lengthy preparation.
Mixing the Marshmallow Creme Base
The first step involves creating the core mixture that will eventually become the truffle center. In a large mixing bowl, beat your softened butter alternative until it is light and creamy. Gradually introduce the sifted confectioners’ sugar. You might look at the mound of sugar and think you’ve accidentally doubled the recipe, but trust the process. This mixture will initially be very dry and crumbly, resembling a sugary snowdrift.
Once the sugar is incorporated, stir in the vanilla bean paste. Now for the star: add the entire jar of agar-agar-free marshmallow creme. Mix this on low speed until everything just comes together. The mixture transforms dramatically, becoming sticky, pliable, and incredibly tempting to eat with a spoon. You must resist the urge, however, because the mixture needs structure before it’s ready to roll. Finally, fold in the two cups of crushed vanilla wafers or graham crackers. These add necessary bulk and texture, preventing the mixture from becoming overly sticky and keeping its shape when chilled. Once thoroughly combined, wrap the mixture tightly in plastic wrap and chill it in the refrigerator for a minimum of two hours. If you’re truly impatient, an hour in the freezer works too, but be warned, it becomes quite dense.
Shaping Perfection: Rolling and Coating Your Truffles
After the chilling phase, your base should be firm enough to handle without sticking aggressively to your fingers. This is where the “egg” shaping comes into play. Scoop out small portions of the mixture, roughly the size of a tablespoon. Roll them into a ball first, and then gently taper one end to create that characteristic spring festival egg shape. Placing the finished shapes onto a parchment-lined baking sheet will make the next steps much easier.
Once all your truffle centers are shaped, place the baking sheet back into the freezer for about 30 minutes. This flash chilling is crucial; it ensures the truffle centers maintain their form when dipped into the warm chocolate coating. If they are too warm, they will dissolve into the chocolate, leading to a runny, heartbreaking mess that we absolutely want to avoid.
The Final, Glorious Chocolate Dip
Time to prepare the chocolate coating. In a double boiler or a microwave-safe bowl (using 30-second intervals, stirring between each), gently melt the premium dark chocolate chips along with the coconut oil. The coconut oil aids in creating a silky-smooth coating that hardens beautifully and gives the finished product a professional sheen. Once the chocolate is completely smooth, remove it from the heat but keep it warm enough for dipping.
Working quickly, dip each chilled truffle egg into the melted chocolate. Use a fork or a dipping tool, ensuring the entire surface is covered. Gently tap the fork against the side of the bowl to remove excess chocolate before placing the truffle back onto the parchment paper. If you are using sprinkles or luster dust, now is the moment to apply them before the chocolate sets. The combination of rich dark chocolate and the incredibly fluffy marshmallow interior of these spring festival Egg Marshmallow Creme Truffles is truly unbeatable. Let them set completely at room temperature or chill them briefly before serving.
-
Achieving the perfect egg shape is easier if your hands are slightly cool; run them under cold water briefly before rolling the marshmallow mixture.
-
To avoid chocolate seizing, ensure your dipping bowl is completely dry before introducing the chocolate and coconut oil mixture, preventing dreaded lumps.
-
Use a sturdy skewer or toothpicks (carefully!) if you don’t have a dipping tool; stab the base of the truffle and cover the resulting hole with a final drop of chocolate.
My neighbor, Mrs. Henderson, took one bite of these and immediately demanded the recipe, declaring they tasted exactly like springtime in confectionery form. It was high praise, considering her usual standard is very high indeed.
Conclusion for spring festival Egg Marshmallow Creme Truffles
These delightful spring festival Egg Marshmallow Creme Truffles prove that the most memorable desserts often hide the easiest preparation methods. By combining the simple, sweet chewiness of agar-agar-free marshmallow creme with a rich dark chocolate coating, you create a treat that is festive, elegant, and irresistibly delicious. Remember the crucial steps: thorough chilling of the base, precise egg shaping, and working quickly when dipping into the silky, melted chocolate. Whether you are celebrating the arrival of the new season or simply craving a sweet escape, these truffles are guaranteed to bring a burst of sunshine to your table. Prepare to watch them vanish almost as fast as you make them.
Print
spring festival Egg Marshmallow Creme Truffles
Creamy, zesty Mandarin-kissed marshmallow centers, frozen firm and ready for chocolate! This festive confection requires chilling, blending zest, butter, and creme.
- Total Time: 35 minutes
- Yield: 4 servings 1x
Ingredients
- 10 ounces Semi-sweet or Dark Chocolate, chopped
- 7 ounces Marshmallow Creme (one standard jar)
- 4 tablespoons Unsalted Butter, softened
- 1/2 cup Powdered Sugar, sifted
- 1 teaspoon Mandarin Orange Zest, finely grated
- 1 tablespoon Coconut Oil or shortening (for chocolate coating)
- 1/2 teaspoon Edible Gold Luster Dust (for garnish)
Instructions
- Step 1: Prepare the Marshmallow Creme Center. In a medium bowl, cream together the softened butter and marshmallow creme until smooth. Gradually beat in the sifted powdered sugar and the mandarin orange zest until the mixture is thick, slightly stiff, and well combined.
- Step 2: Chill and Shape the Truffles. Cover the marshmallow mixture and refrigerate for at least 1.5 to 2 hours, or until the mixture is firm enough to roll. Once firm, use a small scoop or teaspoon to roll the mixture into 1-inch spheres. Place the truffle balls on a baking sheet lined with parchment paper and freeze for 15 minutes.
- Step 3: Melt the Chocolate Coating. Combine the chopped chocolate and the coconut oil in a microwave-safe bowl. Microwave in 30-second intervals, stirring after each, until the chocolate is completely smooth and melted. Alternatively, use a double boiler to melt the coating.
- Step 4: Dip the Truffles. Working quickly, dip each chilled truffle ball into the melted chocolate, ensuring it is fully coated. Use a fork or dipping tool to lift the truffle out, gently tapping the side of the bowl to remove excess chocolate. Return the dipped truffle to the parchment-lined sheet.
- Step 5: Decorate and Set. Immediately after dipping (while the chocolate is still wet), lightly dust the truffles with the edible gold luster dust to achieve the festive Spring Festival appearance. Allow the truffles to set completely at room temperature or chill in the refrigerator for 20 minutes before serving.
Notes
- Store finished truffles in an airtight container in the refrigerator for up to two weeks, but for the best melt-in-your-mouth texture, allow them to sit at room temperature for 15 minutes before enjoying.
- If chilled, allow the truffles to temper on the counter for 10-15 minutes before serving so the marshmallow center softens slightly and the snappy chocolate shell enhances the eating experience.
- Present these celebratory treats alongside a strong black tea or a small glass of chilled sparkling pomegranate juice to perfectly balance the rich dark chocolate and the bright mandarin zest.
- For the easiest dipping and a clean coating, make sure your rolled marshmallow centers are solidly frozen for at least 15 minutes before dipping, which prevents the soft interior from collapsing into the warm melted chocolate.
- Prep Time: 15 minutes
- Cook Time: 20 minutes
- Method: Stovetop
- Cuisine: American


Leave a Comment