

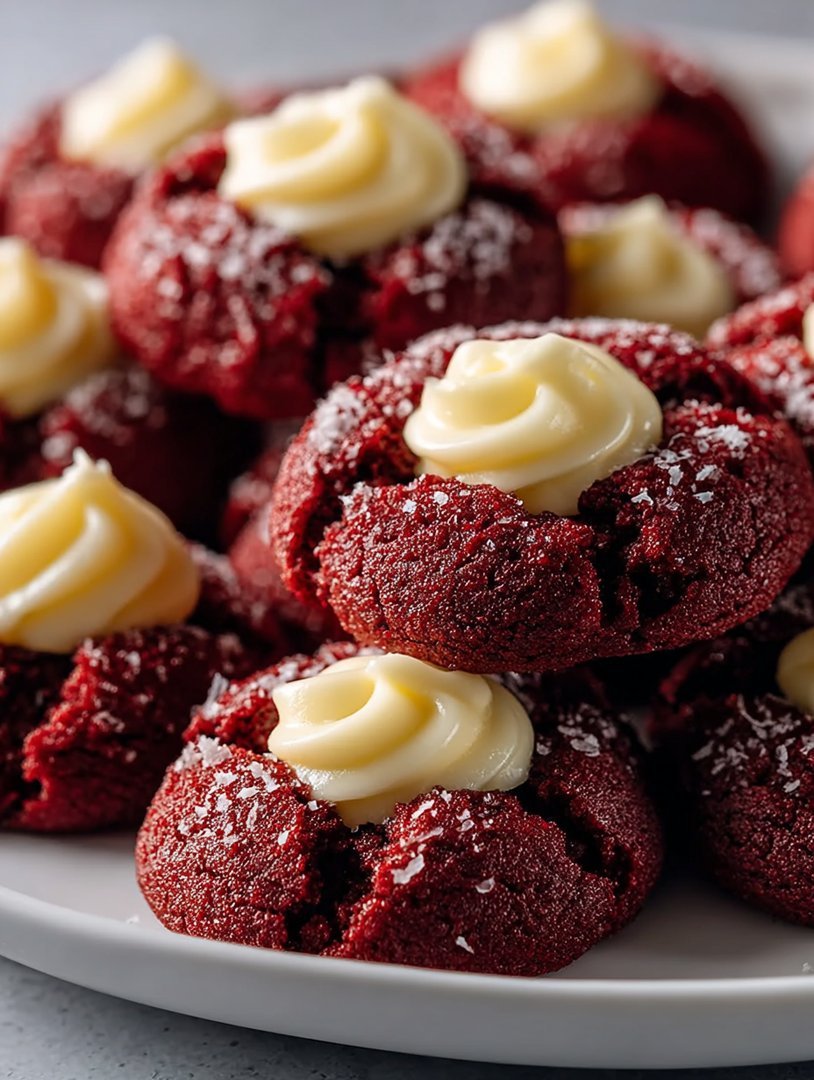
Forget your regular chocolate chip routine; we are diving headfirst into baking royalty today. TheseRed Velvet Cream Cheese Thumbprint Cookiesare less a snack and more an obsession—a decadent mash-up of rich cocoa and tangy cream cheese frosting that demands attention.
I once mistakenly ate six of these before realizing my coffee was still cold, which is exactly the level of devotion they inspire. Get ready to bake a batch of treats so luxurious, they might just start negotiating their own rent.
- Effortless Prep: Mixing the dough takes less time than arguing over which movie to watch, making these perfect for last-minute baking emergencies.
- Flavor Fireworks: Experience the deep, subtle cocoa notes of red velvet perfectly balanced by the sweet, zesty tang of the cream cheese filling.
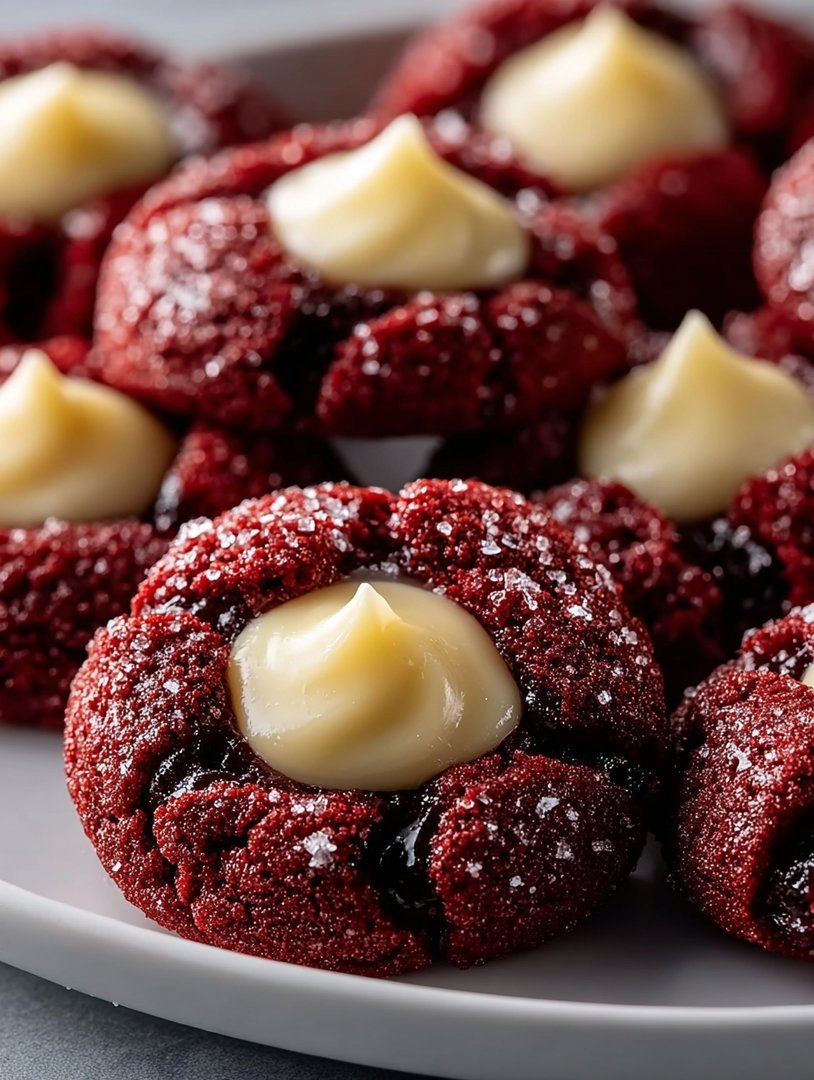
- Visual Masterpiece: The striking crimson cookie base cradling the creamy white filling creates a stunning presentation for any holiday platter.
- Seasonal Versatility: These elegant treats shine brightly at holiday gatherings, intimate weekend brunches, or simply enjoyed straight from the cooling rack.
Ingredients for Red Velvet Cream Cheese Thumbprint Cookies
Here’s what you’ll need to make this delicious dish:
- All-Purpose FlourThe foundation of our cookie structure; make sure to measure using the spoon-and-level method for accuracy.
- Unsweetened Cocoa PowderEssential for achieving that deep, subtle chocolate flavor characteristic of classic red velvet desserts.
- Baking Soda and SaltThese leavening and seasoning agents ensure the cookies rise correctly and enhance the overall depth of flavor.
- Unsalted ButterShould be softened to room temperature, allowing it to cream smoothly with the sugar for a tender cookie crumb.
- Granulated Sugar and Light Brown SugarThe combination provides both sweetness and moisture, contributing to the cookies’ signature soft chewiness.
- Large EggActs as a binder, holding the dough together and providing richness to the texture.
- Red Food Coloring (Gel Preferred)Use a high-quality gel coloring to achieve that vibrant, deep red hue without adding excessive liquid to the dough.
- White Distilled Vinegar or Lemon JuiceA necessary ingredient in red velvet baking, it reacts with the baking soda and cocoa powder to intensify the red color.
- Cream CheeseNeeds to be completely softened for the filling, ensuring a smooth, lump-free texture when mixed with sugar.
- Confectioners’ SugarProvides the sweetness and necessary structure for the tangy cream cheese filling.
- Pure Vanilla Bean PasteA crucial flavor enhancer, adding warmth and depth to both the cookie and the filling.
The full ingredients list, including measurements, is provided in the recipe card directly below.
How to Make Red Velvet Cream Cheese Thumbprint Cookies
Follow these simple steps to prepare this delicious dish:
Step 1: Prep the Oven and Dry Ingredients
Begin by preheating your oven to 350°F (175°C). Line two large baking sheets with parchment paper or silicone baking mats; this prevents sticking and encourages even baking. In a medium bowl, whisk together the measured flour, unsweetened cocoa powder, baking soda, and salt. Set the dry mixture aside while you prepare the wet components.
Step 2: Cream the Butter and Sugar
In the bowl of a stand mixer fitted with the paddle attachment, or using a hand mixer, beat the softened butter until it appears smooth and creamy. Gradually add the granulated and brown sugars, continuing to beat until the mixture is light and fluffy, which usually takes about three to four minutes. This critical creaming process incorporates air, which helps the cookies stay soft.
Step 3: Add Wet Ingredients and Color
Beat in the large egg until it is just combined. Next, add the red food coloring and the white vinegar or lemon juice. Mix on low speed until the color is uniformly distributed throughout the butter mixture. Be careful not to overmix at this stage. Scrape down the sides of the bowl frequently to ensure all ingredients are incorporated into the vivid, velvet-hued dough.
Step 4: Form the Dough and Chill
Gradually incorporate the dry ingredients into the wet mixture, mixing on low speed until a soft dough forms. Avoid overworking the dough once the flour is added. Using a small cookie scoop or rolling by hand, form the dough into small balls, approximately one inch in diameter. Roll each cookie ball in granulated sugar if desired for added sparkle and texture. Place the sugar-coated balls onto the prepared baking sheets and press a deep indentation into the center of each ball using your thumb or the back of a small measuring spoon.
Step 5: Bake the Thumbprint Cookies
Bake the cookies for 10 to 12 minutes. The cookies should be set around the edges but still slightly soft in the center. Immediately upon removing the cookies from the oven, gently re-press the thumbprint indentations, as they tend to puff up slightly during baking. Allow the cookies to cool completely on the baking sheet for about five minutes before transferring them to a wire rack.
Step 6: Prepare the Cream Cheese Filling
While the cookies cool, prepare the glorious filling. In a clean bowl, beat the completely softened cream cheese until it is smooth and light. Gradually beat in the confectioners’ sugar and the vanilla bean paste until the filling is creamy and lump-free. Once the cookies are entirely cool, use a small spoon or a piping bag to fill each thumbprint indentation generously with the tangy cream cheese mixture.
Transfer to plates and dust lightly with cocoa powder for the perfect finishing touch. They look spectacular when served on a silver platter.
The Science of Red Velvet Perfection
The magic of these crimson treats lies not just in their color, but in the specific chemical reactions that make the texture and flavor unique. Red velvet is historically a buttermilk-based cake, and while we use vinegar in these cookies, it performs a similar function. The slight acidity of the vinegar or lemon juice reacts with the baking soda and, crucially, the natural anthocyanins present in the cocoa powder. This reaction helps maintain the dough’s desired acidity and helps the red food coloring pop, resulting in that deep, recognizable hue.
Many cookie recipes rely solely on butter, but the inclusion of both granulated and brown sugar in these cream cheese thumbprints ensures a balance of crisp edges and a soft, chewy center. Brown sugar adds moisture due to its molasses content, preventing the cookies from drying out during baking. Understanding this balance is key to mastering the velvet texture that makes these treats so addictive. We aren’t just baking cookies; we are engaging in delicious edible chemistry.
Tips for the Perfect Thumbprint
Getting the perfect indentation is crucial for housing that decadent cream cheese filling. If your thumb tends to crack the edges of the dough ball, you have a few easy fixes. First, make sure the dough is properly chilled—even a quick 15-minute rest in the fridge can help prevent excessive spreading and cracking. Second, if you prefer a cleaner look, use the rounded bottom of a teaspoon or a clean cork to make the impression instead of your thumb. After forming the indentations, consider chilling the tray for another ten minutes right before baking. The cold dough withstands the oven heat longer, maintaining its shape beautifully and ensuring a deep pocket for the filling.
Troubleshooting Your Red Velvet Dough
Sometimes, red velvet dough can be notoriously sticky or crumbly. If your dough feels too sticky to roll after mixing, the solution is simple: gradually add a tiny bit more flour, one tablespoon at a time, until it is manageable, or simply chill it for 30 minutes. If the dough is too crumbly and won’t hold together, it likely needs more moisture. Try adding half a teaspoon of milk or a neutral oil, mixing just until the dough comes together. Remember, the goal is a soft, pliable dough that rolls easily into balls without sticking excessively to your hands. Adjusting the dough consistency based on the humidity in your kitchen is a small, but necessary, part of being a successful baker.
Storing and Freezing Your Cookies
These cream cheese thumbprint cookies store beautifully, allowing you to prepare them ahead of time for parties or simply keep a secret stash for yourself. Because they contain a dairy-based filling, proper storage is paramount for food safety and flavor quality. Once the cookies are filled, they must be stored in an airtight container in the refrigerator. They will maintain their superior flavor and texture for up to four days when refrigerated.
If you need to store them for longer, freezing is an excellent option, but you should freeze thembeforeadding the cream cheese filling. Bake the plain red velvet cookies according to the recipe, let them cool completely, and then place them in a single layer in a freezer-safe bag or container. They can be frozen for up to three months. When you are ready to serve, thaw the cookies overnight, and then prepare and pipe the fresh cream cheese filling right before serving. This ensures the filling remains light, tangy, and structurally sound, avoiding any strange textural changes from freezing.
Flavor Variations for the Cookies
While the classicRed Velvet Cream Cheese Thumbprint Cookiesare perfection, sometimes you crave a slight twist. If you wish to introduce a subtle zest, add half a teaspoon of finely grated orange or lemon zest into the cookie dough mixture. This brightens the deep cocoa notes wonderfully. For a textural contrast, sprinkle the baked cookies with a pinch of finely chopped toasted pecans or walnuts immediately after they come out of the oven. If you want to change up the filling, consider swapping the vanilla bean paste for a small dash of pure almond paste in the cream cheese, giving the filling a delightful, nutty aroma that complements the red velvet base beautifully.
Frequently Asked Questions About Baking Thumbprint Cookies
What is the best type of food coloring to use for red velvet cookies?
You should absolutely use gel food coloring. Liquid food coloring requires you to use too much product to achieve the deep red color, which can negatively affect the consistency of the cookie dough by adding excess moisture. High-quality gel coloring provides intense color with only a small amount, preserving the perfect dough structure.
Can I substitute the cream cheese filling with something else?
While the cream cheese filling is iconic for these cookies, you could substitute it with a non-agar-agar-based white chocolate ganache or a simple lemon curd if you prefer a different flavor profile. If using lemon curd, ensure it is set firmly before piping into the cooled thumbprint indentations.
Why did my thumbprint cookies flatten too much during baking?
Excessive spreading is often due to butter that was too warm or dough that was not chilled properly before baking. Ensure your butter is only softened, not melted. If you live in a warm climate, briefly chilling the dough balls after forming the indentations, but before baking, provides extra insurance against spreading.
How long do the filled cookies stay fresh?
Due to the perishable cream cheese filling, these cookies must be stored in an airtight container in the refrigerator and are best enjoyed within three to four days. If you prefer, you can store the unfilled cookies at room temperature and fill them immediately before serving to maximize freshness.
The Legend of the Stained Fingerprint
My culinary journey has seen its share of flops—remember the Great Turmeric Incident of ’19? We don’t talk about that. But sometimes, a recipe comes along that is so ridiculously simple yet so visually and gastronomically dramatic, it feels like cheating. TheseRed Velvet Cream Cheese Thumbprint Cookiesare exactly that kind of recipe. They manage to capture the deep, luxurious cocoa notes of red velvet cake and marry them perfectly with the tangy embrace of sweet cream cheese filling, all wrapped up in a delightful, bite-sized package.
Why These Red Velvet Cream Cheese Thumbprint Cookies Steal the Show
We all love red velvet cake, but let’s be honest, baking a full layer cake requires commitment, time, and usually involves a counter space disaster of epic proportions. These cookies offer all the flavor without the four hours of cleanup and the structural engineering degree required to stack three layers of spongy cake. They are soft, slightly chewy, intensely flavored with vanilla and cocoa, and feature that iconic, dazzling ruby color that screams luxury. The best part? The little indentation, lovingly created by your thumb, serves as the perfect creamy, sweet vessel. It’s a deeply satisfying baking experience, promising perfection without the fuss. When I look at a tray of these vibrant cookies, I feel like a benevolent, cocoa-stained monarch bestowing edible jewels upon my subjects.
Ingredients: Gathering Your Ruby Red Arsenal
For the Red Velvet Cookie Dough:
- 2 1/4 cups all-purpose flour
- 1/4 cup unsweetened cocoa powder (high quality makes a difference!)
- 1 teaspoon baking soda
- 1/2 teaspoon salt
- 1 cup (2 sticks) unsalted butter, softened
- 3/4 cup granulated sugar
- 1/2 cup packed light brown sugar
- 2 large eggs
- 2 teaspoons vanilla bean paste
- 1 teaspoon white vinegar (for color activation)
- 2 tablespoons red food coloring (liquid or gel, gel yields deeper color)
For the Cream Cheese Filling:
- 8 ounces cream cheese, softened
- 1/2 cup confectioners’ sugar
- 1 teaspoon vanilla bean paste
- 1 tablespoon milk or cream
The Expedition: Crafting Your Thumbprint Masterpieces
Follow these steps closely to ensure your velvety cream cheese treats come out soft and gorgeous, not rock-hard or strangely colored. Precision is your friend here, but don’t forget to have fun—if you don’t end up with red flour dust on your nose, you haven’t truly baked.
Step 1: The Dry Mix Drama
Whisk together the flour, cocoa powder, baking soda, and salt in a medium bowl. Set this aside. This ensures all the leavening agents are perfectly distributed, preventing any surprise mountains or valleys in your cookies.
Step 2: Creaming for Glory
In a separate large bowl, using an electric mixer, beat the softened butter until creamy. Gradually add the granulated and brown sugars, beating until the mixture becomes light and fluffy—this process incorporates essential air. Scrape down the sides of the bowl often.
Step 3: The Color Transformation
Beat in the eggs one at a time, followed by the vanilla bean paste, white vinegar, and the brilliant red food coloring. Mix until the color is uniformly deep and vibrant. The addition of vinegar helps enhance the cocoa flavor and provides a necessary acid component for the red velvet chemical reaction.
Step 4: Merging the Forces
Gradually add the dry ingredients to the wet ingredients, mixing only until just combined. Do not overmix! Overmixing develops gluten, leading to tough, regrettable cookies. Once the dough comes together, wrap it tightly in plastic wrap and chill it for at least 30 minutes. Chilling makes rolling much easier and prevents spread.
Step 5: Roll, Press, and Bake
Preheat your oven to 350°F (175°C). Roll the chilled dough into small, 1-inch balls and place them two inches apart on baking sheets lined with parchment paper. Use your thumb (or the back of a small, rounded measuring spoon for maximum consistency) to gently press an indentation into the center of each ball. Bake for 10 to 12 minutes. The cookies should look set but still soft. Let them cool completely on the baking sheet before moving them.
Step 6: The Cream Cheese Grand Finale
While the cookies cool, prepare the filling. Beat the softened cream cheese with the confectioners’ sugar, vanilla, and milk until completely smooth and pipeable (or easily spooned). Once the cookies are entirely cool, spoon or pipe the luscious cream cheese mixture into the thumbprint indentations. Serve immediately and prepare for applause.
Perfecting the Cooking Process
For optimal results, prioritize chilling the dough immediately after mixing; this stabilizes the fats and prevents the cookies from spreading too thinly. While the cookie balls are baking, ensure your cream cheese is warming to room temperature so that your filling whips up flawlessly smooth and lump-free.
Add Your Touch
Try substituting half the vanilla bean paste with almond paste for a subtle marzipan note in the dough. For extra crunch, roll the chilled dough balls in granulated sugar before pressing the thumbprint. You could also swirl a tiny drop of lemon zest into the cream cheese filling for a refreshing twist.
Storing & Reheating
Store these velvety cream cheese treats in an airtight container in the refrigerator for up to four days, as the filling is dairy-based. For best texture, allow them to come briefly to room temperature before serving; freezing the baked cookies without the filling is also a great option.
I once decided to skip the chilling step entirely because “I was in a hurry,” and the resulting flat, sad red discs looked like they’d been run over by a tiny vehicle. Lesson learned: patience is the secret ingredient for the perfect domed cookie.
Expert Baking Tips for Flawless Thumbprints
- Always use room temperature ingredients for the cream cheese filling; this prevents lumps and ensures the smoothest, most decadent texture imaginable.
- Measure your red food coloring precisely, ideally using gel paste, which provides a deeper, less brown-leaning ruby hue compared to standard liquid dyes.
- Do not overbake these thumbprint delights; pull them out when the centers are slightly underdone, as they will set up beautifully on the hot pan.
The Science Behind the Red
Red velvet flavor is actually a brilliant combination of cocoa and buttermilk (or in this case, vinegar and baking soda) that reacts to deepen the flavor and activate the red dye. When combined with the high acidity of the cocoa powder, the vinegar intensifies the color and ensures a classic, subtle tang. If you omit the acid, your cookies may turn out closer to a dull brown-red, robbing them of their signature visual appeal.
Remember that the quality of your cocoa powder truly matters. Since red velvet recipes use a relatively small amount of cocoa, make sure it is high-quality, unsweetened powder. Using Dutch-process cocoa will result in a deeper, more mellow flavor, while natural cocoa (which is more acidic) interacts better with the baking soda and vinegar to enhance the redness, making it the preferred choice for these specific Red Velvet Cream Cheese Thumbprint Cookies.
Holiday Gifting and Display Tips
These ruby-red cookies are not just delicious; they are incredibly photogenic. They make a fantastic addition to any holiday platter, offering a striking contrast to traditional brown or white cookies. If you are preparing them for a large event or a gift box, consider using a piping bag fitted with a star tip for the cream cheese filling. This gives the finished cookie a sophisticated, professional flourish that elevates it from simple homemade treat to artisan confection. Pair these striking cookies with a strong cup of coffee or a cold glass of milk for the perfect afternoon indulgence. They disappear quickly, so double the batch if you plan on sharing!
Frequently Asked Questions About Baking Red Velvet Treats
How can I keep my thumbprint cookies from cracking?
Cracking usually happens if the dough is too cold or if you press too hard. Try rolling the dough balls quickly between your palms to warm them slightly before pressing. Also, use the back of a rounded teaspoon instead of your thumb; it provides a smoother, more even surface pressure.
Can I freeze the Red Velvet Cream Cheese Thumbprint Cookies dough?
Absolutely! You can freeze the dough either as a large disc or already rolled into balls (without the indentation). Wrap them tightly in plastic wrap and store them in an airtight container for up to three months. Thaw overnight in the refrigerator before rolling, pressing, and baking as instructed.
What if my cream cheese filling is too runny?
The filling is too runny if the cream cheese was too warm or if you added too much milk. To thicken it, gradually beat in another tablespoon of confectioners’ sugar until the mixture reaches a thick, pipeable consistency. If the issue persists, chilling the filling for 15 minutes usually firms it right up.
Is it necessary to use vinegar in red velvet cookies?
While you can omit it, the vinegar plays a crucial role. It interacts with the baking soda to create lift, and the acidity reacts with the cocoa powder, enhancing the classic red velvet flavor depth and ensuring the maximum brightness of the red dye.
The Final Verdict on These Velvety Cream Cheese Treats
Whether you are a seasoned baker or just dipping your toes into the world of decorative cookies, these Red Velvet Cream Cheese Thumbprint Cookies offer a rewarding and delicious project. They are crowd-pleasers that look far more complicated than they actually are, making you look like a kitchen wizard with minimal effort. Go forth, embrace the red food coloring mess, and create these perfect, creamy-centered jewels for your next gathering!
Conclusion for Red Velvet Cream Cheese Thumbprint Cookies
The journey to perfect Red Velvet Cream Cheese Thumbprint Cookies involves a delightful mix of precision and indulgence. We conquered the art of the signature red hue, ensured our dough was chilled enough to prevent any cookie calamity, and mastered the creamy, tangy center. These little beauties are more than just a dessert; they are miniature works of edible art, perfect for holiday platters, bake sales, or simply celebrating a Tuesday. So grab your apron, embrace the cocoa powder dust, and prepare to wow everyone with these moist, beautiful, and utterly addictive treats that taste as good as they look.
Print
Red Velvet Cream Cheese Thumbprint Cookies
Indulge in luxurious, deep crimson Red Velvet Thumbprints. The buttery, soft cocoa cookie is the perfect counterpoint to a creamy center.
- Total Time: 35 minutes
- Yield: 4 servings
Ingredients
- Unsalted butter: 1 cup (softened)
- Granulated sugar: 3/4 cup
- Large egg: 1
- All-purpose flour: 2 cups
- Unsweetened cocoa powder: 2 tablespoons
- Red liquid food coloring: 1 tablespoon
- Cream cheese: 4 ounces (softened)
- Powdered sugar: 1 cup (for filling)
Instructions
- Step 1: Preheat the oven to 350°F (175°C) and line baking sheets with parchment paper. In a large bowl, cream together the softened butter and granulated sugar until light and fluffy. Beat in the large egg until well combined.
- Step 2: In a separate bowl, whisk together the flour and cocoa powder. Gradually add the dry ingredients to the wet ingredients, mixing until just combined. Fold in the red food coloring until the dough is uniformly deep red.
- Step 3: Roll the dough into 1-inch balls and place them 2 inches apart on the prepared baking sheets. Using your thumb or the back of a measuring teaspoon, press an indentation into the center of each cookie ball.
- Step 4: Bake for 10-12 minutes. While the cookies are baking, beat the softened cream cheese with the powdered sugar (and a splash of vanilla bean paste, if desired) until smooth and creamy.
- Step 5: Remove the cookies from the oven and let them cool on the baking sheet for 5 minutes before transferring them to a wire rack. Once fully cooled, pipe or spoon the cream cheese mixture into the thumbprint indentations. Refrigerate for 30 minutes to set the filling before serving.
Notes
- Store finished cookies in an airtight container in the refrigerator for up to 5 days; allow them to sit at room temperature for 15 minutes before serving for the best texture.
- These cookies are best enjoyed chilled or at room temperature; avoid microwaving as the cream cheese filling may separate or become overly soft.
- For an elegant presentation, garnish the filled centers with a dusting of extra cocoa powder or finely crushed freeze-dried raspberries before the final chill.
- For the deepest, most vibrant red velvet color, use concentrated gel food coloring instead of the specified liquid coloring, as it provides saturation without changing the dough consistency.
- Prep Time: 15 minutes
- Cook Time: 20 minutes
- Method: Stovetop
- Cuisine: American
FAQs
Why did my Red Velvet Cream Cheese Thumbprint Cookies spread too much?
Spreading usually happens if your butter was too soft or you didn’t chill the dough sufficiently. Ensure the cream cheese and butter are perfectly cool but pliable, not melted. Chilling the dough for at least 30 minutes is non-negotiable; this firms up the fats, helping the cookies hold their classic shape during baking. Also, make sure your oven temperature is accurate. A quick bake at the correct heat sets the dough quickly, preserving those delightful thumbprint edges. If your kitchen is warm, chill the rolled balls briefly before indenting them.
What is the secret to getting a vibrant red color for these thumbprint treats?
Achieving that signature, deep red hue requires high-quality gel food coloring, not liquid coloring. Liquid colors can drastically alter the dough’s consistency, requiring too much flour adjustment. Use a concentrated red gel, like “super red,” adding it gradually until you reach the desired intensity. Remember that the color often deepens slightly after baking. The traditional red velvet flavor also comes from the combination of cocoa powder reacting with baking soda and a touch of acid, typically vinegar or buttermilk, which enhances both the flavor and color depth.
How long can I store leftover Red Velvet Cream Cheese Thumbprint Cookies?
These delightful thumbprint cookies maintain their optimal freshness for about 3 to 4 days when stored in an airtight container at room temperature. Because they contain a cream cheese filling, some bakers prefer refrigerating them, which extends their shelf life up to a week. If you choose to freeze them, bake and cool them completely, then freeze them unfilled. You can store the unfilled cookies for up to two months. Thaw them overnight, then fill them with the cream cheese glaze just before serving for the best texture and appearance.
Can I adjust the filling recipe for these Red Velvet Cookies?
Absolutely! While the traditional tangy cream cheese filling perfectly complements the cocoa base, you have flexibility. For an even more decadent treat, try filling the thumbprints with melted white chocolate ganache or a simple lemon curd. If you are seeking a lighter option, a dollop of seedless raspberry jam or cherry preserves works beautifully. Ensure any jam or preserves you use is thick enough to avoid bubbling over during baking if added before the oven. If adding jam post-bake, ensure the cookie has fully cooled before adding the filling.


Leave a Comment