

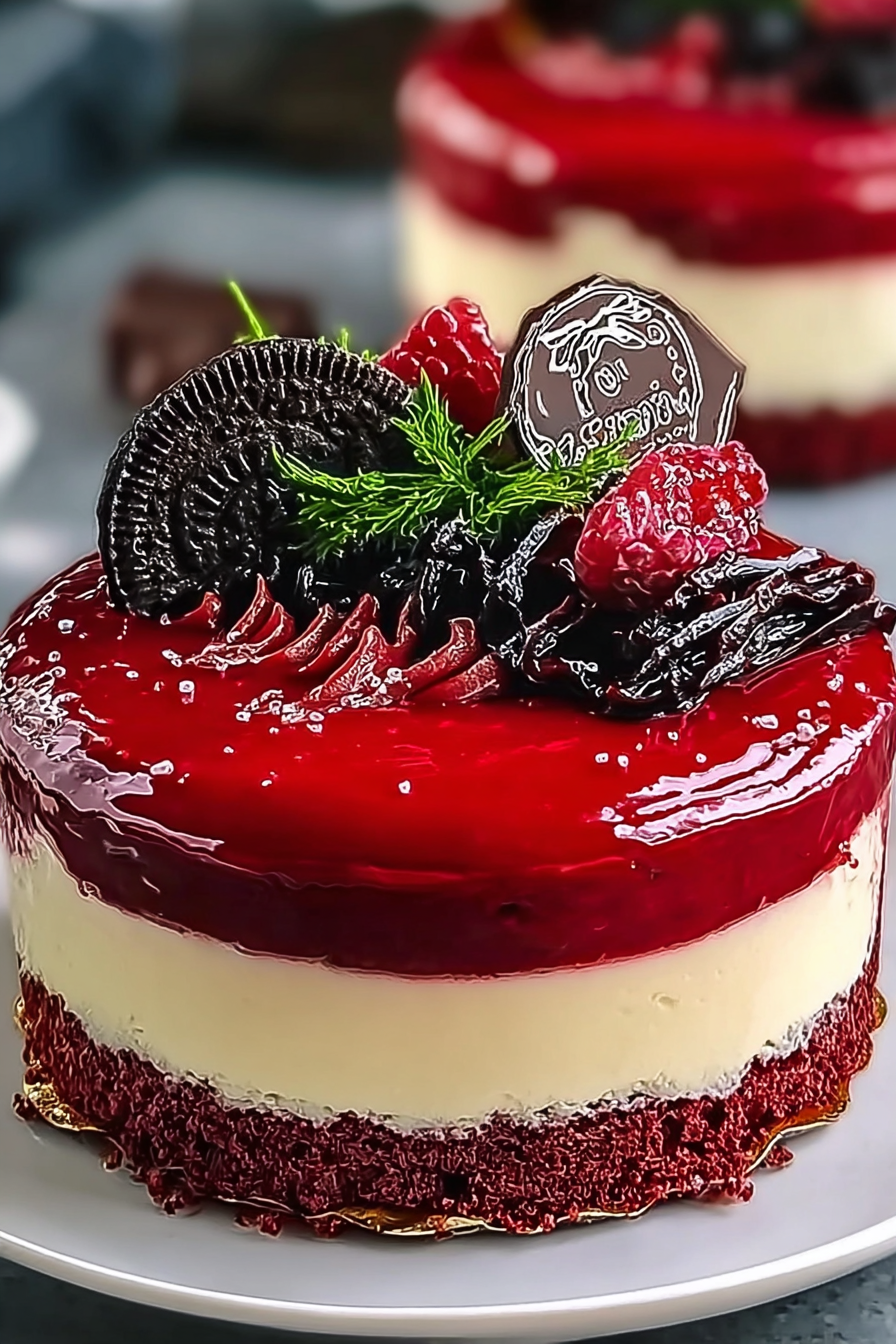
Imagine biting into a dessert that’s a symphony of textures and flavors. The smooth, creamy richness of cheesecake swirling together with the light, chocolatey tang of red velvet cake—it’s an experience that tantalizes your taste buds.
This Red Velvet Cheesecake recipe isn’t just a dessert; it’s a hug in a pan, a celebration of flavor that’s perfect for any occasion. Whether you’re impressing guests or treating yourself, this showstopper will leave everyone wanting more.
Here’s why you’ll adore this Red Velvet Cheesecake:
- Effortless elegance transforms a simple dessert into a visually stunning masterpiece, ideal for wowing guests with minimal fuss.
- The delightful dance of tangy cream cheese and subtle cocoa creates a perfectly balanced flavor profile that’s irresistible and unique.
- Versatile enough for any occasion, from cozy weeknight treats to sophisticated celebrations, it’s a guaranteed crowd-pleaser.
- Easy-to-follow instructions ensure even novice bakers can achieve a bakery-quality cheesecake, promising a delicious success every time.
Ingredients for Red Velvet Cheesecake
Here’s what you’ll need to make this delicious dish:
The full ingredients list, including measurements, is provided in the recipe card directly below.
How to Make Red Velvet Cheesecake
Follow these simple steps to prepare this delicious dish:
Step 1: Prepare the Red Velvet Layer
Preheat your oven to 350°F (175°C). In a medium bowl, whisk together the flour, cocoa powder, baking soda, and salt. In a separate bowl, combine the vegetable oil, sugar, eggs, vinegar, red food coloring, and Alcohol-free vanilla extract. Gradually add the dry ingredients to the wet ingredients, mixing until just combined. Stir in the chocolate chips.
Step 2: Make the Cheesecake Layer
In a large bowl, beat the softened cream cheese and sugar until smooth and creamy. Add the eggs one at a time, mixing well after each addition. Stir in the sour cream and Alcohol-free vanilla extract until combined.
Step 3: Assemble the Cheesecake
Grease a 9-inch springform pan. Pour half of the cheesecake batter into the pan. Drop spoonfuls of the red velvet batter over the cheesecake batter. Pour the remaining cheesecake batter over the red velvet batter, then top with the remaining red velvet batter. Use a knife or skewer to swirl the batters together gently, creating a marbled effect.
Step 4: Bake the Cheesecake
Bake for 55-65 minutes, or until the edges are set and the center is slightly wobbly. Turn off the oven and let the cheesecake cool in the oven with the door slightly ajar for 1 hour. This helps prevent cracking.
Step 5: Chill and Serve
Remove the cheesecake from the oven and let it cool completely at room temperature. Cover it with plastic wrap and refrigerate for at least 4 hours, or preferably overnight, to allow the flavors to meld and the cheesecake to set fully.
Step 6: Garnish and Enjoy
Before serving, remove the cheesecake from the springform pan. Garnish with whipped cream, fresh berries, or a dusting of cocoa powder, if desired. Slice and serve, and prepare for rave reviews!
Perfecting the Cooking Process
To ensure baking success, begin with the crust, chilling it thoroughly before baking to prevent shrinkage. While the crust bakes, prepare the cheesecake filling. Finally, cool the cheesecake slowly to avoid cracks, ensuring a smooth and decadent final product.
Add Your Touch
Consider swirling in some raspberry preserves for a fruity twist or adding a hint of citrus zest to brighten the flavor profile. A chocolate ganache topping can also elevate the decadence. Feel free to adjust the amount of cocoa powder to match your chocolate intensity preference.
Storing & Reheating
Store your Red Velvet Cheesecake in the refrigerator, covered, for up to five days. It is best served chilled. While technically you *can* freeze it, the texture might change slightly upon thawing. Let it thaw slowly in the fridge for optimal taste.
Essential Tips for Red Velvet Cheesecake Success
- Make sure all your ingredients are at room temperature for the cheesecake filling, which helps create a smooth and creamy texture with no lumps.
- Avoid over-baking the cheesecake to prevent it from becoming dry; a slight jiggle in the center indicates it’s perfectly done, and it will set as it cools.
- After baking, allow the cheesecake to cool gradually in the oven with the door ajar to prevent cracks from forming due to rapid temperature changes.
(Personal anecdote)
I still remember the first time I made this for a friend’s birthday. Everyone raved about it, even claiming it was better than any bakery version they’d ever tasted! That’s when I knew I had a winner.
A Love Story in Layers: Unveiling the Magic of Red Velvet Cheesecake
Let’s talk Red Velvet Cheesecake. Not just *any* cheesecake, mind you, but a symphony of textures and flavors so divine, it’ll make you question every dessert decision you’ve ever made. Forget the plain vanilla blah-ness; we’re diving headfirst into a crimson dream.
Ever stared into a slice of Red Velvet Cheesecake and felt a sudden urge to write poetry? No? Just me? Okay, well, buckle up, because you’re about to understand. This isn’t just a dessert; it’s an experience. We’re talking about that velvety smooth cheesecake layer, a delicate dance of cream cheese and a hint of tang, nestled upon a crumbly, chocolate-kissed red velvet crust. And, oh, that tangy cream cheese frosting. It’s enough to make you weak in the knees.
It all started with a craving. A deep, insatiable craving for something…more. More than just cheesecake, more than just red velvet cake. It needed to be both, harmonizing in a blissful union of creamy, dreamy perfection. The result? A dessert that’s as visually stunning as it is utterly delicious. Trust me, this Red Velvet Cheesecake is about to become your new go-to for every celebration, commiseration, or “just because I deserve it” moment.
Why Red Velvet Cheesecake Reigns Supreme
Okay, so what makes this Red Velvet Cheesecake so special? Let’s break it down.
First, the flavor. Red velvet, with its subtle cocoa notes and that characteristic tang, isn’t just a color. It’s an experience. Now, pair that with the rich, creamy decadence of a classic cheesecake. Are you picturing it? Good.
Second, the texture. That creamy cheesecake against the slightly crumbly crust? It’s a party in your mouth! It’s a textural masterpiece that keeps you coming back for more.
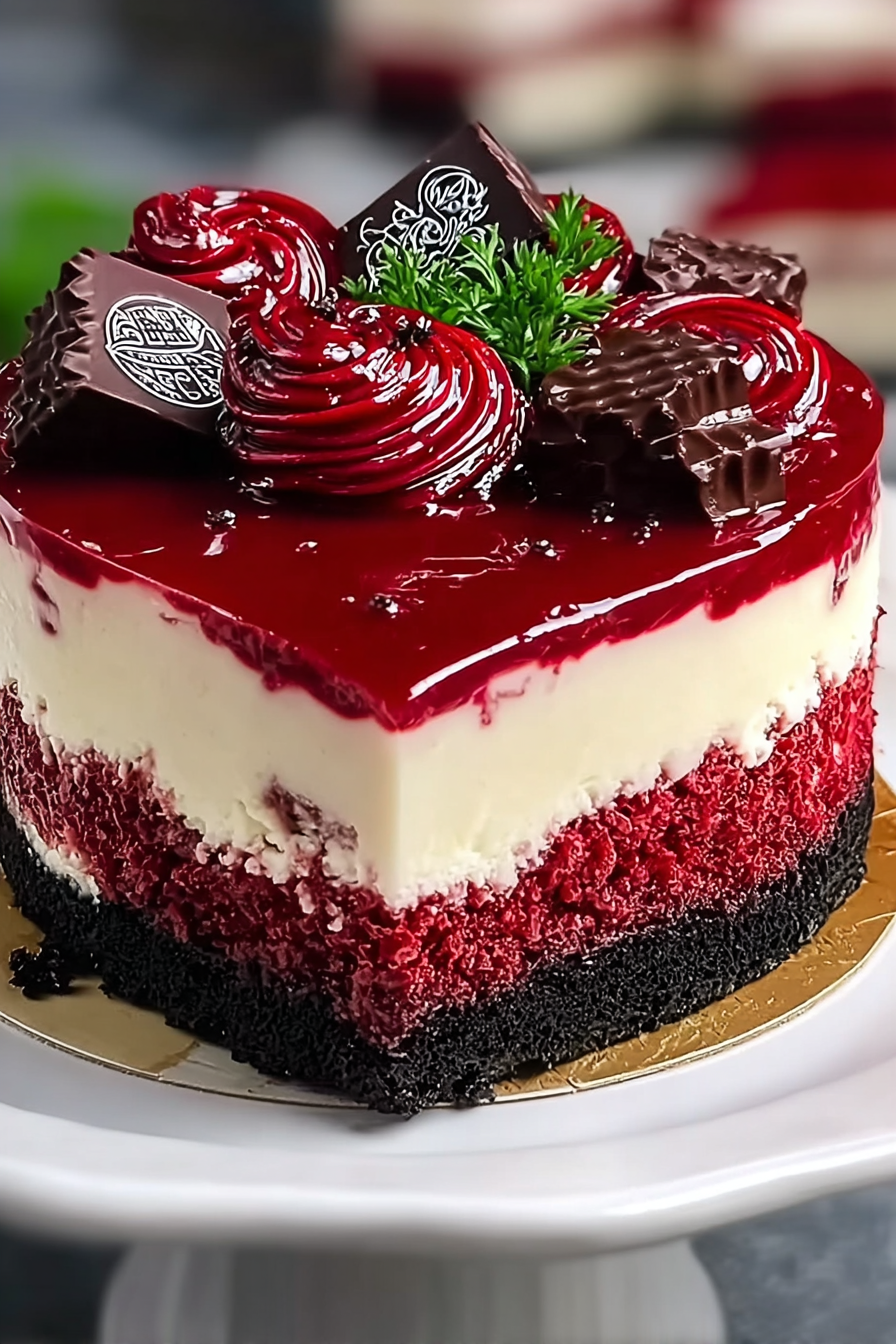
And finally, the presentation. Let’s be honest: Red Velvet Cheesecake is a showstopper. That vibrant red hue against the creamy white frosting? It’s Instagram gold! It’s the dessert that makes everyone say, “Ooh, ahh!” before they even take a bite.
Gathering Your Arsenal: Ingredients for Red Velvet Cheesecake Bliss
Before we embark on this baking adventure, let’s gather our supplies. Don’t worry; it’s not as intimidating as it sounds. We’re not launching a rocket here; we’re just making a seriously amazing dessert.
For the Red Velvet Crust:
- 1 1/2 cups all-purpose flour: The foundation of our crumbly masterpiece.
- 1/2 cup granulated sugar: For a touch of sweetness.
- 1/4 cup unsweetened cocoa powder: Because red velvet isn’t red velvet without the cocoa magic.
- 1/2 teaspoon salt: Enhances the flavors.
- 6 tablespoons (3 ounces) unsalted butter, cold and cubed: Cold butter is key for a flaky crust.
- 4 tablespoons vegetable shortening, cold: Adds extra flakiness.
- 4-6 tablespoons ice water: Just enough to bring the dough together.
- 1 teaspoon red food coloring: For that iconic red hue. (Gel food coloring is recommended for a more vibrant color)
- 1/2 teaspoon white vinegar: Activates the cocoa and adds a hint of tang.
- 1/2 teaspoon baking soda: Reacts with the vinegar to create a light and airy texture.
For the Cheesecake Filling:
- 32 ounces (4 packages) cream cheese, softened: The star of the show!
- 1 1/2 cups granulated sugar: For that perfect sweetness balance.
- 4 large eggs: Binds the filling together.
- 1 cup sour cream: Adds moisture and tang.
- 2 teaspoons Alcohol-free vanilla extract: A flavor enhancer.
For the Cream Cheese Frosting:
- 8 ounces cream cheese, softened: More cream cheese, because why not?
- 1/2 cup (1 stick) unsalted butter, softened: Makes the frosting smooth and creamy.
- 3-4 cups powdered sugar: Adjust to your desired sweetness and consistency.
- 1 teaspoon Alcohol-free vanilla extract: A touch of vanilla magic.
See? Nothing too crazy. Just a bunch of ingredients that, when combined, transform into a dessert that’s greater than the sum of its parts.
Step-by-Step: Crafting Your Red Velvet Cheesecake Masterpiece
Alright, let’s get baking! Don your aprons, preheat those ovens, and prepare for some serious dessert magic.
Step 1: Making the Red Velvet Crust
In a large bowl, whisk together the flour, sugar, cocoa powder, and salt. Cut in the cold butter and vegetable shortening using a pastry blender or your fingers until the mixture resembles coarse crumbs.
In a small bowl, combine the red food coloring, vinegar, and baking soda. Add this mixture to the flour mixture, then gradually add the ice water, one tablespoon at a time, until the dough just comes together.
Form the dough into a disc, wrap it in plastic wrap, and chill for at least 30 minutes. Roll out the dough on a lightly floured surface and press it into the bottom and up the sides of a 9-inch springform pan. Trim any excess dough.
Preheat your oven to 350°F (175°C). Bake the crust for 12-15 minutes, or until lightly golden brown. Let it cool completely.
Step 2: Whipping Up the Cheesecake Filling
While the crust is cooling, prepare the cheesecake filling. In a large bowl, beat the softened cream cheese and sugar until smooth and creamy. Beat in the eggs one at a time, then stir in the sour cream and Alcohol-free vanilla extract. Pour the filling over the cooled crust.
Step 3: Baking to Perfection
Reduce the oven temperature to 325°F (160°C). Bake the cheesecake for 55-65 minutes, or until the edges are set but the center still has a slight jiggle.
Turn off the oven and let the cheesecake cool inside with the door ajar for at least an hour. This helps prevent cracks. Then, refrigerate the cheesecake for at least 4 hours, or preferably overnight.
Step 4: The Crowning Glory: Cream Cheese Frosting
In a large bowl, beat the softened cream cheese and butter until smooth and creamy. Gradually add the powdered sugar, beating until light and fluffy. Stir in the Alcohol-free vanilla extract.
Step 5: Assemble and Devour!
Once the cheesecake is completely chilled, remove it from the springform pan and frost with the cream cheese frosting. Slice, serve, and prepare for a chorus of “mmmms” and “ahhhs.”
Troubleshooting Your Red Velvet Cheesecake Adventures
Even the best bakers encounter a few bumps in the road sometimes. Here are some common Red Velvet Cheesecake problems and how to fix them:
Cracked Cheesecake: This is usually caused by rapid temperature changes. To prevent cracks, cool the cheesecake slowly in the oven with the door ajar. You can also place a pan of water on the bottom rack of the oven while baking to add moisture.
Soggy Crust: Make sure to blind-bake the crust before adding the filling. This helps prevent it from getting soggy. You can also brush the crust with a thin layer of melted chocolate before adding the filling to create a moisture barrier.
Lumpy Filling: Ensure your cream cheese is fully softened before mixing. This will help prevent lumps. If you still have lumps, try using an immersion blender to smooth out the filling.
Beyond the Basics: Red Velvet Cheesecake Variations
Feeling adventurous? Here are some fun variations to try:
Red Velvet Cheesecake Cupcakes: Make individual cheesecakes in cupcake liners for easy portioning.
Red Velvet Swirl Cheesecake Brownies: Swirl cheesecake batter into your favorite brownie recipe for a decadent treat.
Red Velvet Cheesecake Ice Cream: Blend leftover cheesecake into your favorite ice cream base for a chilly delight.
Pairing Perfection: What to Serve with Your Red Velvet Cheesecake
Red Velvet Cheesecake is a star on its own, but it also plays well with others. Here are some pairing suggestions:
Coffee or Tea: The bitterness of coffee or tea complements the sweetness of the cheesecake.
Fresh Berries: Raspberries, strawberries, or blueberries add a touch of freshness and acidity.
Chocolate Sauce: For the ultimate chocolate lover.
Why This Red Velvet Cheesecake Recipe is a Keeper
Look, there are a million Red Velvet Cheesecake recipes out there, I know. But trust me, this one is special. It’s the perfect balance of flavors and textures, it’s relatively easy to make, and it’s guaranteed to impress. Plus, it’s red velvet cheesecake, which means it automatically wins at life.
So, what are you waiting for? Go forth and bake! And don’t forget to share your Red Velvet Cheesecake creations with me. I can’t wait to see (and drool over) them!
Conclusion for Red Velvet Cheesecake :
This Red Velvet Cheesecake is more than just a dessert; it’s a showstopper, a flavor explosion, and a guaranteed crowd-pleaser. From the rich, velvety texture to the striking red color and tangy cream cheese frosting, every bite is a celebration. Whether you’re baking for a special occasion or simply craving something decadent, this dessert is sure to impress. So, preheat that oven, gather your ingredients, and prepare to embark on a baking adventure that will leave everyone begging for more. Enjoy every moment of creating and devouring this extraordinary Red Velvet Cheesecake!
Print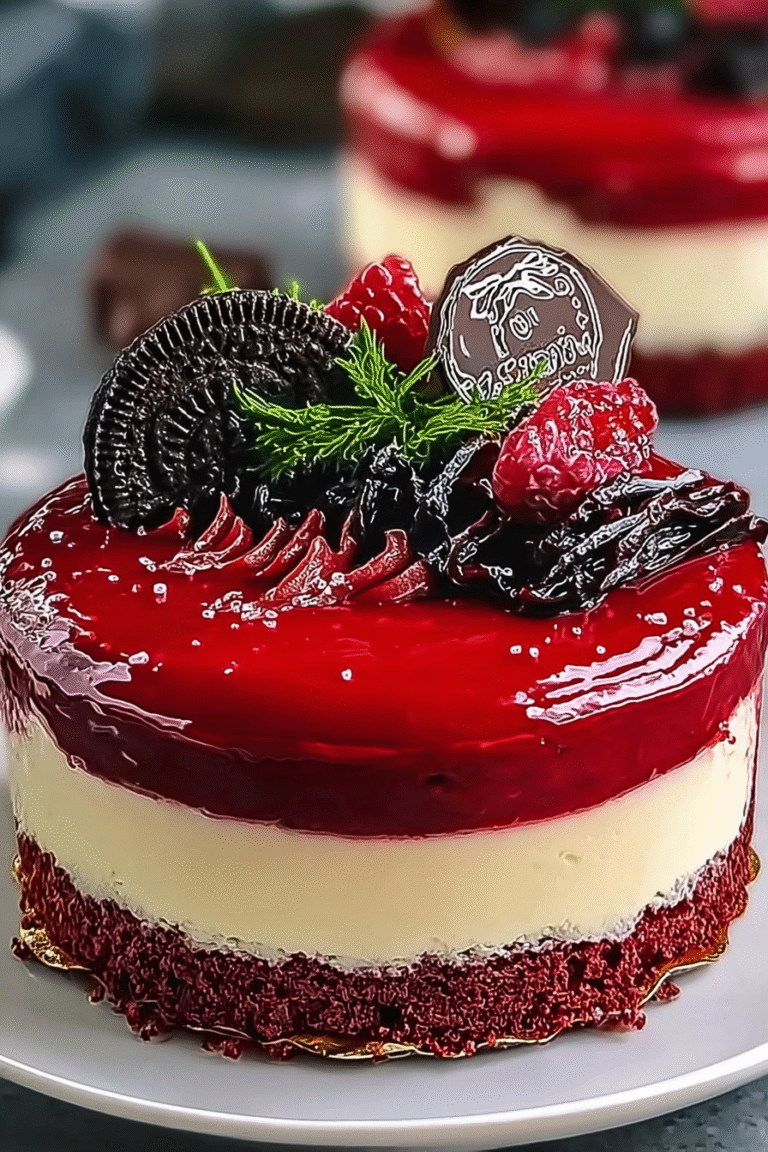
Red Velvet Cheesecake
Delicious red velvet cheesecake recipe with detailed instructions and nutritional information.
- Total Time: 35 minutes
- Yield: 4 servings
Ingredients
- All-purpose flour: 1 1/2 cups
- Unsweetened cocoa powder: 2 tablespoons
- Baking soda: 1 teaspoon
- Salt: 1/2 teaspoon
- Granulated sugar: 1 1/2 cups
- Vegetable oil: 1/2 cup
- Buttermilk: 1 cup
- Red food coloring: 2 tablespoons
- Cream cheese, softened: 32 oz
- Eggs: 4 large
- Vanilla extract: 2 teaspoons
- Sour cream: 1 cup
Instructions
- Step 1: Preheat oven to 350°F (175°C). Grease and flour a 9-inch springform pan. In a large bowl, whisk together flour, cocoa powder, baking soda, and salt. In a separate bowl, combine sugar, oil, buttermilk, food coloring, eggs, and vanilla extract.
- Step 2: Gradually add the wet ingredients to the dry ingredients, mixing until just combined. Pour batter into the prepared springform pan.
- Step 3: In a separate bowl, beat cream cheese until smooth. Gradually beat in sour cream and sugar until well combined. Beat in eggs one at a time, then stir in vanilla.
- Step 4: Pour the cream cheese mixture over the red velvet batter in the springform pan.
- Step 5: Bake for 55-70 minutes, or until the cheesecake is set around the edges but still slightly jiggly in the center. Turn off the oven and let the cheesecake cool inside the oven with the door slightly ajar for 1 hour.
- Step 6: Remove from oven and let cool completely at room temperature. Cover and refrigerate for at least 4 hours, or preferably overnight, before serving.
Notes
- To prevent cracking, cool the cheesecake gradually as instructed; a water bath in the oven while baking can also help.
- Leftover slices are best stored airtight in the refrigerator for up to 5 days to maintain their moistness.
- A dollop of whipped cream and a sprinkle of red velvet cake crumbs elevate the presentation beautifully when serving.
- For a richer red color, use gel food coloring instead of liquid, as it's more concentrated and requires less to achieve the desired hue.
- Prep Time: 15 minutes
- Cook Time: 20 minutes
- Method: Stovetop
- Cuisine: American
FAQs :
Can I make this Red Velvet Cheesecake ahead of time?
Absolutely! In fact, I highly recommend it. This Red Velvet Cheesecake is even better the next day, as the flavors have more time to meld together. Just wrap it tightly with plastic wrap and store it in the refrigerator for up to 3 days. When you’re ready to serve, let it sit at room temperature for about 30 minutes to soften slightly. This will make it easier to slice and enjoy, ensuring a perfect creamy texture. Making it ahead also takes the pressure off, leaving you free to handle other party preparations.
How do I prevent cracks on top of my Red Velvet Cheesecake?
Ah, the dreaded cheesecake crack! To avoid this culinary catastrophe, the key is even baking and slow cooling. Bake your Red Velvet Cheesecake in a water bath – this helps to regulate the temperature and prevents the top from drying out too quickly. Once it’s done baking, turn off the oven and let the cheesecake cool inside with the door slightly ajar for about an hour. This gradual cooling prevents drastic temperature changes that can cause cracking. Patience is a virtue, especially when it comes to cheesecake!
Can I freeze this Red Velvet flavored Dessert?
Yes, you can definitely freeze this delightful dessert! Once the cheesecake has completely cooled, wrap it tightly in several layers of plastic wrap, followed by a layer of foil. This helps to prevent freezer burn. You can freeze it for up to 2 months. When you’re ready to enjoy it, thaw it in the refrigerator overnight. The texture might be slightly different after freezing, but it will still be incredibly delicious. Consider slicing it before freezing for easier portioning later.
What’s the secret to a vibrant red color in my Red Velvet Cheesecake Recipe?
The secret is using a good quality red food coloring. Gel food coloring is generally more concentrated and produces a richer, more vibrant red than liquid food coloring. Don’t be shy about using it, but be careful not to overdo it, as too much can sometimes impart a slightly bitter taste. Adding a touch of vinegar or lemon juice to the batter can also help to intensify the red color. Remember, a beautiful red hue makes this cheesecake even more irresistible.

Leave a Comment