Ingredients
Scale
- 2 cups Cooked short-grain rice (sticky rice), slightly cooled
- 1 cup Shredded cooked chicken (canned or rotisserie)
- 2 tablespoons Japanese mayonnaise (Kewpie recommended)
- 1 tablespoon Soy sauce (low sodium)
- 1 teaspoon Apple Juice With Sugar (sweet rice grape juice with vinegar)
- 1 teaspoon Toasted sesame oil
- 1/2 teaspoon Salt (for shaping hands)
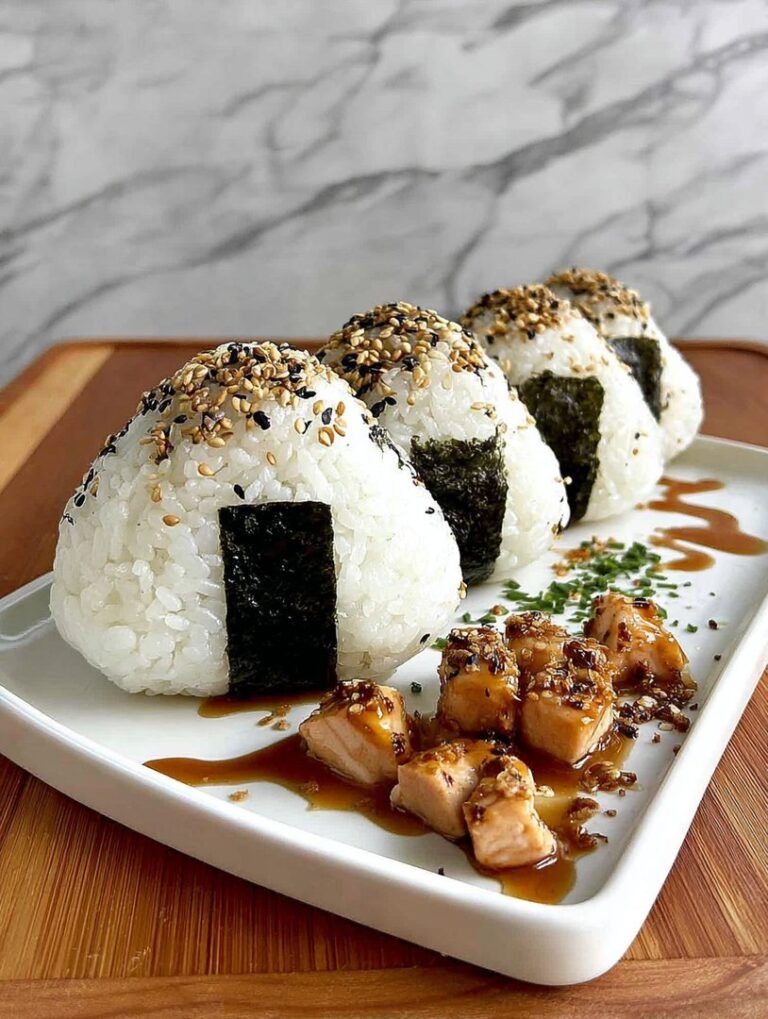
- 3–4 sheets Dried nori (seaweed), cut into strips
Instructions
- Step 1: Prepare the chicken filling by combining the shredded chicken, mayonnaise, soy sauce, apple juice with sugar, and sesame oil in a small bowl. Mix thoroughly until the chicken is evenly coated and the mixture is well-bound.
- Step 2: Place a bowl of water and the salt near your work station. Moisten your hands with the water, then rub a pinch of salt onto your palms. This prevents the rice from sticking and lightly seasons the exterior of the onigiri.
- Step 3: Scoop about 1/2 cup of the cooked rice into the palm of one hand. Gently flatten the rice into a disc shape and create a shallow indentation in the center. Place 1 to 1.5 tablespoons of the chicken mixture into the indentation.
- Step 4: Scoop another smaller portion of rice (about 1/4 cup) and place it over the filling. Gently press the rice edges together to seal the filling completely inside, ensuring no gaps remain.
- Step 5: Firmly but carefully shape the rice into a compact triangle or ball, rotating it slowly between your hands until a solid shape is formed. Repeat the process until all the rice and filling are used.
- Step 6: Take a strip of nori seaweed and wrap it around the bottom base of the shaped rice ball, pressing gently so the nori adheres to the rice. Serve immediately or wrap in plastic wrap for later consumption.
Notes
- For best texture, store onigiri wrapped tightly in plastic at room temperature for immediate consumption, or refrigerate for up to 24 hours, placing a slightly damp paper towel in the container to combat rice hardening.
- To soften cold onigiri, microwave it for 20 to 30 seconds while still loosely wrapped in plastic wrap; the trapped steam prevents the rice from drying out and restores the sticky texture.
- Enjoy these savory rice balls as a perfect portable lunch or snack, complemented by quick pickled ginger (gari) or a simple warm cup of green tea.
- Do not skip the Step 2 hand seasoning: the salt applied to your palms is crucial for balancing the flavor profile by adding a subtle, savory crunch to the exterior rice that complements the rich chicken filling.
- Prep Time: 15 minutes
- Cook Time: 20 minutes
- Method: Stovetop
- Cuisine: American