

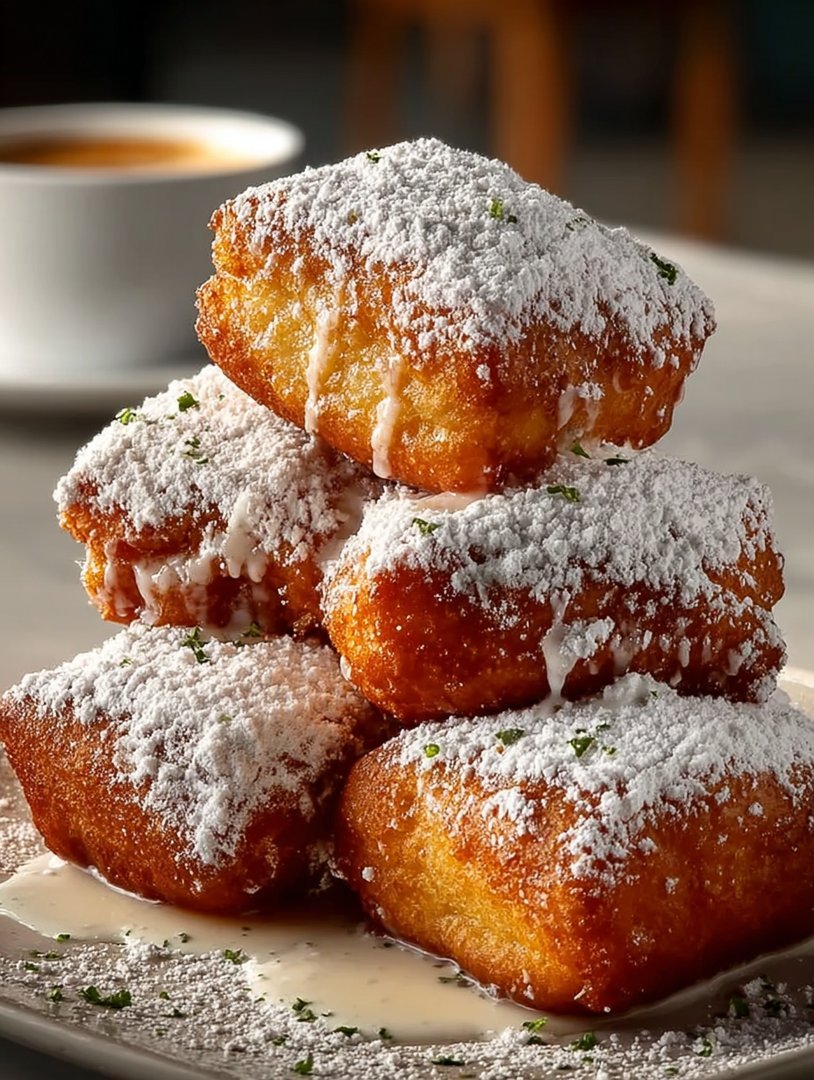
The scent of freshly fried dough dusted with powdered sugar is pure magic, instantly transporting you to a buzzing cafe corner. But what if that bliss came without the gluten drama? Today, we’re achieving dessert destiny with thePerfect Gluten-Free Beignets Recipe, turning humble ingredients into airy, golden pillows of happiness that will make you forget everything else.
For years, I attempted to master the art of the beignet, only to end up with sad, dense hockey pucks disguised in powdered sugar. The traditional recipe, requiring careful gluten development, seemed designed to spite the home cook. Then, the universe handed me a challenge: make them gluten-free. Most people assume that removing gluten from yeasted dough spells disaster—a flat, gritty mess suitable only for bird feeding. I am here to tell you that these assumptions are beautifully, wonderfully wrong. These aren’t just passable gluten-free pastries; they are transcendent, rivaling the originals in their ethereal texture and light, delicate flavor.
My journey involved dozens of failed batches, flour explosions in the kitchen that looked like a ghost convention, and a very confused spouse who kept asking if we were ever going to eat something savory again. The secret, I discovered, lies not in replicating the protein structure of wheat, but in maximizing the steam expansion and quick yeast activation afforded by specific blends of gluten-free flours and starches. The result is a crisp exterior giving way to a cloud-like interior, ready to capture ridiculous amounts of powdered sugar. Preparing this treat is less about precise technique and more about embracing a little joyful chaos in the kitchen.
- Achieving that signature fluffy texture is surprisingly simple thanks to a specific blend of starches and rising agents that ensures maximum lift.
- The flavor profile is delicately sweet, possessing a rich, almost yeasty depth that pairs beautifully with strong coffee or hot chocolate anytime.
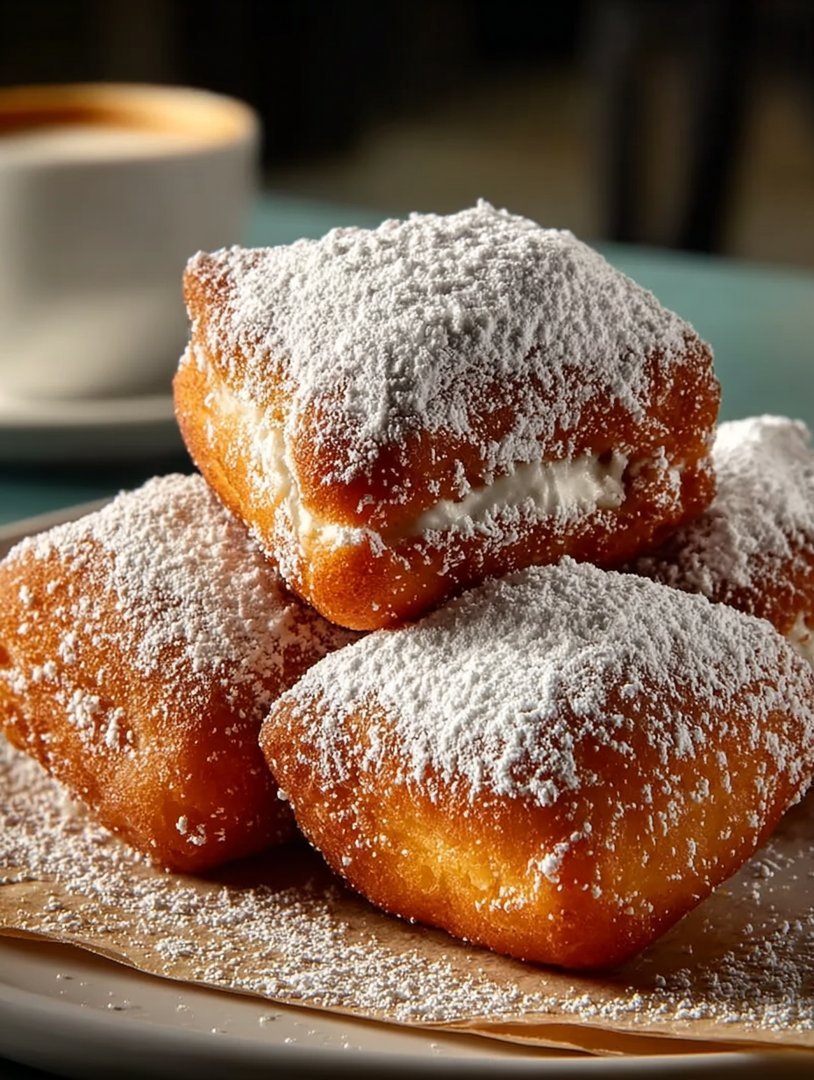
- Visually, these beignets puff up into gorgeous, erratic clouds, ready to be lavishly coated in powdered sugar for irresistible appeal.
- This versatile dough can also be used for mini donut holes or fritters, offering endless possibilities for dessert customization and presentation.
The Alchemy of Gluten-Free Dough
Making a successful yeasted gluten-free dough requires a shift in perspective. You cannot knead it like wheat dough; there is no gluten network to build. Instead, you are aiming for a sticky, slightly wet batter that can trap gas efficiently during proofing and, most importantly, during frying. If your dough feels too stiff, your final product will be dense, betraying the very spirit of the beignet. Think of it less like bread dough and more like a very thick, malleable cake batter.
Selecting the Right Flour Blend
The choice of flour is the single most critical factor in guaranteeing success with this recipe. Avoid single-source flours like plain rice flour, as they result in a chalky texture. A high-quality, pre-mixed 1:1 gluten-free baking blend that already contains xanthan gum is ideal for consistency. The xanthan gum mimics the elasticity of gluten, helping the dough hold its shape and trap the yeast gases. Look for a blend that prominently features rice flour, potato starch, and tapioca starch. This combination provides structure without the overwhelming heaviness that characterizes many poorly executed gluten-free baked goods. If your chosen blend does not include xanthan gum, add 1 teaspoon per cup of flour listed in the recipe.
The temperature of your liquid—whether using dairy milk or a non-dairy alternative—is also crucial for yeast happiness. Yeast is a sensitive little organism; too cold, and it sleeps through the party; too hot, and it dies before the appetizers are served. Aim for 105°F to 115°F (40°C to 46°C). This temperature range ensures rapid activation, producing that delightful, slightly tangy yeast flavor that makes these fried pastries so satisfying. Remember, the goal is light and airy, not leaden, which means treating the dough gently and respecting the rising process.
Ingredients for Perfect Gluten-Free Beignets Recipe
Here’s what you’ll need to make this delicious dish:
- Gluten-Free All-Purpose Flour BlendUse a high-quality 1:1 blend containing xanthan gum for the best structure and texture retention during frying.
- Active Dry YeastEssential for leavening; ensure your yeast is fresh and active for maximum puff and rise.
- Granulated SugarProvides sweetness and acts as food for the yeast, aiding in activation and dough development.
- Warm Milk or Non-Dairy AlternativeMust be between 105°F and 115°F (40°C–46°C) to properly proof the yeast without killing it.
- Unsalted Butter or Plant-Based SpreadAdds richness and tenderness to the dough, preventing it from drying out.
- EggProvides structure, richness, and binds the gluten-free flours together, resulting in a cohesive dough.
- Alcohol-Free Vanilla Extract and Pinch of SaltVanilla enhances the overall dessert flavor profile, while salt balances the sweetness.
- Neutral Oil for FryingUse high smoke point oils like canola, vegetable, or peanut oil, ensuring the frying temperature remains stable.
- Powdered SugarAbsolutely non-negotiable for dusting the final product; use copious amounts for the authentic experience.
The full ingredients list, including measurements, is provided in the recipe card directly below.
How to Make Perfect Gluten-Free Beignets Recipe
Follow these simple steps to prepare this delicious dish:
Step 1: Activating the Yeast and Preparing the Dough
Start by gently warming the milk. Pour the warm milk (ensure it’s not hotter than 115°F) into a large mixing bowl or the bowl of a stand mixer fitted with the dough hook attachment. Sprinkle the active dry yeast and a teaspoon of sugar over the milk. Let this mixture stand for about 5 to 10 minutes until it becomes foamy and frothy, indicating the yeast is alive and well. Add the remaining sugar, softened butter, egg, alcohol-free vanilla extract, and salt to the bowl, mixing lightly to combine. Gradually add the gluten-free flour blend, mixing on low speed until a very sticky, wet dough forms. Do not overmix; just ensure all the flour is incorporated.
Step 2: The First Rise (The Patience Test)
Transfer the sticky dough to a lightly oiled bowl, turning it once to coat. Cover the bowl tightly with plastic wrap or a clean kitchen towel. Place the bowl in a warm, draft-free spot. This dough needs sufficient time to proof—allow it to rise until doubled in size, which usually takes between 1.5 to 2 hours, depending on the warmth of your kitchen. If your kitchen is cool, you can use a proofing drawer or place the bowl inside a cold oven with the light turned on.
Step 3: Rolling, Chilling, and Cutting
Once the dough has doubled, gently punch it down—remembering that this is a soft, delicate dough, not traditional bread. Lightly dust a surface with gluten-free flour. Using a rolling pin, carefully roll the dough into a large rectangle about 1/4 inch thick. This thinness is key for achieving maximum puff. Transfer the rolled dough onto a parchment-lined baking sheet and place it in the refrigerator for 30 minutes. This chilling step firms the dough, making it much easier to handle and cut without losing the precious air bubbles. After chilling, use a pizza cutter or sharp knife to cut the dough into 2-inch squares or diamond shapes.
Step 4: Achieving Frying Perfection
Pour your neutral frying oil into a deep, heavy-bottomed pot or Dutch oven, ensuring the oil is at least 2 inches deep. Heat the oil to 350°F (175°C). Use a thermometer to monitor the temperature precisely; if the oil is too cold, the beignets will absorb too much oil and be greasy; if too hot, they will burn before cooking through. Working in batches of four or five, carefully drop the cut dough squares into the hot oil. Fry for about 1 to 2 minutes per side, turning them once they achieve a deep golden brown color. Watch them closely; they fry quickly!
Step 5: Draining and The Grand Powdered Finale
Use a slotted spoon to carefully remove the golden, puffed beignets from the oil. Transfer them immediately to a wire rack lined with paper towels to drain excess oil. While they are still warm—this is crucial—transfer them to a large bowl or serving platter and dust them aggressively with powdered sugar. There is no such thing as too much powdered sugar when it comes to true New Orleans-style pastries.
Troubleshooting the Puff Factor
If your beignets come out flat, the primary culprits are usually either inactive yeast or oil that is too cool. Always check your yeast expiration date and ensure your proofing milk is at the correct temperature range. If the oil temperature drops below 340°F (170°C) during frying, the steam generation necessary for the explosive puff won’t happen, resulting in a dense product. Use a candy or deep-fry thermometer and give the oil time to recover its heat between batches. Another less common issue might be over-handling the dough during the cutting phase. The less you manipulate the dough after the initial rise, the more gas bubbles remain intact, leading to lighter, more airy fried pillows.
For those who prefer a dipping sauce, skip the traditional chicory coffee accompaniment and try a simple strawberry or mixed berry compote. Simmer fresh or frozen berries with a squeeze of lemon juice and a touch of maple syrup until thickened. This bright, slightly tart sauce cuts through the richness of the fried dough beautifully. Alternatively, a thick chocolate ganache made with dark chocolate and a splash of milk or cream offers a decadent pairing that elevates this classic dessert into an unforgettable experience.
Transfer to plates immediately after heavy dusting and serve while the exterior is still crisp for the perfect finishing touch. These delightful pastries are best enjoyed within minutes of leaving the fryer.
The Accidental Discovery of Sunshine on a Plate
One rainy Tuesday, utterly discouraged by a batch that refused to proof, I impulsively added a pinch of lemon zest, hoping to salvage the flavor. The resulting beignets, while slightly unorthodox, rose spectacularly, offering a subtle brightness that instantly elevated the classic taste. It was an unexpected, joyous surprise—a true cloud of sunshine.
For years, I believed true beignets—those glorious, sugar-dusted pillows of fried dough—were forever off-limits in a gluten-free world. Every attempt ended in dense, sad hockey pucks that looked more like construction materials than celebratory pastries. I mourned the loss of New Orleans flavor, feeling deprived of that essential Southern sweetness. This struggle became my culinary Everest, demanding dozens of failed batches, plenty of tears (mostly of frustration, sometimes of sugar-induced joy), and an absurd number of dishtowels covered in powdered sugar.
I needed a dough that could handle the heat, puff up like a majestic hot air balloon, and still deliver that characteristic slightly chewy, but mostly airy, texture. Most gluten-free doughs collapse under pressure. They are too sticky, too crumbly, or simply refuse to rise, resulting in a textural nightmare. After extensive research, testing various gum ratios, and frankly, talking lovingly to the dough during the proofing process (don’t judge, it helped), I finally unlocked the secret to a stable, yet tender, dough structure.
The solution wasn’t just a simple flour swap; it was a delicate dance of hydration, rest time, and utilizing the right blend of starches and binders. The result? A batch so ethereally light and impossibly fluffy, it truly deserves the title: thePerfect Gluten-Free Beignets Recipe. Prepare yourself for absolute delight, because we are bringing Peach Nectar With Vanilla Street flavor directly to your kitchen, minus the flight and the gluten.
The Secrets to Achieving Light and Fluffy Beignets
The magic of this recipe, the reason these turn out so much better than any previous gluten-free attempts, lies in temperature control and proper yeast activation. Gluten-free dough lacks the elastic net that traditional wheat flour provides, meaning we rely heavily on the steam and carbon dioxide created during frying to achieve lift.
Ingredient Breakdown: Choosing Your Gluten-Free Toolkit
- The Flour Blend:Using a high-quality, cup-for-cup gluten-free flour blend is essential. Look for one that already contains xanthan gum, or be prepared to add a separate binder. We want structure without density.
- Yeast Hydration:Use warm, but not hot, liquid (around 105°F to 110°F). If the liquid is too hot, it kills the yeast. If it’s too cool, the yeast won’t activate properly, leading to a flat dough disaster.
- Dairy Richness:Whole milk provides necessary fat and flavor, resulting in a softer crumb. If opting for a non-dairy substitute, ensure it’s full-fat for the best texture.
Ingredients for the Perfect Gluten-Free Beignets Recipe
This recipe yields about 20-24 medium beignets.
- 1 1/2 cups warm whole milk (or full-fat oat milk), 105°F to 110°F
- 1/2 cup granulated sugar, divided
- 2 1/4 teaspoons active dry yeast (one standard packet)
- 1/2 cup unsalted butter (or dairy-free butter substitute), melted and cooled
- 2 large eggs, lightly beaten
- 1 teaspoon alcohol-free vanilla extract
- 4 1/2 cups high-quality, cup-for-cup gluten-free flour blend (ensure it contains xanthan gum)
- 1 teaspoon salt
- Neutral-flavored frying oil (like canola, vegetable, or peanut)
- 2 cups powdered sugar, for dusting
Step-by-Step Instructions for Dough Perfection
Activating the Yeast (The Bubble Stage)
In a large bowl, combine the warm milk and two tablespoons of the granulated sugar. Sprinkle the active dry yeast over the top. Let this mixture stand for 5 to 10 minutes until it becomes frothy and foamy. If it doesn’t foam, your yeast is likely expired or the milk was too hot; start over.
Mixing the Dough Base
Whisk the melted butter, beaten eggs, remaining sugar, and alcohol-free vanilla extract into the yeast mixture. In a separate, large bowl, combine the gluten-free flour blend and salt. Gradually add the wet ingredients to the dry ingredients, mixing with a wooden spoon or stand mixer fitted with a dough hook until a soft, slightly sticky dough forms. Gluten-free dough will remain stickier than traditional dough; resist adding excess flour.
Proofing and Chilling (Patience is a Virtue)
Transfer the dough to a lightly oiled bowl, turning it to coat. Cover the bowl tightly with plastic wrap and let it proof in a warm place for 1.5 to 2 hours, or until doubled in size. This proofing is vital for the airiness of the finished product. Once proofed, punch the dough down lightly, re-cover it, and chill the dough in the refrigerator for at least 4 hours, or preferably overnight. Chilling makes handling and cutting much easier.
Perfecting the Cooking Process
After letting the dough chill for optimal handling, the next crucial step is ensuring your frying oil is precisely at 375°F. Cut and drop the dough pieces quickly and consistently, managing small batches so the oil temperature remains stable. This sequence guarantees maximum puff and prevents those dreaded soggy centers.
Rolling and Cutting the Squares
Remove the chilled dough and lightly dust a clean work surface and a rolling pin with gluten-free flour. Roll the dough out gently until it is about 1/4 inch thick. Use a pizza cutter or sharp knife to cut the dough into 2-inch by 2-inch squares. Don’t worry about perfect shapes; the rustic edges are part of the charm.
Frying the Perfect Gluten-Free Beignets
In a deep, heavy-bottomed pot or Dutch oven, heat at least two inches of oil to 375°F (use a thermometer!). Maintaining this temperature is key to success, ensuring that the beignets cook through without becoming greasy. Gently drop 4 to 6 beignet squares into the hot oil, ensuring you do not overcrowd the pan. Fry for 1 to 2 minutes per side, until they puff up magnificently and turn golden brown.
The Final Dusting
Carefully remove the fried beignets using a spider strainer or slotted spoon and transfer them to a wire rack lined with paper towels to drain excess oil. While still hot, immediately transfer the beignets to a large paper bag or bowl containing the powdered sugar. Toss vigorously until every glorious surface is coated. Serve immediately and watch them disappear!
Add Your Touch
Feel free to substitute the whole milk with a creamy plant-based alternative like oat or cashew milk to maintain richness. For an extra kick, try dusting the finished product with a blend of cinnamon and cardamom instead of standard powdered sugar. You could also mix a tiny bit of orange blossom water into the dough for a floral note.
Storing & Reheating
Beignets are best eaten immediately, but if you must save them, store cooled leftovers in an airtight container at room temperature for one day. Reheat them quickly in a 350°F oven for five minutes to restore some crispness, then apply a fresh, generous dusting of powdered sugar.
Expert Tips for Frying Perfection
- Ensure the oil maintains a steady 375°F; oil that is too cool results in greasy beignets, while oil that is too hot burns the exterior before the inside cooks fully.
- The overnight chilling phase is mandatory for gluten-free dough; it relaxes the starches, making the dough much less sticky and preventing structural collapse during frying.
- Always dust with powdered sugar while the beignets are piping hot, allowing the heat to slightly melt the sugar, creating that gorgeous, signature crust.
The first time I served these at brunch, my skeptical niece devoured three before realizing they were gluten-free. That silence, followed by the shock of delicious realization, was better than any gold medal.
Conclusion for Perfect Gluten-Free Beignets Recipe
Creating thePerfect Gluten-Free Beignets Recipedoesn’t have to be a source of stress; it should be a delightful journey into texture and flavor. By focusing on precise measurements, honoring the chilling period, and maintaining that optimal frying temperature, you can achieve beignets that rival any traditional bakery version. These fluffy, airy delights prove that dietary restrictions do not necessitate sacrificing joy or incredible taste. Go ahead, fill your plate (and your kitchen) with the sweet scent of success, and enjoy every powdered sugar-dusted bite of these spectacular pastries.
Print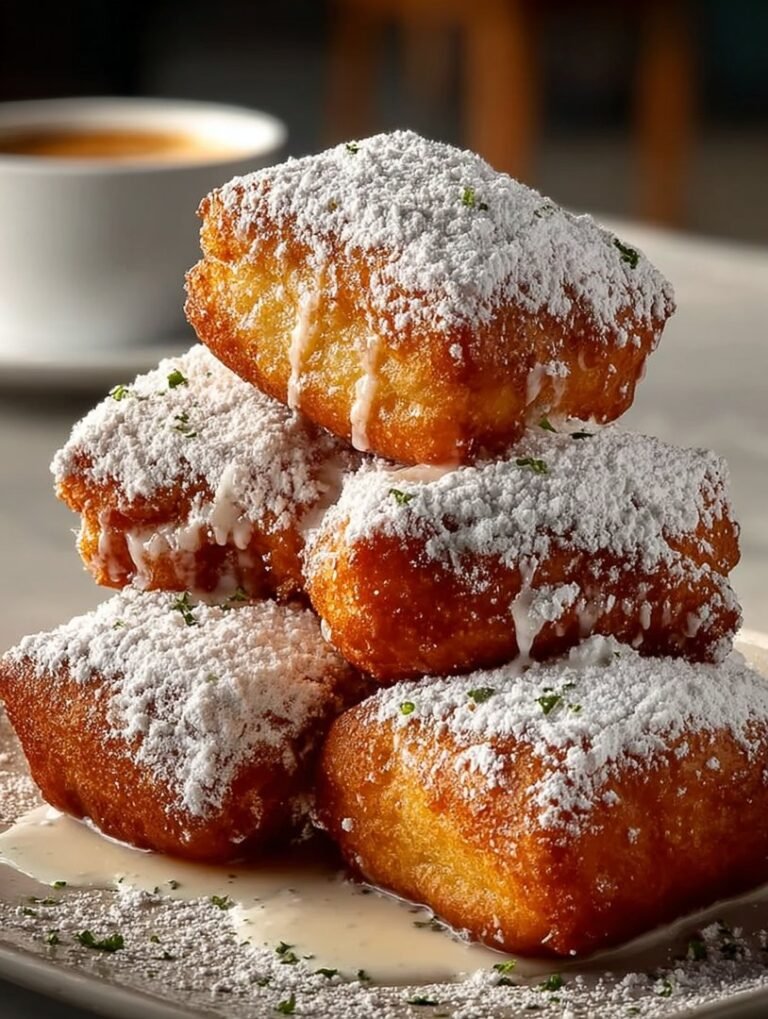
Perfect Gluten-Free Beignets Recipe
Achieve airy, cloud-like beignets without gluten! Our GF blend, activated yeast, and slow proofing (1.5–2 hours) yield perfect, light texture. Full guide and nutrition included.
- Total Time: 35 minutes
- Yield: 4 servings
Ingredients
- Gluten-Free All-Purpose Flour Blend (with xanthan gum): 2 cups (plus 1/4 cup for dusting)
- Warm Whole Milk (105-115°F): 3/4 cup
- Active Dry Yeast: 2 1/4 teaspoons (one standard packet)
- Granulated Sugar: 1/4 cup
- Unsalted Butter (melted and cooled slightly): 3 tablespoons
- Large Egg: 1
- Fine Sea Salt: 1/2 teaspoon
- Vegetable Oil or Canola Oil (for frying): 4 cups
Instructions
- Step 1: Activate the Yeast. In a large mixing bowl, combine the warm milk and the granulated sugar. Sprinkle the active dry yeast over the mixture and let it sit for 5-10 minutes until foamy. Whisk in the melted butter and the large egg until fully combined.
- Step 2: Form the Dough. Gradually add the gluten-free flour blend and salt to the wet ingredients, mixing thoroughly with a wooden spoon or stand mixer until a soft, slightly sticky dough forms. Cover the bowl with plastic wrap and allow the dough to proof in a warm place for 1.5 to 2 hours, or until roughly doubled in size.
- Step 3: Roll and Cut. Lightly dust a clean surface with extra gluten-free flour. Gently turn the risen dough out onto the surface and pat or roll it out to approximately 1/4 inch thickness. Use a pizza cutter or sharp knife to cut the dough into 2-inch squares.
- Step 4: Heat and Fry. Pour the vegetable oil into a deep, heavy-bottomed pot or Dutch oven, heating it to 350°F (175°C). Carefully drop 3-4 beignet squares into the hot oil, ensuring not to crowd the pot. Fry for 45-90 seconds per side, until deeply golden brown and puffed.
- Step 5: Finish and Serve. Use a slotted spoon or spider to transfer the finished beignets to a cooling rack lined with paper towels to drain excess oil. While still warm, generously dust the beignets with powdered sugar before serving immediately.
Notes
- For maximum crispness, store leftover beignets uncovered at room temperature for no more than 24 hours; airtight containers will trap moisture and cause sogginess.
- To recapture a hint of their original puff, reheat stale beignets in a 300°F oven for 3-5 minutes, then dust generously with fresh powdered sugar immediately before eating.
- Pair these light, pillowy treats with a strong chicory coffee or serve them alongside a rich chocolate dipping sauce or tangy fruit compote for an elevated brunch experience.
- Maintain the oil temperature precisely at 350°F while frying; if the temperature drops too low, your delicate gluten-free dough will quickly absorb the oil instead of puffing up light and airy.
- Prep Time: 15 minutes
- Cook Time: 20 minutes
- Method: Stovetop
- Cuisine: American
Leave a Comment