

Remember the chaos of trying to fill a crispy, tubular cannoli shell without shattering it into a million painful crumbs? It was a stressful, messy battlefield for a simple dessert craving.
Forget the frying stress! These easyMini Cannoli Cupsdeliver all the creamy, citrusy bliss of the classic treat without needing a degree in pastry engineering.
- Baking phyllo dough transforms the traditional, complicated fried shells into simple, elegant, golden cups in mere minutes.
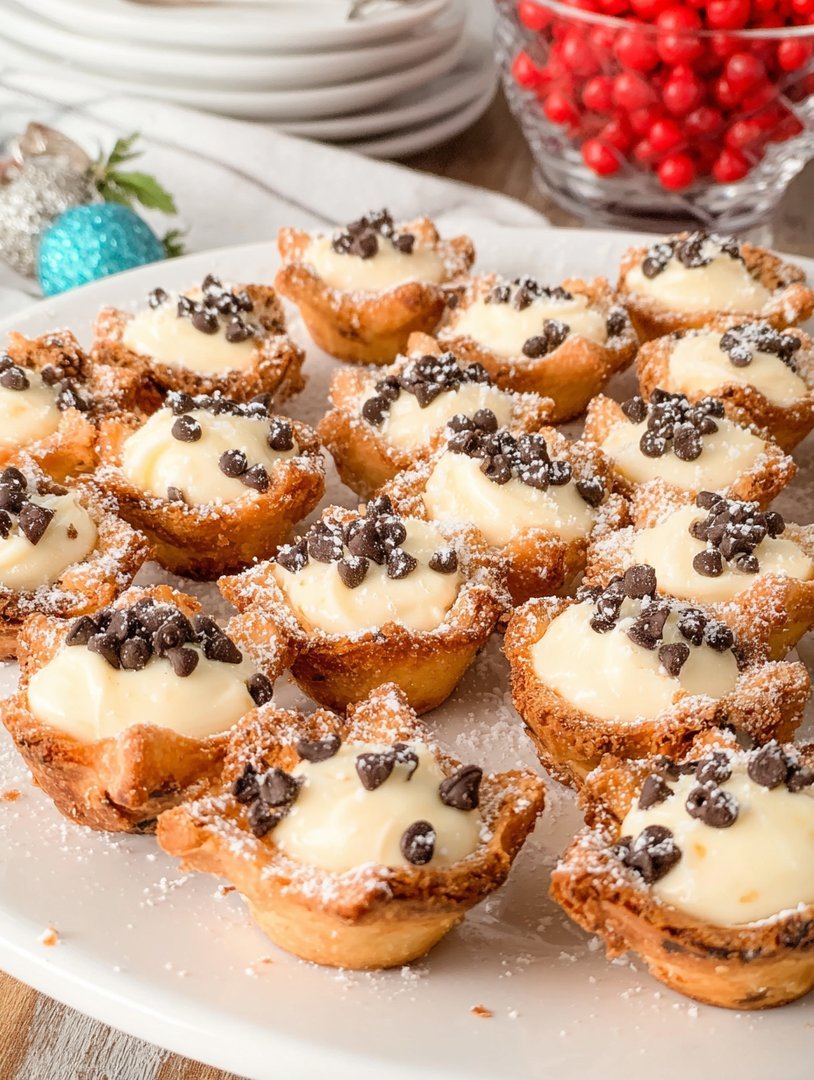
- The velvety ricotta filling, laced with bright orange zest and tiny chocolate chips, offers a perfect balance of sweet and tangy flavors.
- These little dessert cups boast a beautiful contrast between the crisp shell and the snow-white, fluffy interior, making them perfect for entertaining.
- Customize the smooth filling with pistachios, dried cherries, or different flavor extracts to suit any special occasion or preference easily.
The Great Cannoli Shell Rebellion: Why Cups Triumph
Let’s be honest, the standard cannoli shell is an architectural nightmare waiting to happen. You slave away, roll the dough, fry it to a perfect bubble, and then, the moment you try to fill it, *snap*. You are left holding a handful of broken Italian shards and a bowl of ricotta that suddenly seems too heavy for this cruel world. This culinary frustration is precisely why the genius idea of the deconstructed cannoli was born. We take the incredible flavor profile—that sweet, fluffy ricotta filling nestled in a crispy wrapper—and make it genuinely approachable.
MakingMini Cannoli Cupseliminates all the drama. Instead of fiddling with metal tubes and hot oil, you simply use ready-made phyllo dough or even sturdy wonton wrappers, press them into a muffin tin, and bake them until they achieve peak golden perfection. This technique yields a uniformly crispy vessel, sturdy enough to hold the luxurious filling but delicate enough to shatter delightfully with every bite. The entire process reduces the prep time by at least an hour, transforming a labor-intensive Italian classic into a quick, weeknight-friendly dessert that always looks impressive.
Choosing Your Vessel: Phyllo vs. Wonton Wrappers
While both phyllo and wonton wrappers work wonderfully for creating these crispy little bowls, they offer slightly different textures. Phyllo dough, usually found frozen, bakes up incredibly light and flaky, creating thin, shattered layers. If you are aiming for maximum delicate crispness, phyllo is your go-to. You’ll need to brush the layers with melted butter (or a neutral oil) before baking to ensure they brown beautifully and separate into those desirable airy layers. Wonton wrappers, conversely, result in a structure that is a bit sturdier and more cookie-like. They provide a chewiness alongside the crunch, and they are faster to prepare since they don’t require layering—just press, bake, and fill. For a cleaner, faster assembly, many bakers prefer the simplicity of the square wonton wrapper for these quick cannoli desserts.
Secrets to the Silkiest Ricotta Filling
The filling is the true star of the show. Achieving that light, airy, and creamy consistency requires two main things: quality ricotta and proper drainage. If your ricotta is too wet, your filling will be runny, potentially sogging out your crisp cups before the party even starts. Always opt for whole-milk ricotta cheese; the richer fat content guarantees better texture and flavor. Before mixing, you absolutely must drain the ricotta. Place it in a fine-mesh sieve lined with cheesecloth or a coffee filter and let it sit over a bowl in the refrigerator for at least four hours, or ideally, overnight. This step pulls out excess pea protein, concentrating the cheese’s flavor and ensuring a thick, decadent base for your sweetness.
Flavor Balancing Act: Zest, Sugar, and Spice
Traditional cannoli filling relies on a beautiful balance of sweet, tangy, and subtly spiced notes. We achieve the perfect brightness using fresh citrus zest. Orange zest is mandatory here, offering a warm, complex perfume that elevates the simple ricotta. Powdered sugar is the sweetener of choice because it dissolves instantly and completely, preventing any grainy texture that granulated sugar might leave behind. A tiny pinch of ground cinnamon or nutmeg adds that signature warmth without overpowering the citrus. Once these foundational elements are blended until smooth, fold in mini chocolate chips. Mini chips distribute better throughout the filling, ensuring every bite has a satisfying, melty texture contrast. Remember, fold gently—overmixing after adding the chips can break down the integrity of the creamy ricotta mixture.
Ingredients for Mini Cannoli Cups
Here’s what you’ll need to make this delicious dish:
- Ricotta CheeseUse full-fat, whole-milk ricotta for the creamiest texture; remember to drain it thoroughly to remove excess moisture.
- Phyllo Dough SheetsAlternatively, use large square wonton wrappers for a slightly sturdier, quicker base; ensure they are thawed if using phyllo.
- Powdered SugarEssential for a smooth, non-gritty filling, as it dissolves quickly into the ricotta base.
- Alcohol-Free Vanilla ExtractUse a high-quality pure extract to enhance the overall sweetness and provide aromatic depth.
- Orange ZestThe critical flavoring agent that provides the traditional, bright, and slightly floral citrus note required in authentic cannoli.
- Mini Chocolate ChipsFold these into the filling at the end; mini versions disperse better and provide perfect bursts of chocolate.
- Butter or Neutral OilNeeded to brush the phyllo layers, ensuring they bake up golden brown and achieve their signature flakiness.
The full ingredients list, including measurements, is provided in the recipe card directly below.
How to Make Mini Cannoli Cups
Follow these simple steps to prepare this delicious dish:
-
Prepare the Ricotta Filling Base
Drain the whole-milk ricotta overnight in the refrigerator using a sieve lined with cheesecloth to remove maximum moisture. Once drained, transfer the ricotta to a large bowl. Add the powdered sugar, alcohol-free vanilla extract, and orange zest. Use a rubber spatula or electric mixer on low speed to blend until the mixture is completely smooth and fluffy, ensuring no lumps remain.
-
Fold in the Chocolate Chips
Gently fold in the mini chocolate chips and a small pinch of cinnamon or nutmeg, if desired. Do not overmix this step; you want the chocolate chips distributed without deflating the air you incorporated into the creamy mixture. Cover the bowl and refrigerate the filling for at least 30 minutes while you prepare the cups; chilling helps it firm up for easy piping later.
-
Bake the Cannoli Cups
Preheat your oven to 350°F (175°C). If using phyllo dough, stack two sheets together, brushing lightly with melted butter between layers, then cut them into squares large enough to line the muffin tin cups. If using wonton wrappers, lightly spray them with oil. Carefully press the squares into a standard muffin tin to form cup shapes. Bake for 8 to 12 minutes until the cups are light golden brown and wonderfully crisp; watch carefully as phyllo can burn quickly.
-
Cool and Assemble the Mini Cannoli Cups
Remove the baked cups from the oven and let them cool completely in the muffin tin before gently lifting them out. This cooling process helps them maintain their shape and maximizes crispness. Once cooled, spoon the chilled ricotta mixture into a piping bag fitted with a large star tip (or simply use a zip-top bag with the corner snipped off).
-
Finalize and Serve
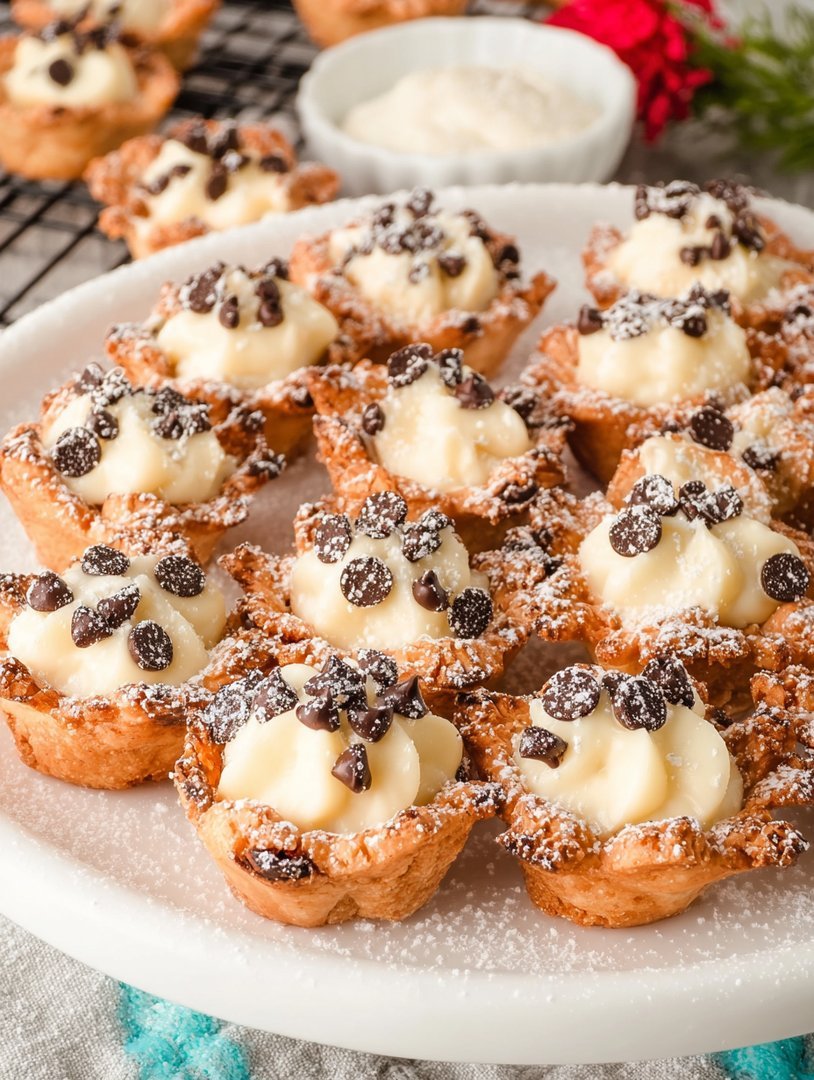
Pipe the creamy ricotta filling generously into each cooled cup just before serving. Garnish the tops immediately with a sprinkle of extra mini chocolate chips, chopped pistachios, or a dusting of powdered sugar for the classic Italian look.
Transfer the delicate cups to a serving platter and serve immediately while the shells are at their crispiest for the perfect dessert experience.
Troubleshooting Common Cannoli Cup Issues
Why did my ricotta filling turn runny?
A runny filling is almost always due to insufficient drainage of the ricotta cheese. Ricotta naturally holds a lot of pea protein (liquid). If you skip the step of draining it overnight in the refrigerator, that liquid mixes with the sugar and thins the mixture out dramatically. Always drain it thoroughly, ideally wrapped in cheesecloth, before mixing in any other ingredients.
How do I keep the shells from getting soggy?
The secret to avoiding soggy shells is assembly timing. The moisture from the ricotta filling will inevitably start to soften the delicate cups over time. For maximum crispness, fill the baked shells no more than 30 minutes before you plan to serve them. You can prepare and bake the shells several days ahead of time and store them in an airtight container at room temperature.
Customizing Your Mini Cannoli Cups
One of the best aspects of this deconstructed approach is how easily you can customize the flavors to match any holiday or personal preference. While the classic orange zest and chocolate combination is undeniably perfect, don’t be afraid to experiment with other additions to your creamy ricotta base. For a bright, tart twist, consider adding the finely minced peel of candied lemon or lime instead of orange zest. You can also swap out the chocolate chips entirely for dried fruit, such as finely diced cherries or apricots, which provide a beautiful jewel tone and a different layer of sweetness.
Flavor Variations for the Filling
- Pistachio Perfection:Fold in 1/4 cup of finely ground pistachios along with the chocolate chips for a rich, earthy crunch and a beautiful green hue.
- Espresso Infusion:Dissolve 1 teaspoon of instant espresso powder in the alcohol-free vanilla extract before mixing it into the ricotta. This creates a subtle coffee backdrop that pairs wonderfully with the dark chocolate chips.
- Nut-Free Crunch:If you avoid nuts, crushed freeze-dried raspberries or strawberries can provide a lovely tangy crunch and vibrant pink color contrast to the white filling.
Frequently Asked Questions About Mini Cannoli Cups
Can I freeze the cannoli filling?
While the cooked shells freeze beautifully, we strongly advise against freezing the ricotta filling. Ricotta cheese has a high moisture content, and freezing it causes the fat and liquid to separate, resulting in a grainy, watery texture when thawed that is unsuitable for piping.
How should I store the leftover baked cups?
Store un-filled cannoli cups in an airtight container at room temperature for up to five days. Never refrigerate the empty shells, as the moisture in the refrigerator air will cause them to lose their crispness quickly. If the cups become slightly soft, you can refresh them by baking them in a 300°F (150°C) oven for about five minutes.
Is there a good substitution for phyllo dough?
Yes, besides wonton wrappers, you can use very thinly rolled puff pastry, cut into squares. Puff pastry will result in a much thicker, flakier, and richer cup compared to the lightness of phyllo, but it works well and holds up beautifully to the filling.
The Great Cannoli Disaster and the Birth of the Mini Cannoli Cups
There is a certain mystique surrounding the traditional Italian cannolo. That perfectly fried, blistered shell, the cool, sweet ricotta spilling out the sides—it’s magnificent. However, making traditional cannoli is less magnificent and often involves specialized metal tubes, gallons of scalding oil, and an alarming amount of swearing. I learned this the hard way during a particularly ambitious attempt for my cousin’s birthday party, which ended less like a Sicilian bakery and more like a grease fire simulation.
After that culinary catastrophe, I swore off full-sized cannoli creation forever. But the craving for that iconic flavor persisted. Necessity, as they say, is the mother of invention, and in this case, invention came in the form of a mini muffin tin. That’s how these fantastic, fuss-freeMini Cannoli Cupswere born. They capture all the flavor, texture, and joy of the classic dessert without requiring you to risk third-degree burns or invest in specialty deep-frying equipment.
These bite-sized desserts are pure genius. They replace the tricky fried shell with an incredibly crisp, baked phyllo dough cup, and the creamy ricotta filling stays exactly the same—rich, sweet, and spiced just right. They are perfect for entertaining because they look stunningly elegant but take minimal effort. Once you realize you can achieve cannoli nirvana with a simple press-and-bake technique, you will never look back. Prepare yourself for the easiest and most delicious trip to Italy your kitchen has ever taken.
Why Ditching the Deep Fryer Was the Best Decision Ever
Traditional cannoli are brilliant, but they demand respect, time, and oil management skills usually reserved for professional fry cooks. By converting the dessert into Mini Cannoli Cups, we eliminate the three main stress points: the specialized forms, the delicate rolling process, and the messy, greasy cleanup. We use phyllo dough sheets, which are notoriously thin and airy, providing that necessary crunch without the heavy density of a traditional fried dough.
This streamlined approach drastically cuts down on active cooking time. You spend about 15 minutes assembling the shells, 10 minutes baking them until golden brown, and then you just whip the filling together while they cool. It’s the ultimate make-ahead party dessert. You can bake the shells days in advance and keep them in an airtight container, then fill them right before serving. This ensures the shells remain exquisitely crisp—a non-negotiable trait for any decent cannoli interpretation. If you’re hosting a dinner party, the ability to front-load dessert prep is invaluable. These miniature shells also make portion control effortless, although self-control around these treats might still prove challenging!
The Ricotta Filling That Will Change Your Life
The soul of any great cannoli is its filling. We need a filling that is sweet, smooth, and robust enough to stand up to the crunch of the shell. We use whole milk ricotta cheese, ensuring we drain it thoroughly. This step is non-negotiable; excess moisture is the enemy of creamy filling and crisp shells. If your ricotta is too wet, your filling will be runny, and your beautiful little cups will become soggy very quickly.
Once drained, the ricotta is blended with powdered sugar—not granulated sugar, which could make the mixture grainy—and flavored intensely with vanilla and cinnamon. A critical ingredient here is the incorporation of miniature chocolate chips and maybe even a dash of orange zest for brightness. These additions provide textural contrast and that classic flavor complexity. The key is to blend the mixture just until smooth; overmixing can sometimes break the ricotta down too much. Chill this filling thoroughly. A cold filling holds its shape better and provides that wonderful temperature contrast against the room-temperature shell.
What You Need: Ingredients for Ultimate Mini Cannoli Cups
For the Mini Cups (The Shells)
- 1 package (16 oz) phyllo pastry dough, thawed
- 1/4 cup unsalted butter, melted
- 2 tablespoons granulated sugar
- 1 teaspoon ground cinnamon
For the Ricotta Filling
- 32 ounces whole milk ricotta cheese, thoroughly drained
- 1 cup powdered sugar (icing sugar)
- 1 teaspoon pure alcohol-free vanilla extract
- 1/2 teaspoon ground cinnamon
- 1/4 teaspoon nutmeg (optional, but highly recommended)
- 1/2 cup miniature semi-sweet chocolate chips, plus extra for garnish
For Garnishing
- Powdered sugar for dusting
- Chopped pistachios
- Maraschino cherries or fresh raspberries (optional)
Assembly Required: Baking and Filling Your Shells
Creating the shells for these Mini Cannoli Cups is far easier than fighting with hot oil. First, ensure your phyllo dough is completely thawed. Because phyllo dries out quickly, keep it covered with a damp towel while you work. Preheat your oven to 350°F (175°C) and lightly grease a standard 12-cup mini muffin tin.
In a small bowl, mix the 2 tablespoons of sugar and 1 teaspoon of cinnamon. Unroll the phyllo and take three sheets. Brush the top sheet lightly with melted butter. Sprinkle generously with the cinnamon-sugar mixture. Layer the next sheet directly on top, brush with butter, and sprinkle with the mix again. Repeat for the third layer. You should have a stack of three buttered and sugared sheets.
Using a sharp knife or pizza cutter, slice the stacked phyllo into 2.5-inch squares. Gently press one square into each cavity of the prepared mini muffin tin, pushing down slightly in the center to form a cup shape. The edges will naturally flare out, creating a beautiful, rustic look. Bake the cups for 8 to 10 minutes, or until they are golden brown and wonderfully crisp. Let them cool completely in the tin before carefully removing them.
While the shells cool, prepare the filling. In a large bowl, combine the drained ricotta, powdered sugar, vanilla, cinnamon, and nutmeg. Mix using a hand mixer on medium speed until the filling is perfectly smooth and airy. Gently fold in the miniature chocolate chips using a spatula. Transfer this luxurious filling to a piping bag fitted with a large star tip (or just snip the corner off a Ziploc bag). Once the Mini Cannoli Cups are fully cooled, pipe the filling generously into each shell. Garnish with chopped pistachios, an extra dusting of powdered sugar, and maybe a tiny chocolate chip.
Perfecting the Cooking Process
To maximize efficiency and ensure peak crispness for your Mini Cannoli Cups, always bake the shells first and allow them to cool completely. Prepare the ricotta filling while the shells are cooling, ensuring the filling is chilled for at least two hours before piping into the cups for optimal texture and stability.
Add Your Touch
Elevate your bite-sized dessert experience by experimenting with flavor. Substitute the chocolate chips with dried cherries or finely chopped candied ginger for a seasonal twist. For a citrus burst, replace the alcohol-free vanilla extract with almond paste, or add a teaspoon of fresh orange zest to the creamy ricotta mixture.
Storing & Reheating
Always store the baked Mini Cannoli Cups shells separately from the filling in airtight containers at room temperature. The ricotta filling must be refrigerated. Fill the cups no more than two hours before serving to prevent the crisp shells from becoming soggy; they do not reheat well once filled.
The first time I served these delightful Mini Cannoli Cups at a family gathering, everyone thought I had spent hours painstakingly rolling dough, but they were shocked when I revealed the muffin tin secret. The ease of this recipe is truly what makes it so memorable.
- Drain the Ricotta Properly:Use a cheesecloth or fine-mesh sieve set over a bowl for several hours, or even overnight, to remove all excess moisture.
- Cover the Phyllo:Phyllo dough dries out almost instantly, so keep any unused sheets covered with a lightly damp towel while you are cutting and assembling the cups.
- Chill the Filling:Ensure the ricotta filling is thoroughly chilled for a minimum of two hours; cold filling pipes beautifully and maintains its structure much better in the crisp shells.
Frequently Asked Questions About Mini Cannoli Cups
These answers address common issues and clarify the process for making perfect miniature cannoli every time.
Can I make the shells gluten-free?
While traditional phyllo dough contains wheat, you can often find gluten-free phyllo pastry in specialty frozen food sections. Alternatively, some bakers use sugar cookie dough pressed into the muffin tins, though this will result in a firmer, less airy shell than the classic Mini Cannoli Cups.
How long do the unfilled shells last?
If baked until very crisp and stored properly in an airtight container at room temperature, the unfilled phyllo shells for your Mini Cannoli Cups will maintain their freshness and crunch for up to three or four days.
What if my filling is too runny?
If your filling is too loose, this usually means your ricotta was not drained completely. To fix it, you can stir in a small amount of powdered sugar, a tablespoon at a time, until it firms up, or if necessary, incorporate a very small amount of stabilized plant-based thickener like guar gum.
Can I use low-fat ricotta cheese?
While you can use low-fat ricotta, the resulting filling will be less creamy and may contain more residual liquid, making it essential to drain it even more thoroughly than the full-fat version. Whole milk ricotta provides the richest flavor and best texture for these Mini Cannoli Cups.
Is it possible to freeze the Mini Cannoli Cups?
No, freezing filled cannoli cups is strongly discouraged. The ricotta filling will thaw poorly and lose its smooth texture, and the crisp phyllo shell will become mushy upon defrosting. Freeze the ricotta filling only if it’s meant to be incorporated into another baked dessert, not for piping into fresh shells.
Embracing the Mini Dessert Movement
The beauty of the Mini Cannoli Cups recipe lies in its ability to deliver sophisticated flavor with absolute ease. You get the richness of the dairy, the intoxicating spices, and the satisfying crackle of the pastry, all in two glorious bites. Forget the stress of deep-frying and the intimidation of Italian pastry making. This recipe proves that sometimes, the simplest methods yield the most profound results.
Next time you are tasked with bringing a dessert to a potluck or hosting a large gathering, skip the complicated tortes and focus on these small wonders. They travel well, they delight everyone, and they cement your status as a baking genius—without requiring you to spend hours over a hot stove. Just remember to make a double batch; these delightful Mini Cannoli Cups disappear faster than you can say “Molto bene!”
Conclusion for Mini Cannoli Cups
This recipe for Mini Cannoli Cups truly revolutionizes dessert making, transforming a complex Italian classic into an effortlessly elegant finger food. By utilizing crispy baked wonton shells and a perfectly sweetened, creamy ricotta filling, you save considerable time without sacrificing any of the iconic flavor or texture. We covered the crucial importance of draining your ricotta, the simple joy of using a muffin tin for creating perfect crunchy cups, and smart strategies for making these adorable desserts ahead of time. Whether you are hosting a formal gathering or simply crave a single, sublime sweet bite after dinner, these easy-to-handle treats guarantee a standing ovation every time. Go ahead, pipe that filling, sprinkle those chips, and enjoy the sweet taste of victory!
Print
Mini Cannoli Cups
Crispy wonton shells cradle a sweet, spiced ricotta cream (vanilla/cinnamon). These no-fry Mini Cannoli Cups bake quickly in a muffin tin! Full instructions and nutritional breakdown included.
- Total Time: 35 minutes
- Yield: 4 servings
Ingredients
- Wonton wrappers (24 square)
- Whole milk ricotta cheese (15 ounces)
- Powdered sugar (1/2 cup)
- vanilla powder (1 teaspoon)
- Ground cinnamon (1/4 teaspoon)
- Mini chocolate chips (1/4 cup)
- Powdered sugar (extra for dusting)
Instructions
- Step 1: Preheat the oven to 350°F (175°C). Lightly spray a 24-cup mini muffin tin with cooking spray. Gently press one wonton wrapper into each cup, folding the corners slightly to fit and form a small cup shape.
- Step 2: Bake the wonton cups for 8 to 10 minutes, or until the edges are golden brown and crispy. Immediately remove the cups from the tin and place them on a wire rack to cool completely.
- Step 3: Prepare the filling by first draining the ricotta cheese. Place the ricotta in a fine-mesh sieve lined with cheesecloth or coffee filters over a bowl and let it drain for at least 30 minutes, or press lightly to remove excess moisture.
- Step 4: Transfer the drained ricotta to a medium bowl. Add the 1/2 cup powdered sugar, vanilla bean paste, and cinnamon. Beat with a hand mixer until the mixture is smooth and creamy. Fold in the mini chocolate chips, then cover and chill the filling for at least 30 minutes.
- Step 5: When ready to serve, transfer the cannoli filling into a piping bag fitted with a star tip (or use a small spoon). Fill each cooled wonton cup generously with the ricotta mixture, then lightly dust the assembled Mini Cannoli Cups with extra powdered sugar.
Notes
- To maintain the crunch, store the unfilled wonton cups in an airtight container at room temperature and keep the prepared filling chilled in the refrigerator for up to three days.
- If your cooled shells feel slightly soft, you can easily restore their crispness by baking them empty at 300°F (150°C) for just two minutes before filling.
- For an elegant serving presentation, try dipping the rims of the cooled wonton cups into a small amount of melted dark chocolate before filling them with the ricotta mixture.
- The 30-minute draining process for the ricotta is crucial; removing that excess moisture ensures your filling is thick, creamy, and stable enough to keep the crispy shells from getting soggy too quickly.
- Prep Time: 15 minutes
- Cook Time: 20 minutes
- Method: Stovetop
- Cuisine: American
FAQs
What is the secret to the perfectly crispy shell for these Mini Cannoli Cups?
The genius of this recipe lies in skipping the challenging deep-fry process associated with traditional cannoli. Instead, we use store-bought wonton wrappers, pressed gently into a mini muffin pan. This method creates the perfect, sturdy, and wonderfully crispy little vessel for your creamy ricotta filling. It’s a huge time-saver and drastically reduces the mess, making these treats accessible even for novice bakers. This is the secret to why these miniature treats are so incredibly popular for entertaining—they are quick, clean, and reliably crunchy, giving you that satisfying snap every time.
How long do Mini Cannoli Cups stay fresh, and how should I store them?
If you are preparing these lovely ricotta-filled treats ahead of time, always store the shells and the filling separately. The crispy cups can remain fresh in an airtight container at room temperature for up to three days. The creamy ricotta filling must be refrigerated, where it will keep perfectly for about four days. Only assemble your Mini Cannoli Cups right before serving, perhaps 30 minutes prior, as the moisture from the filling will soften the crunchy shells quickly. Assembling them last-minute ensures your guests experience that delightful contrast between the creamy interior and the brittle exterior.
Can I customize the flavor profile of the Mini Cannoli Cups filling?
While the classic filling typically includes orange zest and mini chocolate chips, customizing your batch is highly encouraged! For a vibrant twist, try stirring in finely chopped candied cherries, dried cranberries, or toasted pistachios for color and texture. Alternatively, incorporate a touch of lemon zest for a brighter flavor profile, or a tablespoon of finely grated espresso powder for a subtle mocha hint. Remember to drain your ricotta thoroughly before mixing, ensuring the final product stays thick and decadent, no matter which delightful variation you choose to experiment with.
Is it possible to prepare the filling for the Mini Cannoli Cups ahead of time?
Absolutely! Preparing the cannoli filling in advance is highly recommended, as it allows the flavors to meld beautifully in the refrigerator. After mixing the ricotta with the powdered sugar, vanilla, and zest, cover the bowl tightly and chill it for at least four hours, or preferably overnight. The extended chill time also helps the ricotta firm up, making it much easier to pipe cleanly into the prepared crispy cups later without running. Simply transfer the chilled mixture to a piping bag fitted with a decorative tip just before you are ready to assemble and dazzle your guests.


Leave a Comment