

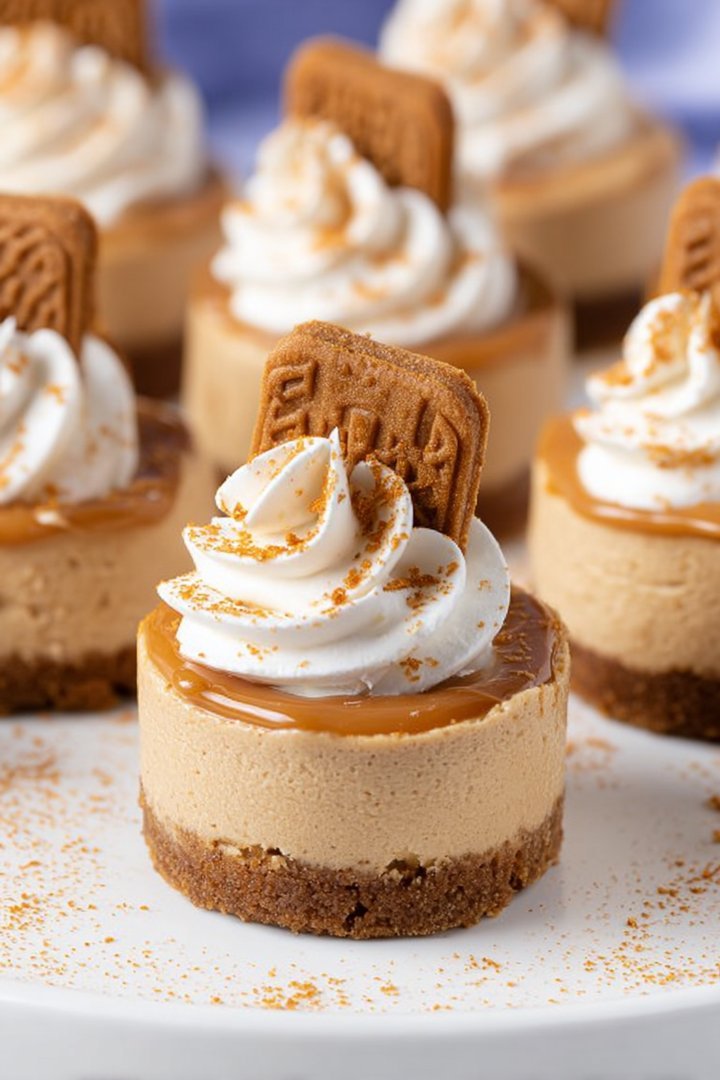
Imagine biting into a tiny cloud of creamy bliss, infused with the warm, spiced embrace of Biscoff cookies. These Mini Biscoff Cheesecakes are not just desserts; they’re little pockets of happiness, ready to brighten your day with every delightful bite.
These miniature marvels are so good, they’ll make you want to hide them from your family and enjoy them all yourself. Just kidding… mostly! Seriously though, prepare for a flavor explosion that perfectly balances creamy, crunchy, and subtly spiced notes, making them utterly irresistible.
Here’s why you’ll absolutely adore these Mini Biscoff Cheesecakes:
- Effortlessly simple to prepare, these cheesecakes are perfect for both beginner bakers and seasoned pros looking for a quick treat.
- The unique flavor profile of Biscoff cookies creates a symphony of warm spices and caramelized sweetness that dances on your palate.
- Their charming miniature size and elegant presentation make these cheesecakes an impressive addition to any dessert table or gathering.
- Adaptable for various occasions, these Mini Biscoff Cheesecakes are delightful as an everyday indulgence or a special occasion centerpiece.
Ingredients for Mini Biscoff Cheesecakes
Here’s what you’ll need to make this delicious dish:
The full ingredients list, including measurements, is provided in the recipe card directly below.
How to Make Mini Biscoff Cheesecakes
Follow these simple steps to prepare this delicious dish:
Step 1: Prepare the Biscoff Crust
Crush the Biscoff cookies into fine crumbs using a food processor or by placing them in a resealable bag and crushing them with a rolling pin. Mix the crushed cookies with melted butter until well combined.
Step 2: Press into Muffin Tin
Line a muffin tin with paper liners. Press the Biscoff cookie mixture firmly into the bottom of each liner to create a compact crust.
Step 3: Make the Cheesecake Filling
In a large bowl, beat the softened cream cheese and granulated sugar until smooth and creamy. Beat in the egg and Alcohol-free vanilla extract until just combined. Be careful not to overmix. Gently swirl in the Biscoff spread, creating a marbled effect.
Step 4: Fill and Bake
Spoon the cheesecake filling evenly into the prepared muffin liners, filling them almost to the top. Bake in a preheated oven at 325°F (160°C) for 18-20 minutes, or until the edges are set and the centers are slightly wobbly.
Step 5: Cool and Chill
Turn off the oven and let the cheesecakes cool inside with the door slightly ajar for about an hour. This helps prevent cracking. Then, transfer the muffin tin to the refrigerator and chill for at least 3 hours, or preferably overnight.
Step 6: Garnish and Serve
Once chilled, remove the Mini Biscoff Cheesecakes from the muffin tin. Melt additional Biscoff spread and drizzle over the top of each cheesecake. Garnish with crushed Biscoff cookies for added flavor and texture. Serve chilled and enjoy these perfect little bites of heaven!
Perfecting the Cooking Process
Efficiency is key to cheesecake bliss! Start by prepping all your ingredients. Next, blend the base and bake it. While the base is cooling, prepare the cheesecake filling. Finally, assemble and refrigerate until set. This sequence ensures each component is ready when you need it.
Add Your Touch
Want to make these **Mini Biscoff Cheesecakes** your own? Consider swapping the speculoos spread with another nut butter or chocolate hazelnut spread. A dash of cinnamon or nutmeg in the filling can add warmth. For extra indulgence, swirl in melted white chocolate before baking.
Storing & Reheating
These delightful **Mini Biscoff Cheesecakes** are best stored in the refrigerator in an airtight container. They’ll stay fresh for up to 5 days. Since they’re served chilled, reheating isn’t necessary. Just grab one straight from the fridge and enjoy!
Tips from the Test Kitchen
- For a smoother cheesecake filling, ensure your cream cheese is at room temperature before blending. Cold cream cheese can result in lumps.
- Avoid overbaking the base. A slightly golden crust is ideal; overbaking can make it dry and crumbly, and nobody wants that!
- Let the cheesecakes chill completely before serving. This allows the flavors to meld and the texture to firm up perfectly.
(Personal anecdote formated as paragraph subheading)
I remember the first time I made these, my nephew declared them “the best thing ever invented.” That’s a pretty good endorsement, right? They’re always a hit at family gatherings!
Why You’ll Absolutely Adore These Mini Biscoff Cheesecakes
Let’s be honest, the world is full of desserts vying for your attention. Cakes, cookies, pies…the list is endless. So, why should you dedicate precious baking time to these **Mini Biscoff Cheesecakes**? Well, buckle up, buttercup, because I’m about to lay down some serious dessert logic.
First off, they’re mini! Everything’s better in miniature form, isn’t it? Tiny hats, miniature ponies, and especially cheesecakes. It’s portion control disguised as adorable deliciousness. You get all the satisfaction of a full-sized cheesecake without the guilt (or the need to unbutton your pants).
Secondly, Biscoff. Need I say more? That caramelized, spiced flavor is basically edible nostalgia. It’s like a warm hug from your grandma, if your grandma happened to be a master baker with a secret stash of speculoos cookies. The combination of the creamy cheesecake filling and the crunchy Biscoff crust is a textural symphony in your mouth.
And finally, they’re surprisingly easy to make! No complicated techniques, no fancy equipment required. Just a few simple steps and you’re on your way to cheesecake heaven. Even if you’re a kitchen novice, you can whip these up with confidence. Seriously, if I can do it, anyone can. (And trust me, my early cooking attempts were…questionable.)
The Allure of Mini Desserts
There’s something inherently charming about miniature desserts. They’re perfect for parties, potlucks, or just a little treat for yourself. They’re also incredibly versatile. You can decorate them with fresh fruit, chocolate shavings, or even a drizzle of more Biscoff spread (because why not?).
Plus, **mini Biscoff cheesecakes** are a guaranteed crowd-pleaser. I’ve never met anyone who could resist their allure. They’re the ultimate comfort food, guaranteed to brighten even the gloomiest of days. So, ditch the diet (just for today!) and indulge in a little bit of cheesecake magic. You deserve it.
A Love Affair with Biscoff
Let’s talk more about Biscoff, shall we? This isn’t just your average cookie spread; it’s a culinary phenomenon. That unique, spiced flavor is simply irresistible. It’s the perfect complement to the creamy cheesecake filling, adding a layer of warmth and complexity that will tantalize your taste buds.
You can find Biscoff spread at most grocery stores, usually near the peanut butter and other nut butters. If you’re feeling adventurous, you can even try making your own! But honestly, the store-bought version is pretty darn good, and it saves you a lot of time and effort.
Beyond the Basics
: Variations and Substitutions
While I’m a firm believer in the classic **mini Biscoff cheesecake** recipe, I’m also a big fan of experimentation. So, if you’re feeling creative, feel free to put your own spin on things.
- **Different Crust:** Instead of crushed Biscoff cookies, try using graham crackers or chocolate wafers for the crust.
- **Flavor Infusions:** Add a dash of Alcohol-free vanilla extract, alcohol-free almond extract, or even lemon zest to the cheesecake filling for a subtle flavor twist.
- **Toppings Galore:** Get creative with your toppings! Fresh berries, whipped cream, chocolate sauce, or even a sprinkle of sea salt can elevate these cheesecakes to the next level.
Remember, cooking is all about having fun and expressing your creativity. So, don’t be afraid to experiment and try new things. You might just discover your new favorite dessert!
The Secret to Perfect Mini Biscoff Cheesecakes: A Step-by-Step Guide
Alright, let’s get down to brass tacks. You’re ready to bake, and I’m here to guide you every step of the way. Follow these instructions carefully, and you’ll be rewarded with the most delectable **mini Biscoff cheesecakes** you’ve ever tasted.
Step 1
: The Crust
First, you’ll need to create the Biscoff cookie crust. In a food processor, pulse the Biscoff cookies until they’re finely crushed. If you don’t have a food processor, you can put the cookies in a ziplock bag and crush them with a rolling pin. It’s a great way to relieve stress!
Next, mix the crushed cookies with melted butter until well combined. Press the mixture into the bottom of a muffin tin lined with cupcake liners. Make sure to press firmly to create a solid base. Bake the crusts for about 5-7 minutes, or until lightly golden. Let them cool completely before adding the filling.
Step 2
: The Filling
While the crusts are cooling, it’s time to make the cheesecake filling. In a large bowl, beat the cream cheese until smooth and creamy. Make sure your cream cheese is at room temperature, or it will be difficult to blend.
Gradually add the sugar and continue beating until well combined. Then, add the eggs one at a time, mixing well after each addition. Be careful not to overmix, as this can cause the cheesecake to crack.
Finally, stir in the Biscoff spread and Alcohol-free vanilla extract until just combined. Don’t overmix!
Step 3
: Assembly and Baking
Pour the cheesecake filling into the cooled crusts, filling them almost to the top. Bake the cheesecakes for about 18-20 minutes, or until the filling is set but still slightly jiggly in the center.
Let the cheesecakes cool completely in the muffin tin before transferring them to the refrigerator to chill for at least 2 hours. This allows the filling to set properly and prevents them from collapsing.
Step 4
: Toppings and Serving
Once the cheesecakes are chilled, it’s time to add the toppings! Get creative and have fun with it. I like to top mine with a dollop of whipped cream, a drizzle of Biscoff spread, and a sprinkle of crushed Biscoff cookies. But you can use any toppings you like.
Serve the cheesecakes chilled and enjoy!
Troubleshooting Your Mini Biscoff Cheesecakes: Common Problems and Solutions
Even the most experienced bakers sometimes run into snags. So, if you’re having trouble with your **mini Biscoff cheesecakes**, don’t despair! Here are some common problems and their solutions:
- **Cracked Cheesecakes:** Cracked cheesecakes are usually caused by overbaking or overmixing. To prevent cracking, avoid overbaking the cheesecakes and don’t overmix the filling. You can also try baking the cheesecakes in a water bath.
- **Soggy Crust:** A soggy crust is usually caused by using too much butter or not baking the crust long enough. To prevent a soggy crust, use the correct amount of butter and bake the crust until it’s lightly golden.
- **Lumpy Filling:** A lumpy filling is usually caused by using cold cream cheese. To prevent a lumpy filling, make sure your cream cheese is at room temperature before blending.
- **Cheesecakes Not Setting:** If your cheesecakes aren’t setting, it could be because you didn’t bake them long enough or you didn’t chill them long enough. Make sure to bake the cheesecakes until the filling is set but still slightly jiggly in the center, and chill them for at least 2 hours.
Remember, practice makes perfect! Don’t be discouraged if your first batch isn’t perfect. Just keep trying, and you’ll eventually master the art of making **mini Biscoff cheesecakes**.
Mini Biscoff Cheesecakes: A Dessert for Every Occasion
Whether you’re hosting a fancy dinner party or just craving a sweet treat, these **mini Biscoff cheesecakes** are the perfect dessert for any occasion. They’re easy to make, incredibly delicious, and guaranteed to impress your friends and family.
So, what are you waiting for? Grab your ingredients and get baking! Your taste buds will thank you. And who knows, you might just become the next star baker in your circle of friends. Happy baking!
Conclusion for Mini Biscoff Cheesecakes:
These Mini Biscoff Cheesecakes are the ultimate treat! With a buttery Biscoff crust, a velvety smooth cheesecake filling, and a generous drizzle of Biscoff spread, these mini desserts are a guaranteed crowd-pleaser. They are easy to make, can be prepared in advance, and offer endless possibilities for customization. So, go ahead, bake up a batch of these little delights and prepare for a taste sensation that will leave you wanting more!
Print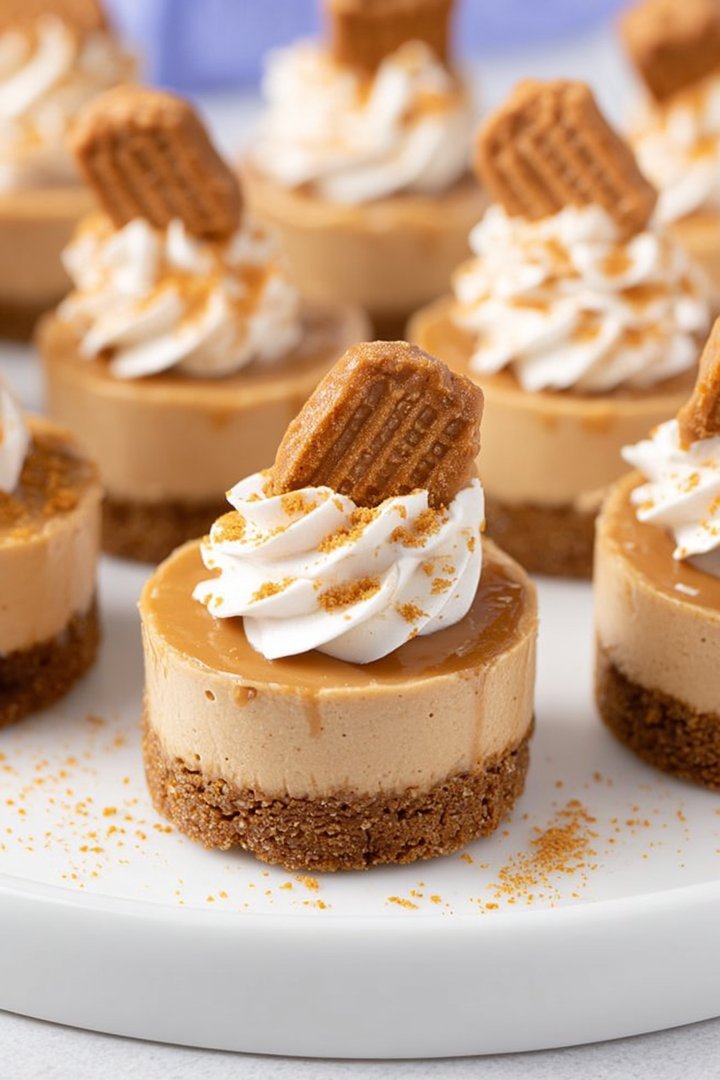
Mini Biscoff Cheesecakes
Delicious mini biscoff cheesecakes recipe with detailed instructions and nutritional information.
- Total Time: 35 minutes
- Yield: 4 servings
Ingredients
- Biscoff cookies: 150g
- Unsalted butter, melted: 50g
- Cream cheese, softened: 200g
- Icing sugar: 50g
- Double cream: 100ml
- Biscoff spread, melted: 50g
- Vanilla extract: 1/2 tsp
- Biscoff cookie crumbs (for garnish): 2 tbsp
Instructions
- Step 1: Crush the Biscoff cookies into fine crumbs using a food processor or by placing them in a ziplock bag and crushing with a rolling pin. Mix the cookie crumbs with the melted butter and press evenly into the base of 6 muffin liners or small ramekins.
- Step 2: In a large bowl, beat the softened cream cheese and icing sugar together until smooth and creamy. Add the double cream and vanilla extract and continue to beat until the mixture is light and fluffy.
- Step 3: Gently fold in half of the melted Biscoff spread into the cream cheese mixture, being careful not to overmix.
- Step 4: Spoon the cheesecake mixture over the prepared Biscoff cookie bases, dividing it evenly among the 6 portions.
- Step 5: Drizzle the remaining melted Biscoff spread over the top of each cheesecake. Sprinkle with Biscoff cookie crumbs.
- Step 6: Refrigerate the mini cheesecakes for at least 2 hours, or preferably overnight, to allow them to set completely before serving.
Notes
- Store leftover mini cheesecakes in an airtight container in the refrigerator for up to 3 days.
- These mini cheesecakes are best served chilled, straight from the fridge.
- For an extra touch of Biscoff flavor, warm the Biscoff spread slightly before drizzling for a smoother finish.
- Ensure your cream cheese is fully softened to avoid lumps in the cheesecake filling, resulting in a perfectly smooth texture.
- Prep Time: 15 minutes
- Cook Time: 20 minutes
- Method: Stovetop
- Cuisine: American
FAQs:
What makes these Mini Biscoff Cheesecakes so irresistible?
Oh, where do I even begin? These aren’t just desserts; they’re tiny bites of pure happiness. The combination of the crunchy Biscoff crust, the creamy cheesecake filling, and that luscious Biscoff spread on top creates a symphony of textures and flavors that will make your taste buds sing. Plus, they’re mini! Which means you can totally have two (or three) without feeling *too* guilty. They’re dangerously delicious and perfect for satisfying any sweet craving you might have.
Can I make these Mini Biscoff Cheesecakes ahead of time?
Absolutely! In fact, I highly recommend it. Making them ahead of time gives the flavors a chance to meld together beautifully. They’ll need to chill in the fridge for at least 4 hours, but overnight is even better. Just be sure to keep them covered so they don’t dry out. This makes them the perfect dessert for parties or gatherings when you want to get ahead of the game. Simply whip them up the day before, and you’re golden!
Are there any substitutions I can make in this Mini Biscoff Cheesecake recipe?
Of course! Baking should be fun and adaptable. If you’re not a fan of Biscoff cookies (gasp!), you could use graham crackers for the crust. For the filling, you can use a plant-based cream cheese alternative, just make sure it’s firm enough to hold its shape. And if you want to add a little extra pizzazz, a sprinkle of sea salt on top adds a delightful contrast to the sweetness. Feel free to experiment and make these mini cheesecakes your own!
How do I store leftover Mini Biscoff Cheesecakes?
Storing these is super easy, assuming you actually *have* leftovers! Keep them in an airtight container in the refrigerator. They will stay fresh for up to 3-4 days. Though, let’s be honest, they probably won’t last that long! The cool temperature will also help to keep the cheesecake firm and the Biscoff flavors singing. If you want to freeze them, individually wrap each cheesecake tightly in plastic wrap, then place them in a freezer-safe bag. They can be frozen for up to 2 months.


Leave a Comment