

Remember the exact moment you tasted that perfect golden crust submerged in a rich, velvety sauce? This dish isn’t just dinner; it’s a moment of pure culinary magic, and learning thisKatsu Curry Easy guided Japanese recipetransforms any ordinary weeknight into an absolute celebration.
Get ready to ditch the takeout menu because achieving this level of deep comfort food satisfaction at home is remarkably simple, offering that glorious balance of crunchy texture and profoundly savory flavor we all crave.
- This simplified process utilizes common kitchen staples and smart shortcuts, ensuring that even a novice cook can quickly master the delicate art of Japanese comfort food preparation.
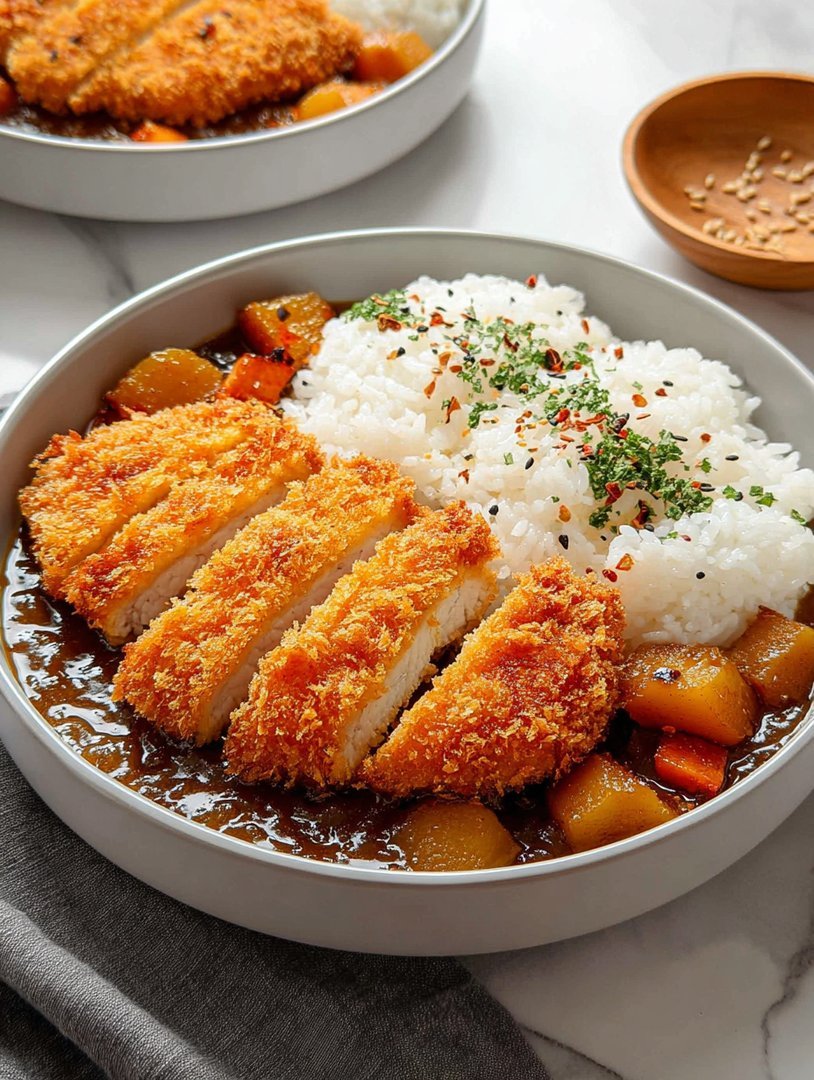
- Experience the magnificent balance of umami, savory sweetness, and mild spice, where the thick, aromatic curry coats the juicy, flawlessly fried chicken cutlet.
- The intense contrast of textures—shattering, crunchy breading against incredibly tender meat and the smooth, luxuriant sauce—makes this meal a true visual and sensory feast.
- Serve this beautiful dish over fluffy sticky rice, alongside refreshing pickled vegetables, or repurpose the leftovers into an outstanding sandwich for lunch the next day.
The Golden Ratio of Comfort: Why We Love Japanese Katsu Curry
Katsu Curry holds a sacred place in the hierarchy of comfort food. It’s the culinary equivalent of finding a forgotten twenty-dollar bill in a coat pocket, especially when done right. We often associate complex recipes with dishes that taste this good, but the real secret to Katsu Curry is its deceptively straightforward approach to flavor layering. The combination of crispy chicken or turkey cutlets and a deeply savory, slightly sweet curry sauce is a symphony that demands a standing ovation.
My own journey to Katsu perfection involved several embarrassing kitchen mishaps. There was the infamous “Soggy Saturday,” where I accidentally steamed the breading instead of frying it, resulting in a texture akin to wet cardboard. Then came “The Great Oil Fire Scare,” which involved me forgetting that panko absorbs oil like a sponge set loose in the ocean. These humbling experiences taught me patience and, crucially, the precise methodology needed to achieve that shattering crunch. You want a crust so perfect that it announces its presence with an audible, satisfying crackle before your teeth even reach the tender poultry beneath. We are aiming for golden perfection, not a beige tragedy.
The beauty of the Japanese curry roux, which forms the base of the sauce, lies in its accessibility. Unlike traditional Indian curries that demand a complex dance of spice blending, Japanese curry is often built upon ready-made blocks (available mild, medium, or hot) or a quick scratch-made version that relies heavily on a deeply flavored stock and aromatics. We enhance this base with subtle additions—a touch of grated apple or a splash of rich soy sauce—to give it that characteristic complexity without hours of simmering. This recipe strips away the fuss, leaving you with pure, unadulterated Japanese bliss ready in under an hour, proving that incredible flavor doesn’t require complex commitment.
The Secrets to the Perfect Katsu
The success of this dish hinges entirely on the quality of your Katsu cutlet. A perfect Katsu is juicy inside and fantastically crisp outside, providing the crucial textural counterpoint to the thick, glossy curry sauce. We rely on Panko breadcrumbs, the rock star of the crust world, due to their large, flaky structure which minimizes oil absorption and maximizes crunch. Forget regular breadcrumbs; if you aren’t using panko, you aren’t making true Katsu.
Selecting Your Cut of Poultry
For the best results, choose boneless, skinless chicken breast or turkey tenderloins. You must prepare the meat by tenderizing and flattening it consistently. Place the poultry between two pieces of cling wrap and use a meat mallet or the flat side of a rolling pin to gently pound it out until it is about half an inch thick. This process ensures quick and even cooking, preventing the dreaded dry center while maintaining maximum juiciness. Seasoning the meat well at this stage is absolutely non-negotiable; a little salt and pepper go a long way in building flavor from the inside out.
Mastering the Triple Dip (Breading)
The famous triple-dip method is your shield against soggy sadness. This technique creates a secure coating that sticks tightly to the meat, protecting it from the oil and the sauce. Set up three shallow dishes: one with flour, one with beaten eggs, and one with Panko breadcrumbs. First, dredge the flattened cutlet thoroughly in the flour, shaking off any excess. The flour provides a dry surface for the egg to cling to. Next, move it to the egg wash, ensuring complete coverage. Finally, press the cutlet firmly into the panko, making sure every millimeter is completely covered with those wonderful flakes. Do not rush this step; the more panko adhered, the crispier your outcome will be.
Ingredients for Katsu Curry Easy guided Japanese recipe
Here’s what you’ll need to make this delicious dish:
- Chicken or Turkey CutletsUse thin, boneless breasts or tenderloins, pounded evenly for quick cooking and tender results.
- Panko BreadcrumbsEssential for the signature crunchy texture; standard breadcrumbs simply cannot replicate the lightness of Panko.
- All-Purpose Flour and EggsThese form the critical binding agents necessary for the triple-dip breading process, ensuring the crust adheres to the meat.
- Neutral Frying OilChoose an oil with a high smoke point, such as canola, vegetable, or peanut oil, perfect for shallow frying the Katsu to a deep golden color.
- Japanese Curry Roux BlocksThese pre-packaged blocks are the backbone of the sauce, providing deep umami flavor and excellent thickening properties.
- Vegetables for the Sauce BaseA combination of chopped onion, carrots, and potatoes provides body and sweetness to the thick, satisfying curry.
- Chicken or Vegetable BrothUse a good quality broth to dissolve the roux and create the desired rich consistency for the curry sauce.
- Flavor EnhancersIngredients like grated apple (for sweetness), a spoonful of soy sauce (for depth), and a bay leaf elevate the complexity of the final sauce.
The full ingredients list, including measurements, is provided in the recipe card directly below.
How to Make Katsu Curry Easy guided Japanese recipe
Follow these simple steps to prepare this delicious dish:
Step 1: Prepare and Bread the Cutlets
Pound the chicken or turkey cutlets to approximately half an inch thick and season them lightly with salt and pepper. Set up your dredging station with flour, beaten egg, and Panko. Coat each cutlet first in flour, shaking off excess, then dip completely in the egg, and finally press firmly into the Panko, ensuring a thick, uniform layer. Place the breaded cutlets on a wire rack while you start the sauce.
Step 2: Start the Curry Sauce Base
In a large saucepan or pot, heat a tablespoon of oil over medium heat. Add the chopped onions, carrots, and potatoes, and sauté them for about 5 to 7 minutes until the onions soften slightly. Add the chicken or vegetable broth to the pot, bring the liquid to a boil, then reduce the heat to a simmer, covering the pot partially. Cook the vegetables until the potatoes are tender, which usually takes around 10 to 15 minutes.
Step 3: Dissolve the Curry Roux
Remove the pot from the heat. This is crucial as adding the roux while boiling can cause splashing. Break the Japanese curry roux blocks into pieces and drop them into the hot broth. Stir constantly until the blocks are completely dissolved and the sauce begins to thicken immediately. Return the pot to low heat, add your flavor enhancers like grated apple and soy sauce, and simmer gently for another 5 minutes, ensuring the sauce is smooth and velvety. Taste and adjust seasoning as needed.
Step 4: Fry the Katsu Cutlets
While the curry simmers, heat about 1 inch of neutral oil in a large skillet to 350°F (175°C). Carefully place the breaded cutlets into the hot oil, ensuring you do not crowd the pan, which would lower the oil temperature. Fry for about 3 to 4 minutes per side until the Katsu is deeply golden brown and beautifully crisp, and the internal temperature reaches 165°F (74°C). Transfer the finished Katsu to a wire rack lined with paper towels to drain excess oil.
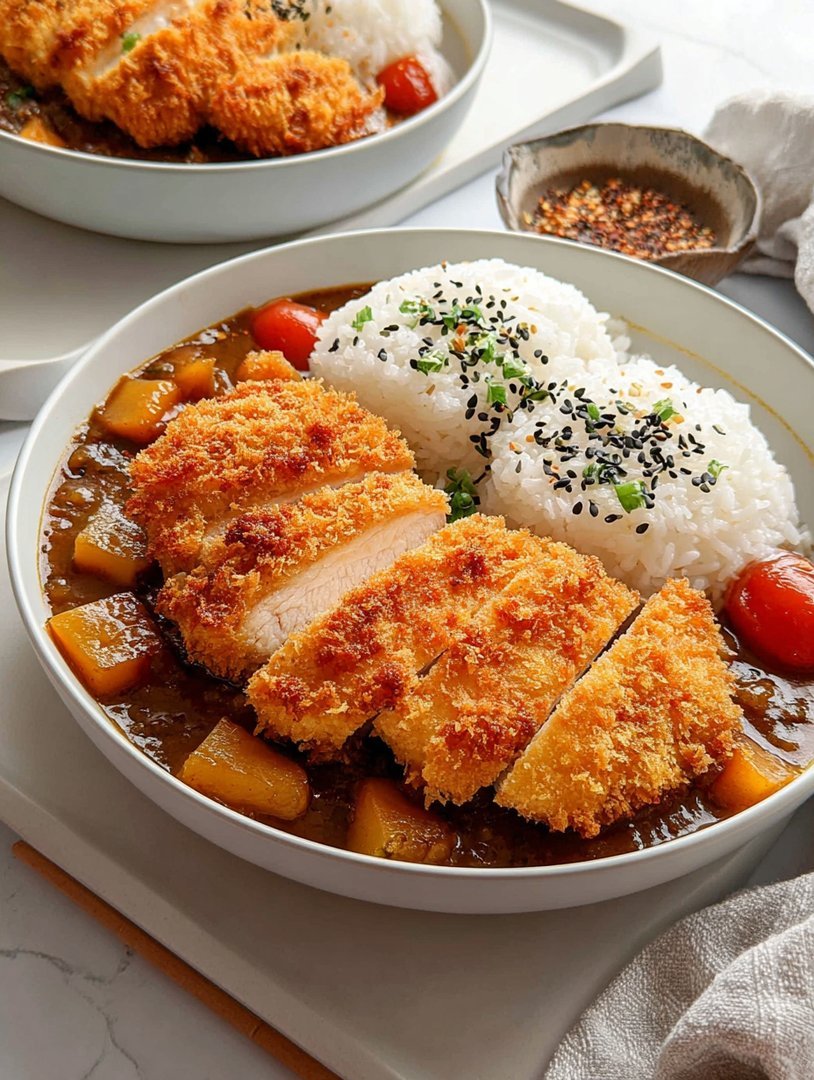
Transfer the golden, crispy cutlets onto plates piled high with fluffy steamed rice and generously spoon the thick, aromatic curry sauce alongside, or pour it dramatically over one side of the Katsu for the perfect finishing touch.
Troubleshooting Common Katsu Calamities
Even though this is a simple recipe, things can occasionally go sideways. Knowing how to troubleshoot the most common issues ensures your meal remains spectacular. The main calamities typically involve a soggy crust, dry meat, or a curry that lacks punch. Prevention is always easier than cure, especially in the kitchen, so pay close attention to temperatures and technique throughout the process.
Preventing the Soggy Crust Disaster
If your Katsu comes out less crunch and more chew, there are three likely culprits. First, your oil temperature was too low, causing the panko to absorb oil instead of crisping quickly. Always check your oil with a thermometer—it must stay consistently around 350°F (175°C). Second, you crowded the pan; only fry cutlets one or two at a time. Third, never let the finished Katsu sit on a flat plate; the steam trapped underneath will soften the crust immediately. Always use a wire rack after frying so air can circulate completely around the cutlet.
Achieving Sauce Depth: The Flavor Boosters
A good Katsu curry sauce should be savory, rich, and slightly complex, not merely spicy. If your sauce tastes flat, it needs layers. Aside from the required curry roux, consider adding a teaspoon of honey or brown sugar to counteract the savory richness with a touch of sweetness. A very small amount of finely grated ginger added during the simmering phase can also drastically brighten the flavor profile. If your sauce is too thin, return it to the heat and let it simmer uncovered for a few extra minutes, or dissolve a small amount of cornstarch in cold water and whisk it in gradually.
Pairing and Presentation Suggestions
The traditional way to serve Katsu Curry is undeniably the best: alongside a mound of freshly steamed, sticky short-grain Japanese rice. However, thoughtful pairing and presentation elevate the entire dining experience from a simple weeknight meal to something truly memorable. Think about adding elements that cut through the richness of the fried chicken and the thick sauce, providing a refreshing textural and acidic contrast.
Optimal Side Dishes for Balance
Japanese pickles, known as tsukemono, are a must-have accompaniment. These typically include bright pink pickled ginger (beni shoga) or pickled radishes. The sharpness and acidity of these condiments reset the palate beautifully. For a quick green side, try a simple shredded cabbage salad dressed with a light, tangy sesame vinaigrette. This adds a clean, fresh crunch that complements the heavy nature of the curry and the fried cutlet. Finally, a small sprinkle of toasted sesame seeds or finely chopped scallions over the curry before serving adds a final aromatic and visual flourish.
Frequently Asked Questions About Katsu Curry
Yes, you absolutely can bake the Katsu for a lighter alternative. Preheat your oven to 400°F (200°C) and spray the breaded cutlets lightly with oil or cooking spray. Bake for 15 to 20 minutes, flipping halfway through, until golden and cooked through. While baking won’t achieve the exact depth of flavor or shattering crispness of frying, it remains a fantastic, healthier option.
The curry sauce and cooked rice can be stored in airtight containers in the refrigerator for up to 4 days. However, the crispy Katsu cutlet is best eaten fresh. If you must store the Katsu, keep it separate from the sauce. Reheat the Katsu in an air fryer or oven to regain crispness; microwaving will render it soggy.
Japanese curry, or “kare,” is typically much thicker, sweeter, and milder than Indian or Thai curries. Its sweetness comes from ingredients like grated apple, honey, and caramelized onions, while its thickening power comes from the use of a flour-based roux. This combination results in a savory gravy-like texture that pairs perfectly with deep-fried food.
The Quest for Restaurant-Quality Katsu Curry at Home
There is a specific kind of culinary heartbreak reserved for trying to recreate your favorite restaurant dish in your own kitchen, only to produce a sad, watery imitation. For years, Japanese Katsu Curry felt like my white whale—the crispy chicken was always slightly soggy, and the rich, velvety sauce tasted disappointingly flat. I chased that perfect balance of savory sweetness and crunchy texture across continents, always failing, until one particularly disastrous attempt involving accidental chili powder and a very confused spouse. That night, I decided to stop guessing and start mastering. What I discovered was that making truly phenomenal katsu curry is not about complex ingredients; it is about technique and patience.
This legendary dish—golden-fried protein served atop fluffy rice, smothered in a deeply flavorful brown sauce—deserves a spot in your weekly rotation. Forget those instant roux blocks for a moment; we are building a sauce from the ground up, ensuring maximum depth and flavor. This guide provides a trulyKatsu Curry Easy guided Japanese recipethat promises crispy cutlets and a deeply satisfying sauce every time, turning your kitchen into your favorite Japanese diner.
Essential Ingredients for Legendary Flavor
A great Katsu Curry relies on two distinct elements: the crunchy katsu cutlet and the deeply savory curry sauce. Gathering your components beforehand is crucial for a smooth cooking experience.
For the Chicken Katsu Cutlets
- 4 boneless, skinless chicken breasts (about 6 ounces each), pounded thin
- 1 cup all-purpose flour
- 2 large eggs, lightly beaten
- 2 cups panko breadcrumbs (the secret to maximum crunch)
- Salt and black pepper to taste
- Vegetable oil for frying
For the Japanese Curry Sauce
- 2 tablespoons unsalted butter or neutral oil
- 1 large yellow onion, diced
- 2 medium carrots, peeled and diced
- 2 medium potatoes, peeled and diced
- 2 cloves garlic, minced
- 1 tablespoon fresh ginger, grated
- 3 tablespoons all-purpose flour
- 4 cups vegetable or chicken broth
- 2 tablespoons soy sauce
- 1 tablespoon dark brown sugar
- 1 teaspoon garam masala or a mild curry powder blend
- 1 tablespoon ketchup or tomato paste (optional, for acidity)
Serving Suggestions
- Steamed short-grain rice
- Fukujinzuke (Japanese pickles) or sliced scallions
Step-by-Step Guide to Crispy Perfection
The key to mastering this dish is managing your time and heat. We will first prepare the Katsu, then move on to the simmering sauce.
Phase 1: Preparing the Chicken Katsu
Start by preparing your chicken. Place the chicken breasts between two sheets of parchment paper and pound them until they are uniformly about half an inch thick. Season both sides generously with salt and pepper. Now, set up the classic breading station: one shallow dish for flour, one for beaten eggs, and one for the panko breadcrumbs. This is the moment to channel your inner assembly line master.
Dredge each chicken cutlet in the flour, shaking off the excess. Next, dip it completely into the egg mixture, allowing any drip-off to return to the bowl. Finally, press the cutlet firmly into the panko breadcrumbs, ensuring every surface is thickly coated. Place the breaded cutlets on a wire rack or baking sheet and chill them for at least 15 minutes. This chilling step is non-negotiable; it helps the panko adhere beautifully, preventing the dreaded flake-off during frying.
Phase 2: Building the Velvety Curry Sauce
While the chicken chills, begin the sauce. In a large pot, melt the butter over medium heat. Add the diced onion, carrots, and potatoes. Sauté for about 8 to 10 minutes until the onions soften and the vegetables begin to slightly brown. Add the minced garlic and grated ginger, cooking for one more minute until fragrant. Sprinkle in the flour and curry powder, stirring constantly for two minutes to create a roux. This cooks out the raw flour taste and deepens the flavor profile.
Slowly whisk in the broth, ensuring no lumps form. Once smooth, stir in the soy sauce, brown sugar, and ketchup (if using). Bring the mixture to a boil, then reduce the heat immediately to low. Simmer gently for 20 to 25 minutes, or until the carrots and potatoes are tender and the sauce has thickened significantly. If you prefer a smoother sauce, you can use an immersion blender to partially puree some of the vegetables, adding luxurious body.
Phase 3: Frying the Chicken Cutlets
Heat about two inches of vegetable oil in a deep skillet or pot to 350°F (175°C). Carefully place one or two cutlets into the hot oil, making sure not to overcrowd the pan, which would lower the oil temperature and result in greasy katsu. Fry for 3 to 4 minutes per side until deeply golden brown and cooked through (internal temperature should reach 165°F or 74°C).
Transfer the finished katsu to a clean wire rack lined with paper towels—this allows air to circulate underneath and maintains that glorious crunch. Slice the katsu into thick strips for serving. Ladle a generous portion of rice onto a plate, spoon the thick, rich Japanese curry sauce alongside or over the rice, and place the sliced katsu next to the rice, ensuring the cutlet maintains maximum crispness before serving. This approach guarantees every bite is a perfect harmony of textures and flavors.
Perfecting the Cooking Process
For maximum efficiency and perfect results, start by preparing the chicken and chilling the cutlets. While they rest, begin simmering the curry sauce. Fry the katsu only in the final moments before serving, ensuring the cutlets remain scorching hot and fantastically crispy when meeting the warm, fragrant sauce.
Add Your Touch
Customize this dish by swapping chicken for turkey or beef cutlets. To boost the sauce’s umami, add a teaspoon of apple cider vinegar or a splash of Worcestershire sauce substitute. For extra fiber, toss in some peas or mushrooms during the last 10 minutes of simmering the sauce.
Storing & Reheating
Store the sauce and the katsu separately to preserve the crispness of the cutlet. The curry sauce keeps well in an airtight container for up to four days. Reheat the chicken katsu in a 350°F oven or air fryer for 8 to 10 minutes until hot and crispy, never in the microwave.
My partner, who generally views my attempts at ‘fusion’ food with suspicion, took one bite of this perfected curry and immediately requested it for our weekly movie night. That confirmation alone made the years of soggy failures worth it.
Chef’s Expert Tips for Flawless Katsu
-
Always pound the chicken to an even thickness; this ensures the cutlet cooks uniformly and prevents dry patches or raw centers.
-
Use high-quality panko breadcrumbs, not standard breadcrumbs, as the large flakes are essential for achieving that authentic, airy crunch.
-
Do not skip the chilling step after breading; cold cutlets hold their coating much better and absorb less oil during the frying process.
Frequently Asked Questions About Japanese Curry
What makes Japanese curry different from Indian curry?
Japanese curry, often calledcurry rice, is generally sweeter, thicker, and milder than Indian varieties. It relies on a rich, dense roux (like the one we built) and incorporates ingredients like grated apple or honey (replaced here by brown sugar) for sweetness, resulting in a unique, savory profile.
Can I make the Japanese curry sauce vegetarian?
Absolutely. Simply omit the chicken fat/butter and use a plant-based oil instead, ensuring you use vegetable broth. The dense, flavorful vegetables provide enough body and substance to make this a rich, satisfying meatless meal.
Why did my Katsu coating fall off during frying?
The coating often falls off because the cutlet wasn’t properly pressed into the panko, or the oil wasn’t hot enough. Remember to press firmly during breading and, crucially, chill the cutlets before frying to help the layers set.
How can I make the Katsu Curry Easy guided Japanese recipe faster?
If you need to cut down on time, prepare the curry sauce entirely the day before, as the flavors deepen overnight. When you are ready to serve, simply fry the chicken katsu fresh, and reheat the sauce.
The Deep History of Katsu Curry
While often associated with traditional Japanese cuisine, curry actually arrived in Japan via the British, who had adopted the dish from India, during the Meiji era (1868–1912). The Japanese adapted the spices to fit their palate, developing the signature thick, roux-based sauce we know today.
Katsu, meanwhile, evolved fromtonkatsu(fried chicken cutlet), which was Westernized intokatsu-reizu(cutlet over rice with curry) in the early 20th century. By using chicken or beef, we honor the evolution of this classic comfort food, blending the crispy frying technique with the savory depth of the traditional Japanese sauce. The result is a profoundly satisfying and universally beloved dish that perfectly captures the fusion of East and West. This chicken katsu recipe provides an approachable entry point to experiencing authentic Japanese home cooking, demonstrating that complex flavor does not require complex execution.
The Quest for Crispy Perfection: Mastering the Chicken Katsu
Let’s be honest, we all have that comfort food we dream about when life decides to dump all its organizational challenges on our heads. For many, that golden beacon of comfort is Katsu Curry. It’s the ultimate combination: ridiculously crunchy chicken bathed in a deep, savory, slightly sweet curry sauce, served over a bed of fluffy rice. It sounds fancy, like something requiring a decade of training, but fear not! ThisKatsu Curry Easy guided Japanese recipetransforms kitchen stress into delicious simplicity.
Forget standing in line at the bustling Japanese diner; you are about to become the master of the breadcrumb universe. We are skipping the complexity and jumping straight to the flavor payoff. Get ready to impress yourself—and anyone lucky enough to share this epic meal.
Your Culinary Arsenal: Ingredients Checklist
Gathering your mise en place is half the battle won. We focus on quality ingredients that deliver maximum impact without unnecessary complications. Remember, for the best results, use genuine Japanese curry blocks (roux); they provide that signature flavor profile that distinguishes Katsu curry from other global curries.
For the Crispy Chicken Katsu
- 2 boneless, skinless chicken breasts (sliced horizontally into 4 thin cutlets)
- 1 cup all-purpose flour
- 2 large eggs (whisked)
- 2 cups Japanese panko breadcrumbs
- 1 teaspoon salt
- 1/2 teaspoon black pepper
- Vegetable or canola oil (for frying)
For the Savory Japanese Curry Sauce
- 1 tablespoon vegetable oil
- 1 large onion (chopped)
- 2 carrots (peeled and roughly chopped)
- 1 medium potato (peeled and roughly chopped)
- 3 cups chicken or vegetable broth
- 1 pack (about 3.5 oz) Japanese curry roux blocks (medium heat suggested)
- 1 tablespoon soy sauce
- 1 teaspoon honey or sugar (optional, for sweetness balance)
For Serving
- Hot steamed white rice
- Shredded cabbage or pickled ginger (optional)
Step-by-Step Guide to Chicken Katsu Mastery
Preparing the Perfect Cutlets
The foundation of this meal is a tender, crunchy cutlet. Start by taking your chicken pieces and placing them between two sheets of plastic wrap. Gently, but firmly, pound them with a meat mallet or a heavy rolling pin until they are uniformly thin, about 1/4 inch thick. Season both sides generously with salt and pepper.
Next, set up your standard breading station: three wide, shallow dishes. The first dish holds the flour, the second holds the whisked eggs, and the third holds the beautiful panko breadcrumbs. This technique ensures a locked-in, impenetrable crust.
Dredge each cutlet first in the flour (shaking off excess), then immerse it fully in the egg mixture, allowing excess to drip away. Finally, press the cutlet firmly into the panko, ensuring every surface is completely coated. This step requires patience but pays off immensely. Place the breaded cutlets on a wire rack and chill them in the refrigerator for at least 30 minutes; this firming stage is non-negotiable for crispy results!
Frying the Golden Katsu
Pour about 1 inch of oil into a deep skillet or pot. Heat the oil to 340°F (use a thermometer if possible). If you don’t have one, test the oil by dropping a few panko crumbs in; they should sizzle vigorously and turn golden in about 30 seconds.
Carefully place one or two cutlets into the hot oil, ensuring you do not overcrowd the pan, which lowers the temperature dramatically. Fry each side for 3 to 4 minutes until they achieve a deep, beautiful golden-brown color and the chicken is cooked through. Transfer the cooked Katsu to a wire rack lined with paper towels to drain excess oil. Using a rack prevents the bottom crust from getting soggy.
Constructing the Velvety Curry Sauce
Sautéing the Aromatics and Vegetables
While the chicken is chilling, you can start on the star of the show: the sauce. Heat 1 tablespoon of oil in a large pot or Dutch oven over medium heat. Add the chopped onions and sauté until they soften and become translucent, about 5 to 7 minutes. Add the chopped carrots and potatoes, stirring and cooking for another 5 minutes.
Pour in the chicken broth, bringing the mixture to a boil. Once boiling, reduce the heat immediately to a gentle simmer. Cook until the potatoes and carrots are tender when pierced with a fork, which typically takes 15 to 20 minutes.
Thickening and Finishing the Curry
Remove the pot from the heat and break the curry roux blocks into pieces before adding them to the hot broth. Stir continuously until the blocks are fully dissolved and the sauce begins to thicken uniformly. Return the pot to very low heat. Stir in the soy sauce and the optional honey or sugar, adjusting for sweetness if necessary.
Allow the curry to simmer gently for about 5 to 10 minutes, stirring occasionally, until it reaches a rich, velvety consistency. Remember, the sauce will thicken further as it cools, so don’t let it become too stiff on the stove.
Plating Your Katsu Curry Easy guided Japanese recipe
The assembly is simple but satisfying. Ladle a generous portion of hot steamed rice onto a plate. Next, slice the chicken Katsu diagonally into thick strips; this looks professional and makes it easier to eat. Arrange the sliced Katsu beside the rice. Finally, pour the rich, savory curry sauce generously over the rice and partly over the Katsu. You want that magnificent crunch to still peek through the lush sauce. Garnish with a side of crunchy shredded cabbage or pickled ginger for brightness, and take a moment to admire your culinary masterpiece before diving in.
Conclusion for Katsu Curry Easy guided Japanese recipe
You have successfully conquered the kitchen and delivered an incredible meal. This Katsu Curry Easy guided Japanese recipe proves that restaurant-quality dining is completely achievable at home, even on a busy weeknight. We navigated the complexities of perfect frying and mastered the silky texture of the classic Japanese curry, resulting in a dish that is both deeply satisfying and ridiculously comforting. The combination of crispy chicken and rich, savory sauce creates a flavor profile that truly sings. Enjoy the applause, grab a fork, and make this easy Katsu guide a regular fixture in your weeknight rotation.
Print
Katsu Curry Easy guided Japanese recipe
Achieve flawless Katsu Curry at home. Includes complete cooking instructions and detailed nutritional breakdown.
- Total Time: 35 minutes
- Yield: 4 servings 1x
Ingredients
- 2 boneless chicken breast chops (about 6 oz each), pounded thin
- 1 cup panko breadcrumbs
- 1/2 cup all-purpose flour
- 1 large egg, whisked
- 1 package (8 oz) Japanese curry roux blocks (e.g., S&B Golden Curry)
- 1 large yellow onion, roughly chopped
- 4 cups water or chicken stock
- 3 cups vegetable oil, for frying
Instructions
- Step 1: Prepare the curry sauce by sautéing the chopped onion in a large pot with a splash of oil until softened (about 5-7 minutes). Add the water or stock and bring to a boil; reduce heat and simmer gently for 10 minutes.
- Step 2: Remove the pot from the heat and break the curry roux blocks into the liquid, stirring until they are completely dissolved and the sauce is smooth. Return the pot to very low heat and simmer for an additional 15 minutes, stirring occasionally to prevent sticking.
- Step 3: Prepare the beef katsu by setting up a breading station with three shallow dishes: one with flour seasoned with salt and pepper, one with the whisked egg, and one with the panko breadcrumbs. Dip each chicken breast chop sequentially into the flour, then the egg, and finally firmly press it into the panko until fully coated.
- Step 4: Heat the vegetable oil in a large deep skillet or pot to 340°F (170°C). Carefully fry the breaded chicken thighs, one at a time, for 4 to 6 minutes per side, until they are deep golden brown and cooked through (internal temperature of 145°F). Remove the katsu and let them drain on a wire rack or paper towels.
- Step 5: To serve, place a generous scoop of hot steamed rice on a plate. Slice the fried katsu into thick strips and arrange them alongside the rice. Ladle the thick Japanese curry sauce over the rice and the edge of the katsu.
Notes
- Store leftover curry sauce separately in an airtight container in the fridge for up to 4 days, or freeze cooled portions for quick future meals.
- To revive leftover Katsu and restore its beautiful crunch, reheat it gently in a toaster oven or air fryer at 350°F (175°C) for 5-8 minutes until piping hot.
- For a traditional serving contrast, pair the rich curry with a simple side of thinly shredded cabbage or a handful of Japanese pickled ginger (Gari).
- When breading the pounded chicken, press the panko firmly into the meat to ensure the coating is dense and won't slip off during the frying process, guaranteeing maximum crunch.
- Prep Time: 15 minutes
- Cook Time: 20 minutes
- Method: Stovetop
- Cuisine: American
FAQs
What are the best tips for achieving the ultimate crispy texture in this Katsu Curry Easy guided Japanese recipe?
The secret to next-level crispiness lies in proper preparation and temperature control. First, ensure you press the panko breadcrumbs firmly onto the pounded chicken cutlets; this prevents gaps. Second, chilling the breaded chicken for at least 30 minutes before frying helps the coating adhere perfectly, minimizing dropout. Crucially, maintain your oil temperature between 325°F and 350°F. If the oil is too cool, the chicken absorbs too much grease; if it’s too hot, the crust burns before the chicken cooks through. Use fresh panko, never standard breadcrumbs, for that authentic shatteringly crisp bite.
Can I prepare the chicken and sauce components of the Katsu Curry Easy guided Japanese recipe in advance?
Absolutely, pre-planning is a time-saver! You can prepare the curry sauce entirely up to two days ahead of time. The flavor actually deepens as the sauce sits overnight in the refrigerator. Simply reheat gently, adding a splash of broth if it seems too thick. For the chicken, you can pound and bread the cutlets completely and store them on a baking sheet covered loosely in the fridge for up to 12 hours. However, for maximum crispiness, always fry the chicken Katsu just before you plan to serve the meal. This ensures the best texture contrast against the savory sauce.
How do I ensure the curry sauce achieves the perfect velvety consistency in this Katsu Curry guide?
Achieving that classic, rich texture relies primarily on the Japanese curry roux (blocks). Ensure you sauté the onions, carrots, and potatoes until they are tender before adding the liquid (broth/water). Once boiling, reduce the heat to a simmer before stirring in the roux blocks. Break them up thoroughly to avoid lumps. If your sauce is too thin after simmering, let it simmer uncovered for a few extra minutes to allow evaporation. Conversely, if it becomes too thick, simply whisk in a little more warm broth or water until you reach your desired luxurious consistency.
What non-traditional but effective flavor boosts can I add to my Katsu Curry Easy guided Japanese recipe?
While the classic recipe is magnificent, slight adjustments can personalize the flavor profile. Many home cooks add a spoonful of grated apple or a dash of mango chutney during the simmering stage for a subtle sweetness that cuts through the richness. Another excellent addition is a splash of soy sauce or Worcestershire sauce (ensure it is alcohol-free) right at the end to enhance the umami depth. Some even introduce a teaspoon of instant coffee powder or cocoa powder to darken the sauce and add an interesting, complex bitterness, though always taste test as you go.

Leave a Comment