

The aroma of freshly fried panko and that unbelievably savory-sweet drizzle is a scent memory I chase daily. When you crave crunch, comfort, and an explosion of umami, nothing delivers quite like a properJapanese Katsu Bowl with Tonkatsu Sauce.
Forget takeout tonight; we are bringing the spirit of Tokyo street food right into your kitchen with this incredibly satisfying, golden-brown chicken cutlet recipe. Get ready for audible crunching, because this bowl is phenomenal.
- This recipe provides the ultimate textural contrast: tender, juicy chicken encased in a shatteringly crispy, golden panko crust, achieving perfection in every bite.
- Craft the authentic, richTonkatsu Sauceusing everyday pantry staples, achieving that perfect balance of tangy, sweet, and spiced flavor effortlessly at home.
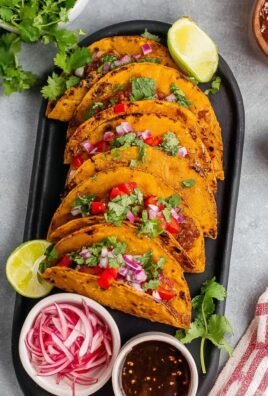
- Visually stunning and deeply comforting, this bowl layers fluffy rice, vibrant cabbage slaw, and that beautiful, glossy sauce for maximum dining appeal.
- It is highly versatile; swap the protein for turkey or dense tofu, making this weeknight comfort food adaptable for almost every dinner preference and guest.
The Saga of the Crispy Chicken Cutlet
There is a specific kind of culinary magic that happens when a humble slice of chicken breast meets the relentless crunch of panko breadcrumbs. I remember the first time I attempted katsu. I thought, “How hard can deep-frying a piece of breaded chicken be?” Famous last words, right?
My inaugural attempt resulted in cutlets that were either strangely pale, soggy, or tragically burned on the outside while still chilly within. It was a disaster that smelled suspiciously like disappointment and burnt oil. My dog, who usually considers floor scraps a five-star dining experience, approached the plate, sniffed skeptically, and retreated back to his bed. If a dog refuses crispy chicken, you know you have failed spectacularly.
However, failure, as they say, is merely preparation for a better recipe. After extensive testing—and several unfortunate oil splatters—I mastered the art of the perfect, non-greasy, uniformly golden katsu. The secret is the temperature control and the triple dredging method, which we will cover in detail. Once you achieve that perfect crackle, everything changes. Life suddenly has more meaning, and weeknights become an occasion for celebration.
ThisJapanese Katsu Bowl with Tonkatsu Sauceis more than just a meal; it’s an experience. It layers textures and flavors expertly: the foundation of warm, sticky rice, the cool, refreshing bite of shredded cabbage, the star player—that golden, crispy cutlet—and finally, the luscious, homemade Tonkatsu sauce tying it all together. This sauce is a symphony of umami, created using pantry staples like ketchup, Worcestershire-style sauce, and a touch of fruit vinegar, resulting in a complex flavor profile that elevates the entire dish.
While katsu might sound intimidating, I promise you, this recipe simplifies the process without sacrificing authenticity or that necessary crunch factor. It’s comforting, it’s quick enough for a weeknight dinner, and frankly, it tastes exactly like the dish you’d pay three times the price for at a dedicated Japanese spot. Plus, you get to skip the awkward small talk with the waiter. Win-win.
Ingredients for Japanese Katsu Bowl with Tonkatsu Sauce
Here’s what you’ll need to make this delicious dish:
- Chicken CutletsUse boneless, skinless chicken breasts, sliced horizontally and pounded thinly to ensure quick, even cooking and maximum crispness.
- Panko BreadcrumbsThese are non-negotiable for true katsu; their flaky texture absorbs less oil and delivers that signature airy crunch compared to standard breadcrumbs.
- All-Purpose Flour and EggsThese form the essential binder for the dredging station, creating a secure coating that ensures the panko adheres perfectly to the chicken.
- Vegetable Oil or Canola OilChoose an oil with a high smoke point necessary for frying at 350°F (175°C) without burning, ensuring the katsu is golden, not greasy.
- Short-Grain White RiceUse a sticky variety like Japanese short-grain or Calrose rice, providing the necessary starchy base to hold the bowl together.
- Shredded CabbageFinely shred green cabbage, which serves as a crucial, refreshing, palate-cleansing element alongside the rich fried chicken.
- Ketchup and Brown SugarThese ingredients form the sweet, acidic backbone of the Tonkatsu Sauce, balancing the savory elements beautifully.
- Worcestershire-Style Sauce (No Anchovies/Fish)Look for a vegetarian or specialized savory sauce alternative to provide the essential fermented, complex umami flavor depth.
- Soy Sauce or TamariUsed to add saltiness and deepen the savory profile of the sauce; Tamari is a great gluten-free option.
- Apple Cider Vinegar and Grated GingerA touch of vinegar cuts through the richness, while the ginger adds a subtle, fresh spice note to the finished sauce.
The full ingredients list, including measurements, is provided in the recipe card directly below.
How to Make Japanese Katsu Bowl with Tonkatsu Sauce
Follow these simple steps to prepare this delicious dish:
Step 1: Prep the Chicken and Assemble the Dredging Station
Slice the chicken breasts horizontally to create four thin cutlets. Place each cutlet between two sheets of plastic wrap and pound them gently to about 1/4 inch thickness. Season both sides with salt and pepper. Next, set up your standard dredging station: one shallow dish for flour, one for beaten eggs, and one for panko breadcrumbs. Ensure the flour and panko are spread out evenly for easy coating.
Step 2: Dredge and Chill the Katsu
Working one cutlet at a time, dredge the chicken completely in the flour, shaking off any excess. Dip it into the egg wash, allowing excess to drip away, then finally press it firmly into the panko breadcrumbs, making sure the entire surface is thickly coated. Place the breaded cutlets on a wire rack or baking sheet and chill in the refrigerator for at least 15 minutes. This chilling period is essential; it helps the coating adhere firmly, preventing the dreaded panko separation during frying.
Step 3: Prepare the Quick Tonkatsu Sauce
While the chicken is chilling, prepare the sauce. In a small saucepan over medium-low heat, whisk together the ketchup, brown sugar, Worcestershire-style sauce, soy sauce, apple cider vinegar, and grated ginger. Bring the mixture to a gentle simmer, stirring constantly until the sugar dissolves and the sauce slightly thickens, usually about 3 to 5 minutes. Remove the sauce from the heat and set it aside. The longer it sits, the more the flavors meld.
Step 4: Fry the Chicken Cutlets to Golden Perfection
Heat 1 1/2 inches of oil in a large, deep skillet or Dutch oven to 350°F (175°C). Use a thermometer to monitor the temperature; stability is key. Carefully place one or two cutlets into the hot oil, ensuring you do not overcrowd the pan, which would drop the oil temperature. Fry for 3 to 4 minutes per side, until the katsu is deep golden brown and the internal temperature reaches 165°F (74°C). Remove the katsu and place it on a clean wire rack over a baking sheet to drain the excess oil thoroughly.
Step 5: Assemble the Japanese Katsu Bowl
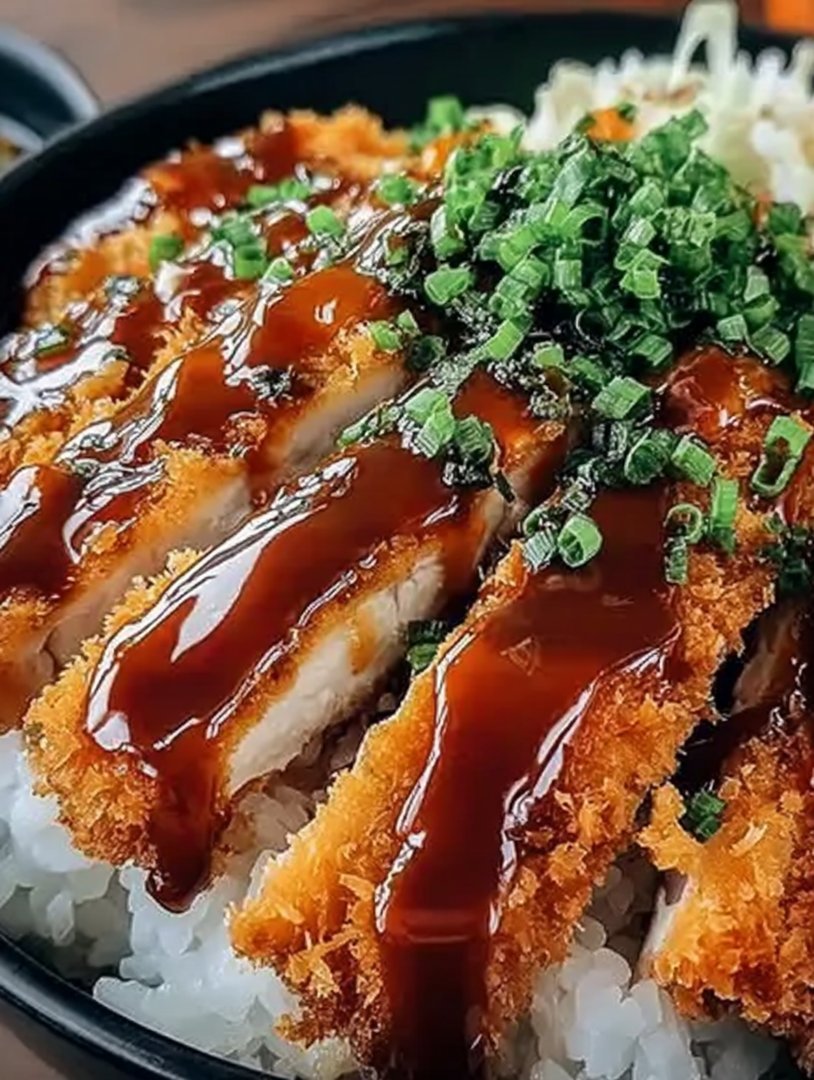
Slice the cooked, rested chicken katsu into 1-inch strips. To assemble the bowls, place a generous scoop of hot, cooked short-grain rice in the bottom of each bowl. Top the rice with a handful of thinly shredded cabbage. Arrange the sliced, crispy chicken katsu gently over the cabbage and rice. Transfer to plates and drizzle generously with the homemade Tonkatsu Sauce for the perfect finishing touch.
Mastering the Crispy Katsu Technique
Achieving restaurant-quality crispiness requires a few strategic moves. Firstly, remember that wire rack is your friend. Never place freshly fried katsu directly onto paper towels, as this traps steam underneath the crust, turning your beautiful crunch into a disappointing chew. The wire rack allows air to circulate around the cutlet, keeping the coating unbelievably crisp while the oil drains away.
Why Pounding the Chicken is Non-Negotiable
Pounding the chicken serves two vital purposes. It tenderizes the meat, making it exceptionally satisfying, and more importantly, it ensures uniform thickness. If the meat is thin and uniform, it cooks at the same speed as the panko crust, preventing the scenario where your exterior is perfect but the interior is dry or, worse, undercooked. Aim for a thickness similar to a standard envelope—thin, but not fragile.
Oil Temperature Management for Ideal Katsu
Consistency in oil temperature is the single biggest factor determining success or failure in katsu. If the oil is too cool (below 325°F), the panko will slowly absorb the oil, leading to a greasy, heavy crust. If the oil is too hot (above 375°F), the outside will burn before the interior cooks. Maintain that sweet spot of 350°F (175°C), monitoring closely, especially after adding cold ingredients, and never crowd the pan.
Frequently Asked Questions About Japanese Katsu
Can I prepare the Katsu ahead of time?
You can prepare the chicken cutlets up to Step 2 (dredging and chilling) several hours in advance. Keep the cutlets covered tightly in the refrigerator. However, for maximum crunch, you must fry the katsu immediately before serving; reheating fried food never quite achieves the initial perfection.
What is a good substitute for chicken in this bowl?
Beef sirloin, sliced thin and pounded, makes an excellent alternative for beef katsu. Alternatively, thick slices of firm tofu or eggplant can be used for a vegetarian option; just ensure you press the tofu thoroughly to remove excess moisture before dredging.
How should I store leftover Tonkatsu Sauce?
Store any leftover homemade Tonkatsu Sauce in an airtight container in the refrigerator. It will keep well for up to two weeks. If the sauce thickens too much upon chilling, you can thin it out slightly by whisking in a few drops of hot water or fruit broth before serving.
What sides pair well with the Japanese Katsu Bowl?
The bowl itself is quite complete, but traditional accompaniments include miso soup or quick-pickled cucumbers. The addition of a small drizzle of Japanese mayonnaise (the rich, tangy kind) directly over the katsu or alongside the cabbage slaw is also highly recommended for an extra layer of richness.
Why This Recipe Will Become Your Weeknight Favorite
ThisJapanese Katsu Bowl with Tonkatsu Sauceis the ultimate culinary contradiction: it tastes complex and indulgent, yet it requires straightforward ingredients and simple, repeatable steps. Once you’ve built your confidence in the frying stage, this dish takes barely 30 minutes from pantry to plate.
The beauty of this meal lies in its balance. The crispy, savory element of the chicken is perfectly offset by the soft rice and the sharp, clean crunch of the fresh cabbage, all brought into harmony by that rich, tangy, sweet sauce. It is comfort food that feels special, perfect for chasing away the weekday blues or celebrating a casual weekend night. Stop dreaming of crispy textures and start frying—your stomach will thank you.
The aroma of freshly fried panko and that unbelievably savory-sweet drizzle is a scent memory I chase daily. When you crave crunch, comfort, and an explosion of umami, nothing delivers quite like a properJapanese Katsu Bowl with Tonkatsu Sauce.
Forget takeout tonight; we are bringing the spirit of Tokyo street food right into your kitchen with this incredibly satisfying, golden-brown chicken cutlet recipe. Get ready for audible crunching, because this bowl is phenomenal.
- This recipe provides the ultimate textural contrast: tender, juicy chicken encased in a shatteringly crispy, golden panko crust, achieving perfection in every bite.
- Craft the authentic, richTonkatsu Sauceusing everyday pantry staples, achieving that perfect balance of tangy, sweet, and spiced flavor effortlessly at home.
- Visually stunning and deeply comforting, this bowl layers fluffy rice, vibrant cabbage slaw, and that beautiful, glossy sauce for maximum dining appeal.
- It is highly versatile; swap the protein for turkey or dense tofu, making this weeknight comfort food adaptable for almost every dinner preference and guest.
The Saga of the Crispy Chicken Cutlet
There is a specific kind of culinary magic that happens when a humble slice of chicken breast meets the relentless crunch of panko breadcrumbs. I remember the first time I attempted katsu. I thought, “How hard can deep-frying a piece of breaded chicken be?” Famous last words, right?
My inaugural attempt resulted in cutlets that were either strangely pale, soggy, or tragically burned on the outside while still chilly within. It was a disaster that smelled suspiciously like disappointment and burnt oil. My dog, who usually considers floor scraps a five-star dining experience, approached the plate, sniffed skeptically, and retreated back to his bed. If a dog refuses crispy chicken, you know you have failed spectacularly.
However, failure, as they say, is merely preparation for a better recipe. After extensive testing—and several unfortunate oil splatters—I mastered the art of the perfect, non-greasy, uniformly golden katsu. The secret is the temperature control and the triple dredging method, which we will cover in detail. Once you achieve that perfect crackle, everything changes. Life suddenly has more meaning, and weeknights become an occasion for celebration.
ThisJapanese Katsu Bowl with Tonkatsu Sauceis more than just a meal; it’s an experience. It layers textures and flavors expertly: the foundation of warm, sticky rice, the cool, refreshing bite of shredded cabbage, the star player—that golden, crispy cutlet—and finally, the luscious, homemade Tonkatsu sauce tying it all together. This sauce is a symphony of umami, created using pantry staples like ketchup, Worcestershire-style sauce, and a touch of fruit vinegar, resulting in a complex flavor profile that elevates the entire dish.
While katsu might sound intimidating, I promise you, this recipe simplifies the process without sacrificing authenticity or that necessary crunch factor. It’s comforting, it’s quick enough for a weeknight dinner, and frankly, it tastes exactly like the dish you’d pay three times the price for at a dedicated Japanese spot. Plus, you get to skip the awkward small talk with the waiter. Win-win.
Ingredients for Japanese Katsu Bowl with Tonkatsu Sauce
Here’s what you’ll need to make this delicious dish:
- Chicken CutletsUse boneless, skinless chicken breasts, sliced horizontally and pounded thinly to ensure quick, even cooking and maximum crispness.
- Panko BreadcrumbsThese are non-negotiable for true katsu; their flaky texture absorbs less oil and delivers that signature airy crunch compared to standard breadcrumbs.
- All-Purpose Flour and EggsThese form the essential binder for the dredging station, creating a secure coating that ensures the panko adheres perfectly to the chicken.
- Vegetable Oil or Canola OilChoose an oil with a high smoke point necessary for frying at 350°F (175°C) without burning, ensuring the katsu is golden, not greasy.
- Short-Grain White RiceUse a sticky variety like Japanese short-grain or Calrose rice, providing the necessary starchy base to hold the bowl together.
- Shredded CabbageFinely shred green cabbage, which serves as a crucial, refreshing, palate-cleansing element alongside the rich fried chicken.
- Ketchup and Brown SugarThese ingredients form the sweet, acidic backbone of the Tonkatsu Sauce, balancing the savory elements beautifully.
- Worcestershire-Style Sauce (No Fish Ingredients)Look for a vegetarian or specialized savory sauce alternative to provide the essential fermented, complex umami flavor depth.
- Soy Sauce or TamariUsed to add saltiness and deepen the savory profile of the sauce; Tamari is a great gluten-free option.
- Apple Cider Vinegar and Grated GingerA touch of vinegar cuts through the richness, while the ginger adds a subtle, fresh spice note to the finished sauce.
The full ingredients list, including measurements, is provided in the recipe card directly below.
How to Make Japanese Katsu Bowl with Tonkatsu Sauce
Follow these simple steps to prepare this delicious dish:
Step 1: Prep the Chicken and Assemble the Dredging Station
Slice the chicken breasts horizontally to create four thin cutlets. Place each cutlet between two sheets of plastic wrap and pound them gently to about 1/4 inch thickness. Season both sides with salt and pepper. Next, set up your standard dredging station: one shallow dish for flour, one for beaten eggs, and one for panko breadcrumbs. Ensure the flour and panko are spread out evenly for easy coating.
Step 2: Dredge and Chill the Katsu
Working one cutlet at a time, dredge the chicken completely in the flour, shaking off any excess. Dip it into the egg wash, allowing excess to drip away, then finally press it firmly into the panko breadcrumbs, making sure the entire surface is thickly coated. Place the breaded cutlets on a wire rack or baking sheet and chill in the refrigerator for at least 15 minutes. This chilling period is essential; it helps the coating adhere firmly, preventing the dreaded panko separation during frying.
Step 3: Prepare the Quick Tonkatsu Sauce
While the chicken is chilling, prepare the sauce. In a small saucepan over medium-low heat, whisk together the ketchup, brown sugar, Worcestershire-style sauce, soy sauce, apple cider vinegar, and grated ginger. Bring the mixture to a gentle simmer, stirring constantly until the sugar dissolves and the sauce slightly thickens, usually about 3 to 5 minutes. Remove the sauce from the heat and set it aside. The longer it sits, the more the flavors meld.
Step 4: Fry the Chicken Cutlets to Golden Perfection
Heat 1 1/2 inches of oil in a large, deep skillet or Dutch oven to 350°F (175°C). Use a thermometer to monitor the temperature; stability is key. Carefully place one or two cutlets into the hot oil, ensuring you do not overcrowd the pan, which would drop the oil temperature. Fry for 3 to 4 minutes per side, until the katsu is deep golden brown and the internal temperature reaches 165°F (74°C). Remove the katsu and place it on a clean wire rack over a baking sheet to drain the excess oil thoroughly.
Step 5: Assemble the Japanese Katsu Bowl
Slice the cooked, rested chicken katsu into 1-inch strips. To assemble the bowls, place a generous scoop of hot, cooked short-grain rice in the bottom of each bowl. Top the rice with a handful of thinly shredded cabbage. Arrange the sliced, crispy chicken katsu gently over the cabbage and rice. Transfer to plates and drizzle generously with the homemade Tonkatsu Sauce for the perfect finishing touch.
Mastering the Crispy Katsu Technique
Achieving restaurant-quality crispiness requires a few strategic moves. Firstly, remember that wire rack is your friend. Never place freshly fried katsu directly onto paper towels, as this traps steam underneath the crust, turning your beautiful crunch into a disappointing chew. The wire rack allows air to circulate around the cutlet, keeping the coating unbelievably crisp while the oil drains away.
Why Pounding the Chicken is Non-Negotiable
Pounding the chicken serves two vital purposes. It tenderizes the meat, making it exceptionally satisfying, and more importantly, it ensures uniform thickness. If the meat is thin and uniform, it cooks at the same speed as the panko crust, preventing the scenario where your exterior is perfect but the interior is dry or, worse, undercooked. Aim for a thickness similar to a standard envelope—thin, but not fragile.
Oil Temperature Management for Ideal Katsu
Consistency in oil temperature is the single biggest factor determining success or failure in katsu. If the oil is too cool (below 325°F), the panko will slowly absorb the oil, leading to a greasy, heavy crust. If the oil is too hot (above 375°F), the outside will burn before the interior cooks. Maintain that sweet spot of 350°F (175°C), monitoring closely, especially after adding cold ingredients, and never crowd the pan.
Frequently Asked Questions About Japanese Katsu
Can I prepare the Katsu ahead of time?
You can prepare the chicken cutlets up to Step 2 (dredging and chilling) several hours in advance. Keep the cutlets covered tightly in the refrigerator. However, for maximum crunch, you must fry the katsu immediately before serving; reheating fried food never quite achieves the initial perfection.
What is a good substitute for chicken in this bowl?
Beef sirloin, sliced thin and pounded, makes an excellent alternative for beef katsu. Alternatively, thick slices of firm tofu or eggplant can be used for a vegetarian option; just ensure you press the tofu thoroughly to remove excess moisture before dredging.
How should I store leftover Tonkatsu Sauce?
Store any leftover homemade Tonkatsu Sauce in an airtight container in the refrigerator. It will keep well for up to two weeks. If the sauce thickens too much upon chilling, you can thin it out slightly by whisking in a few drops of hot water or fruit broth before serving.
What sides pair well with the Japanese Katsu Bowl?
The bowl itself is quite complete, but traditional accompaniments include miso soup or quick-pickled cucumbers. The addition of a small drizzle of Japanese mayonnaise (the rich, tangy kind) directly over the katsu or alongside the cabbage slaw is also highly recommended for an extra layer of richness.
Why This Recipe Will Become Your Weeknight Favorite
ThisJapanese Katsu Bowl with Tonkatsu Sauceis the ultimate culinary contradiction: it tastes complex and indulgent, yet it requires straightforward ingredients and simple, repeatable steps. Once you’ve built your confidence in the frying stage, this dish takes barely 30 minutes from pantry to plate.
The beauty of this meal lies in its balance. The crispy, savory element of the chicken is perfectly offset by the soft rice and the sharp, clean crunch of the fresh cabbage, all brought into harmony by that rich, tangy, sweet sauce. It is comfort food that feels special, perfect for chasing away the weekday blues or celebrating a casual weekend night. Stop dreaming of crispy textures and start frying—your stomach will thank you.
My journey into Japanese home cooking started, as many culinary adventures do, with a monumental disaster involving sticky rice and a broken immersion blender. I swore off making anything requiring precision until I stumbled upon the glorious simplicity of the Katsu bowl. Forget hours of simmering complicated broths; this dish is pure, crispy comfort food designed for weeknights when your energy levels are lower than a snail’s belly button. It’s the kind of meal that makes you feel like a culinary genius, even though the heavy lifting is done by a simple breadcrumb—the mighty Panko. The real secret weapon, however, is the rich, tangy, and deeply savory homemade Tonkatsu Sauce, which transforms humble fried chicken into a vibrant, complex feast. This perfect marriage of textures and flavors is exactly what we are creating today: the ultimate, deeply satisfyingJapanese Katsu Bowl with Tonkatsu Sauce. It’s crispy, savory, slightly sweet, and unbelievably comforting.
I know what you’re thinking: Can’t I just buy the sauce? Sure, you could. But that’s like buying a premade birthday cake when you know deep down you are capable of baking the most magnificent, slightly lopsided, but utterly charming cake yourself. Making Tonkatsu Sauce from scratch takes about ten minutes and guarantees a freshness and depth that the bottled varieties just can’t replicate. We combine simple pantry staples to create an umami explosion that cuts through the richness of the fried chicken perfectly. Plus, the bragging rights are immense. When your family asks what makes this Katsu so special, you can casually mention, “Oh, the sauce? I whipped that up myself.” Instant hero status achieved.
Gathering Your Ingredients for Culinary Triumph
Before donning your apron and entering the crispy zone, make sure your pantry is stocked. We are separating the ingredients into three main groups: the Katsu cutlets, the essential Tonkatsu Sauce, and the components for building the perfect rice bowl.
The Crispy Chicken Katsu
- 2 large chicken breasts, butterflied or pounded to ½ inch thickness (about 6–8 ounces each)
- Salt and freshly ground black pepper
- ½ cup all-purpose flour
- 2 large eggs, lightly beaten
- 2 cups Panko breadcrumbs (these are non-negotiable for maximum crunch)
- 3 cups neutral cooking oil (canola, vegetable, or peanut) for frying
The Signature Homemade Tonkatsu Sauce
This sauce is the heart and soul of the dish. Adjust the vinegar and sugar ratios to suit your personal tang preference.
- ½ cup ketchup
- 2 tablespoons Worcestershire sauce (ensure it’s animal pectin-free)
- 1 tablespoon soy sauce (or tamari for a gluten-free option)
- 1 tablespoon brown sugar or maple syrup
- 1 tablespoon apple cider vinegar
- 1 teaspoon ground ginger
- ½ teaspoon garlic powder
- A pinch of cayenne pepper (optional, for a subtle kick)
Building the Bowl
- 4 cups cooked short-grain Japanese rice
- 1 cup shredded cabbage or mixed greens
- Optional garnishes: Sesame seeds, finely chopped scallions, or a dollop of Japanese mayonnaise (Kewpie style)
Step-by-Step Guide to Perfect Katsu
The cooking process is a structured three-part symphony: sauce first, then Katsu, then assembly. Stick to this order, and you’ll avoid the frantic scramble of trying to fry chicken while simultaneously chopping cabbage.
Crafting the Legendary Tonkatsu Sauce
Combine all Tonkatsu Sauce ingredients in a small bowl. Whisk thoroughly until the brown sugar is completely dissolved and the mixture is smooth. Taste and adjust. If it’s too thick, add a splash of water or broth; if it needs more zing, add a touch more vinegar. Set this aside; the flavors deepen as it rests.
Preparing and Frying the Chicken
This is where the magic happens. We need three stations for breading: the flour dredge, the egg wash, and the Panko pile. Think of it as a culinary assembly line—efficiency is key.
- Season the chicken cutlets generously with salt and pepper on both sides.
- Dredge each piece first in the flour, shaking off the excess. This step ensures the egg sticks well.
- Dip the floured chicken into the egg wash, making sure both sides are fully coated.
- Finally, press the chicken firmly into the Panko breadcrumbs. Crucially, press the Panko deep into the meat. The tighter the crumbs are packed, the crispier the crust will be, reducing the chance of them falling off during frying.
- Heat the oil in a deep, heavy-bottomed pan or Dutch oven to 350°F (175°C). Use a thermometer if possible. If the oil is too cool, the Katsu will be greasy; if too hot, it will burn before cooking through.
- Carefully place one or two cutlets into the hot oil, ensuring you do not overcrowd the pan, which lowers the oil temperature dramatically.
- Fry for 3 to 4 minutes per side, or until the exterior is deeply golden brown and crispy, and the internal temperature reaches 165°F (74°C).
- Remove the Katsu and immediately place it on a wire rack over a baking sheet to drain the excess oil. This prevents the bottom from getting soggy.
Assembling the Delicious Japanese Katsu Bowl with Tonkatsu Sauce
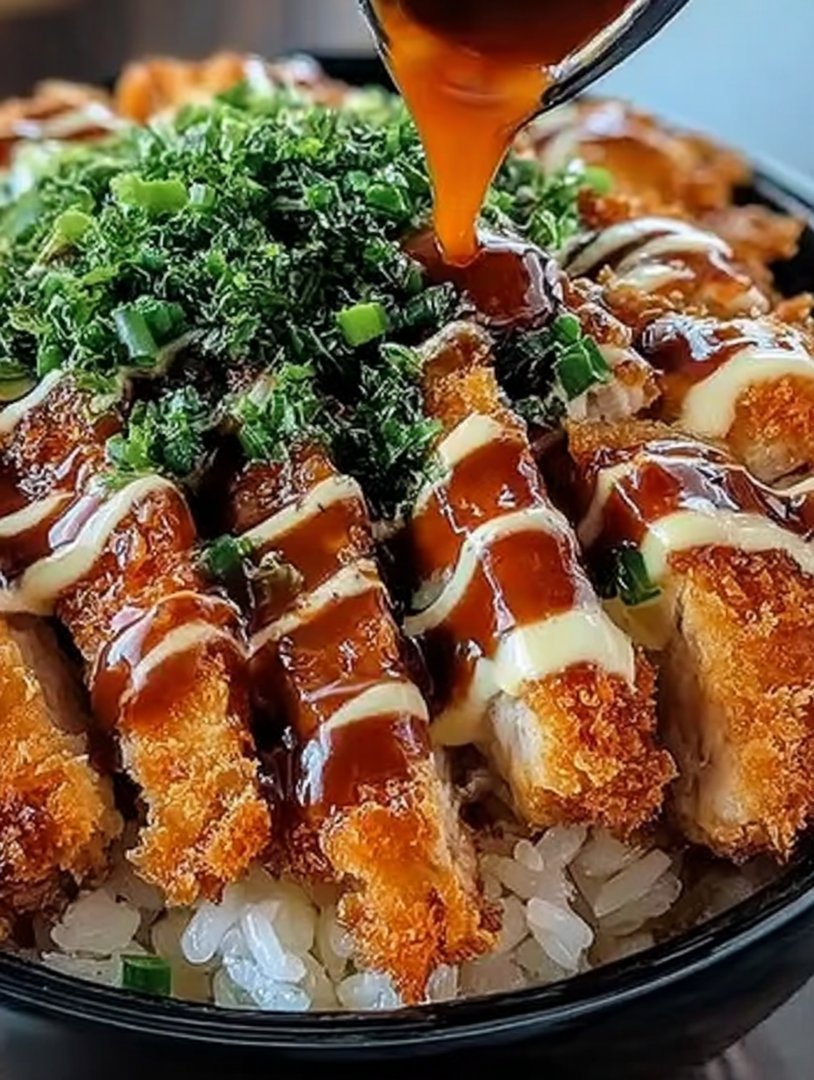
Once the chicken has rested for a couple of minutes, slice it into thick, diagonal strips. Arrange a generous scoop of steaming rice in a bowl. Layer the shredded cabbage next to the rice, offering a crucial cool and crunchy contrast. Place the sliced Katsu over the rice or resting on the cabbage. Drizzle the Tonkatsu Sauce generously over the cutlets. Garnish with sesame seeds and scallions for the finishing touch. Serve immediately and prepare for happy silence at the dinner table.
Perfecting the Cooking Process
For ultimate efficiency, start by mixing the Tonkatsu sauce first, allowing its flavors to meld. Next, prepare your rice and set up the Katsu breading station while the oil heats. Fry the cutlets in batches, placing them on a wire rack to maintain maximum crunch while you quickly assemble the remaining bowls.
Add Your Touch
Swap chicken for turkey tenderloins or even firm pressed tofu for a vegetarian option. Enhance the spice level by adding a dash of Sriracha to the sauce, or mix dried seaweed flakes (nori) into the Panko for an added savory, oceanic depth to the crust. Shredded carrots also add color to the bowl.
Storing & Reheating
Store leftover Katsu and rice separately in airtight containers in the refrigerator for up to three days. To regain that glorious crunch, reheat the Katsu in an oven or air fryer at 350°F (175°C) for 8 to 10 minutes until piping hot and crispy again. Never use the microwave.
My friend, who is notoriously clumsy in the kitchen, once attempted this recipe after a long day. She messaged me later saying the secret was simply pressing the Panko so hard it almost looked like chicken armor. Her first attempt was flawless!
Chef’s Expert Tips for Katsu Mastery
- Maintain the oil temperature precisely at 350°F (175°C) using a thermometer; this prevents the chicken from becoming oily or burning before it is fully cooked inside.
- Always place freshly fried Katsu on a wire cooling rack instead of paper towels, allowing air circulation to keep the bottom supremely crisp.
- For the Tonkatsu sauce, grate fresh ginger instead of using powder for a brighter, more aromatic flavor profile that truly elevates the entire dish.
Why This Katsu Bowl is Your New Weeknight Hero
We’ve covered the technical aspects, but let’s talk about the sheer joy this dish delivers. In a world full of complicated cooking trends, the Katsu bowl offers delicious, straightforward satisfaction. It’s hearty without being heavy, familiar yet exotic, and entirely customizable to your pantry and preferences. While the frying step might seem daunting, trust me when I say that the investment of ten minutes in hot oil yields a payout of flavor and texture that far exceeds the effort.
Furthermore, mastering the chicken breading technique prepares you for so many other culinary adventures, from schnitzel to crispy fried fish. The Panko crust is the universal equalizer of texture, turning even a basic chicken cutlet into a masterpiece of crunch. Paired with the zingy, addictive sauce, this meal quickly becomes a family favorite. You are not just serving dinner; you are delivering comfort in a bowl.
Troubleshooting Common Katsu Concerns
Even the best chefs occasionally face minor hurdles. What if your Panko keeps falling off? You probably didn’t shake off enough excess flour in step one, which prevents the egg wash from adhering properly. Remember the flour acts as the adhesive, but too much flour repels the egg. What if the chicken is too dark on the outside and raw inside? Your oil is too hot; drop the temperature immediately and slice the meat thinner next time. Precision matters here, but don’t panic—it’s just fried chicken, and delicious mistakes still happen.
The beauty of the Japanese Katsu Bowl lies in its construction. Every element plays a crucial role: the warm rice is the base, the crisp, cool cabbage provides freshness, the Katsu delivers savory warmth, and the thick, tangy sauce ties it all together. It’s a truly balanced meal designed for maximum textural satisfaction.
Frequently Asked Questions About Japanese Katsu
Can I bake the Chicken Katsu instead of frying it?
Yes, absolutely! For a lighter, healthier option, preheat your oven to 400°F (200°C). Place the breaded cutlets on a lightly oiled baking sheet. Bake for 20 to 25 minutes, flipping halfway through, until golden and cooked completely. Using an air fryer at 375°F (190°C) for 12 to 15 minutes also yields excellent, crispy results.
What makes Panko different from regular breadcrumbs?
Panko breadcrumbs are made from crustless white bread, resulting in larger, lighter, and flakier shards. They absorb less oil and create a far superior, airier crunch compared to the dense, finer texture of traditional Western breadcrumbs, which often result in a heavier crust.
How long can I store the homemade Tonkatsu Sauce?
The homemade sauce keeps very well. Store it in an airtight container in the refrigerator for up to two weeks. Its flavors will actually continue to deepen and improve over the first few days, making it excellent for advanced preparation.
What is the best type of rice to use for a Katsu bowl?
Short-grain Japanese sticky rice is traditionally preferred. Its high starch content makes it slightly tacky, perfect for eating with chopsticks and absorbing the rich flavors of the sauce and the chicken. However, medium-grain rice works well in a pinch.
Can I prepare the chicken ahead of time?
You can pound and bread the chicken cutlets up to 12 hours in advance. Arrange the breaded cutlets on a tray lined with parchment paper, cover loosely, and refrigerate. Do not stack them. This actually helps the coating adhere better, but only fry them right before serving for optimal crispiness.
Conclusion for Japanese Katsu Bowl with Tonkatsu Sauce
You’ve mastered the art of the perfect, crispy chicken cutlet and whipped up a batch of that magical, tangy Tonkatsu sauce. This dish is more than just a meal; it’s an experience—a glorious collision of texture and flavor guaranteed to transport your taste buds straight to the streets of Tokyo. Ditch the takeout menu, embrace the Panko, and serve up this incredible Japanese Katsu Bowl with Tonkatsu Sauce. Whether you are hosting a celebratory feast or just need a quick weeknight dinner, this savory bowl remains the ultimate definition of comfort food done right. Go forth and savor the crunch!
Print
Japanese Katsu Bowl with Tonkatsu Sauce
Master the ultimate Katsu! Our detailed recipe ensures golden, shattering Panko crusts on juicy chicken cutlets. Deep fry perfection guaranteed. Full cooking instructions and nutrition facts included.
- Total Time: 35 minutes
- Yield: 4 servings 1x
Ingredients
- 2 boneless chicken breast cutlets (about 4 oz each)
- 1 cup Panko breadcrumbs
- 1/4 cup all-purpose flour
- 1 large egg, lightly beaten
- 2 cups vegetable oil (for deep frying)
- 2 cups cooked short-grain Japanese rice
- 1/2 cup store-bought Tonkatsu sauce
- 1 cup finely shredded green cabbage (for garnish)
Instructions
- Step 1: Prepare the beef and breading station. Pat the beef cutlets dry, lightly score the edges (to prevent curling), and season both sides with salt and pepper. Set up a three-stage breading station: one shallow dish with flour, one with the beaten egg, and one with the Panko breadcrumbs.
- Step 2: Bread the cutlets. Dredge each chicken cutlet first in the flour (shaking off excess), then dip completely into the egg mixture, and finally press firmly into the Panko breadcrumbs, ensuring the entire surface is coated evenly.
- Step 3: Fry the Katsu. Heat the vegetable oil in a deep pan or pot to 340°F (170°C). Carefully place the breaded cutlets into the hot oil and fry for 3–4 minutes per side, or until the exterior is golden brown and crispy and the internal temperature reaches 145°F (63°C).
- Step 4: Slice the Katsu. Remove the fried cutlets and place them on a wire rack or paper towel-lined plate to drain excess oil. Once cooled slightly, slice each cutlet crosswise into 1-inch wide strips.
- Step 5: Assemble the Katsu Bowls. Divide the cooked Japanese rice evenly among two serving bowls. Top the rice with a bed of shredded green cabbage, then arrange the sliced Tonkatsu on top of the cabbage. Drizzle generously with the Tonkatsu sauce immediately before serving.
Notes
- Store leftover sliced Katsu in an airtight container lined with a paper towel in the fridge for up to two days, ensuring it is cooled completely before sealing to prevent condensation and sogginess.
- To restore the maximum crispness of refrigerated Katsu, reheat it quickly in a preheated 350°F (175°C) oven or air fryer for 8–10 minutes, avoiding the microwave entirely.
- For the crispiest, most secure coating, adopt the "dry/wet hand technique" (dry hand for flour/Panko, wet hand for egg) to ensure maximum Panko adhesion without clumping.
- Elevate your bowl by adding a sprinkle of toasted sesame seeds over the Katsu and serving a side of Japanese pickled ginger (gari) for a sharp, palette-cleansing counterpoint to the rich sauce.
- Prep Time: 15 minutes
- Cook Time: 20 minutes
- Method: Stovetop
- Cuisine: American
FAQs
How do you ensure the chicken cutlet stays perfectly crisp in this Japanese Katsu Bowl?
The key to perpetual crunchiness lies in timing and technique. After frying your chicken katsu to a golden perfection, avoid placing it directly onto the rice immediately. Instead, let the cutlets rest briefly on a wire rack—never on a paper towel, as this steams the bottom! Slice the katsu right before serving, and only drizzle the rich Tonkatsu sauce over the top layer, ensuring the rest of the breading remains gloriously untouched by moisture until the last possible second. This technique guarantees maximum structural integrity for your fried delights in the finished dish.
Are there any good substitutes if I don’t have authentic Panko breadcrumbs for this savory Japanese comfort food?
While Panko is the undisputed champion for that airy, splinter-like crunch we adore, standard breadcrumbs are a poor substitute. If you’re in a pinch while preparing your Japanese Katsu Bowl, try blitzing dried, crusty bread until you achieve jagged, irregular flakes—texture is everything! Alternatively, some cooks swear by crushed cornflakes mixed with a little flour. Remember, the goal is maximum surface area and minimal moisture absorption. Experimentation is fun, but Panko’s unique flake structure is exceptionally difficult to beat for achieving that truly authentic, light Katsu texture.
How do I achieve the perfect balance and thickness for the homemade Tonkatsu Sauce component of this dish?
Crafting the ideal homemade Tonkatsu Sauce requires a masterful blend of sweet, tangy, and savory elements. We achieve the characteristic rich flavor profile by relying on ingredients like ketchup, fruit purées, soy sauce, and a touch of apple cider vinegar for necessary brightness. We thicken the sauce naturally using simple techniques, ensuring it clings beautifully to the crispy cutlet without becoming too thin or too gloppy. Always simmer the sauce gently until it coats the back of a spoon—this guarantees that luscious, restaurant-quality consistency for your Japanese Katsu Bowl with Tonkatsu Sauce.
What elements of the Japanese Katsu Bowl can I prepare in advance for quicker weeknight assembly?
Efficiency is the home cook’s best friend, especially when craving deep-fried delights! You can definitely prepare the Tonkatsu Sauce up to three days ahead; it tastes even better after the flavors mingle in the fridge. Cook and store your fluffy steamed rice and slice all your cabbage garnish earlier too. The one component that demands immediate attention is the katsu itself. Do not fry the chicken ahead of time, as it will lose its crucial crispness. However, you can bread the chicken cutlets fully, cover them tightly, and refrigerate them until you are ready to fry, saving significant prep time when building your crispy cutlet bowl.
Leave a Comment