

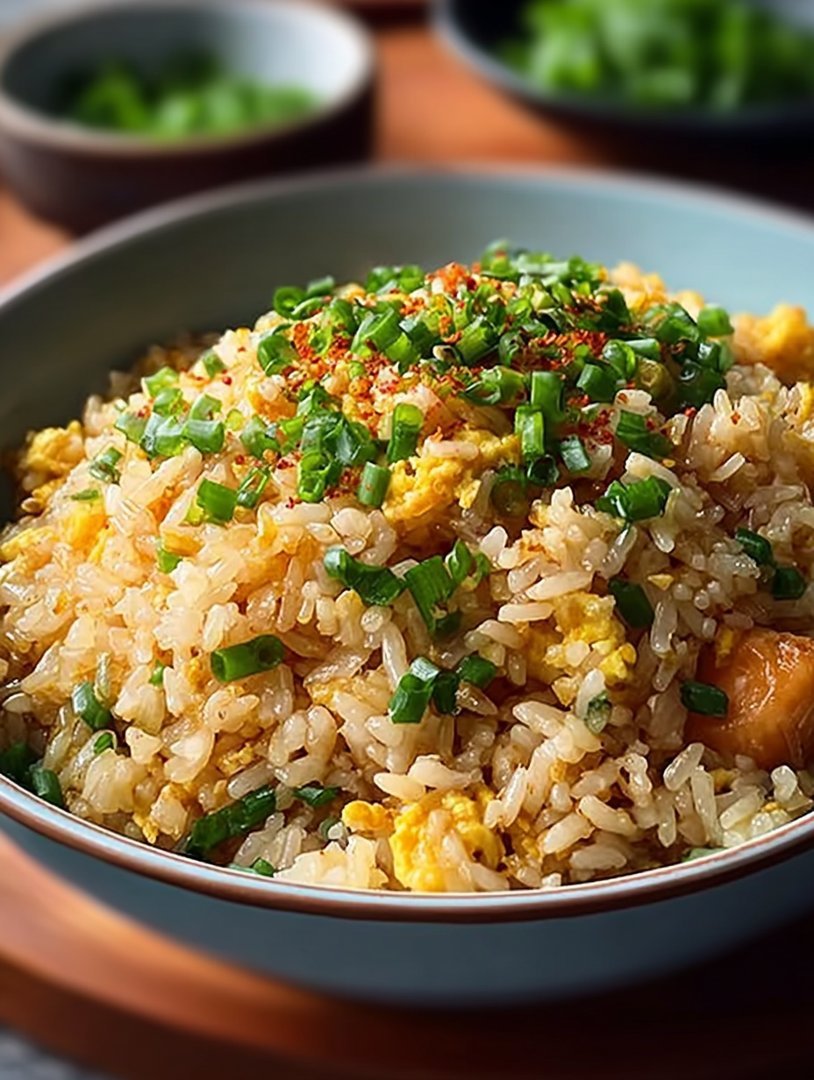
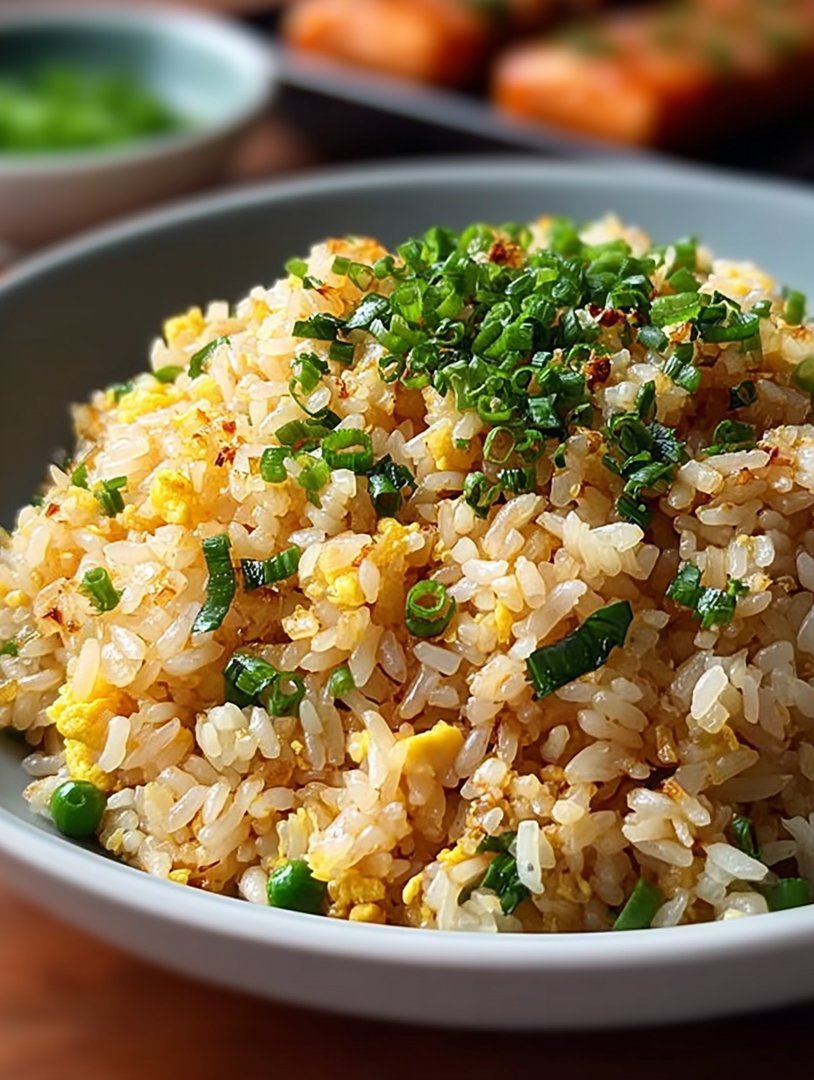
Remember that time you needed dinner in ten minutes but wanted five-star flavor? Forget delivery; the aromatic sizzle of authenticJapanese Garlic Fried Riceis the answer to your weeknight prayers. This isn’t just rice; it’s a symphony of deeply caramelized garlic, rich umami, and fluffy texture—guaranteed to make even the pickiest eaters abandon their plates in satisfied silence.
Before diving into the intoxicating aroma of sizzling garlic, let’s look at why this specific recipe transcends your average weeknight stir-fry. We are optimizing for speed, flavor depth, and that elusive restaurant-quality texture that prevents the rice from turning into a sad, sticky mess. This recipe is fundamentally simple, relying on impeccable technique and the absolute freshest garlic you can find.
- Preparation is incredibly fast, requiring less than 20 minutes from prep to plate, making it ideal for those hectic, demanding weeknight evenings.
- Features a unique savory-sweet flavor profile, perfectly balanced by the punchy, deeply toasted garlic and rich umami soy seasoning.
- Visually stunning with golden grains of rice speckled with bright green onions and crispy, deeply browned garlic chips throughout the dish.
- Highly versatile; easily adapts to incorporate leftover grilled chicken, shredded turkey, or thin slices of quickly sautéed beef for added protein.
Ingredients for Japanese Garlic Fried Rice
Here’s what you’ll need to make this delicious dish:
- Cooked and Chilled RiceUse medium-grain Japanese rice or Jasmine rice, cooked the day before and refrigerated; cold rice is essential for avoiding stickiness.
- Garlic ClovesAt least four to six large cloves are required; we use a heavy hand here for maximum flavor and texture.
- Butter or GheeThis provides a rich, luxurious mouthfeel and helps the garlic caramelize beautifully without burning, offering depth.
- Soy SauceUse high-quality, reduced-sodium soy sauce to control the saltiness while delivering essential umami flavor.
- Sesame OilA small drizzle added at the very end to provide a distinctive, nutty, and highly aromatic finish to the dish.
- Green Onions (Scallions)Slice these thinly; they provide essential color, crunch, and a fresh, pungent contrast to the rich garlic.
- EggOne or two eggs scrambled quickly into the wok offer richness and a binding element that enhances the overall texture of the rice.
- Salt and Freshly Ground Black PepperSeasoning should be done in layers, balancing the natural sweetness and spice of the ingredients.
The full ingredients list, including measurements, is provided in the recipe card directly below.
How to Make Japanese Garlic Fried Rice
Follow these simple steps to prepare this delicious dish:
Step 1: Prep the Garlic and Rice
Peel and mince the garlic aggressively, or slice it thinly if you prefer crispy garlic chips; set aside. Take the chilled rice out of the refrigerator and break up any large clumps with your hands. Having the rice completely separated ensures even cooking and perfect texture later on. Prep all other additions, like green onions and any proteins, ensuring everything is within arm’s reach of the cooking area, a concept known asmise en place.
Step 2: Infuse the Oil and Sauté the Aromatics
Heat your wok or largest skillet over medium-high heat. Add the butter and half of the minced garlic. Cook this carefully, stirring frequently for about 60 to 90 seconds, until the garlic is fragrant and just beginning to turn golden brown. Remove this fragrant oil and garlic mixture from the pan and set it aside—this prevents the garlic from burning during the high-heat rice cooking phase.
Step 3: Scramble the Egg and Cook the Protein
Increase the heat to high. Add a splash of neutral oil, then pour in the whisked egg. Scramble quickly and remove before it fully sets, or push it to one side. If using protein (like chicken or beef), add it now and cook until heated through and lightly browned. Once cooked, combine the protein and egg briefly.
Step 4: Fry the Rice and Season
Add the chilled rice directly into the very hot wok. Use the back of a spatula or spoon to flatten the rice against the bottom surface, letting it sizzle and warm up. Stir constantly and vigorously, breaking up any remaining clumps. Continue frying for 3 to 4 minutes until the rice begins to make a slight popping sound and looks slightly dried out and fluffy.
Step 5: Finish the Dish
Add the remaining raw minced garlic (yes, raw, for that pungent freshness) and the prepared reserved garlic oil mixture back into the rice. Drizzle in the soy sauce and a dash of white pepper. Toss quickly and vigorously to ensure the seasonings coat every single grain. Turn off the heat immediately and stir in most of the chopped green onions and a generous splash of sesame oil.
Transfer to plates and drizzle with sauce for the perfect finishing touch.
The Secrets to Perfect Fried Rice Texture
Achieving restaurant-quality fried rice involves understanding a few fundamental principles that separate the amateurs from the trueyakimeshimasters. The key is controlling moisture, managing temperature, and ensuring even distribution of flavors. Many people struggle with fried rice becoming sticky or mushy, a tragedy that ruins the dish entirely. This usually happens because too much moisture is released during cooking, turning the grains into a paste rather than fluffy, separate kernels.
The Science of Day-Old Rice
If you take one piece of advice from this entire article, let it be this: use rice that was cooked yesterday. Freshly cooked rice retains high levels of moisture, which immediately steams when it hits the hot pan, resulting in mushy, clumped-together grains. When rice is refrigerated overnight, the starches firm up, and the excess moisture evaporates, making the grains dry, hard, and perfectly separated. This is the only type of rice that can withstand the intense heat of the wok without collapsing. If you absolutely must use freshly cooked rice, spread it thin on a baking sheet and pop it in the freezer for about 15 minutes to rapidly cool and dry the surface.
Mastering the Garlic Infusion
The genius ofJapanese Garlic Fried Ricelies in the dual application of garlic. We divide the garlic into two distinct batches. The first batch is cooked gently in butter or oil to create a deeply nutty, savory base—this extracted oil carries the essence of caramelized garlic throughout the dish. The second batch, added raw at the very end, provides a sharp, fresh, vibrant garlic aroma and flavor that cuts through the richness. This layering of cooked and raw garlic prevents the flavor from being flat while simultaneously ensuring you get that satisfying garlic punch.
Elevating Your Japanese Garlic Fried Rice
While the basic preparation is flawless on its own, part of the joy of cooking is customization. Fried rice is the perfect canvas for creative additions, turning a humble side dish into a complete and satisfying meal. You can use this recipe as a starting point and adapt it based on what you have readily available in your kitchen or what seasonal vegetables look appealing. Just remember that whatever you add should be precooked or chopped small enough to heat through quickly without releasing excess moisture.
Adding Protein and Vegetables
If you want to transform this side into a main course, lean proteins work exceptionally well. Shredded rotisserie chicken or finely diced lean beef, sautéed quickly before the rice is added, are fantastic additions. For a vegetable boost, consider adding finely diced carrots, frozen peas (added directly to the wok for the last minute of cooking), or thinly sliced shiitake mushrooms. When adding vegetables, ensure they are relatively dry; excess water will drop the temperature of your pan and steam the rice, which we desperately want to avoid.
The Importance of High Heat and Agitation
Fried rice should never be cooked over medium heat. You need the highest heat your stove can safely manage. This allows the rice to fry and dry out instantly, creating that desirable texture and slight char known aswok hei, or the “breath of the wok.” When the rice hits the high heat, moisture evaporates instantly, and the surface of the rice caramelizes slightly, giving it a toasted flavor. Constant stirring and tossing are necessary to ensure even cooking and prevent scorching. If you hear the rice sizzling loudly, you are doing it right. If it’s steaming, your pan isn’t hot enough or you’ve added too much rice at once.
Flavor Boosters Beyond Soy
While soy sauce is the foundation, don’t limit yourself. A dash of oyster sauce (if you eat seafood) or a vegetarian-friendly mushroom-based seasoning sauce adds incredible depth and savoriness. If you like a little heat, a drop of chili oil mixed in right before serving gives a wonderful warmth. For a brighter note, some cooks like to add a tiny splash of rice vinegar just off the heat to cut through the richness of the butter and garlic, balancing the strong umami profile.
Serving Suggestions and Presentation
Presentation matters, especially when the dish is as visually appealing asJapanese Garlic Fried Rice. While it’s fantastic served directly from the wok into a bowl, taking a moment to garnish properly elevates the entire dining experience. Don’t underestimate the power of a final, elegant touch.
Garnishing for Impact
The freshest flavors should always be added at the end. Reserve a small handful of the finely chopped green onions and scatter them over the rice just before serving; this provides a beautiful contrast of bright green against the golden rice. If you created crispy garlic chips during the initial sauté step, sprinkle those over the top for crunch and intense aroma. A final flourish might include a thin stream of sesame oil over the entire dish, ensuring the scent hits the nose right before the first bite. Pair this rice with simple grilled chicken skewers or seared salmon for a balanced, delightful dinner that feels far more complicated than it actually is.
Pairing with Complementary Dishes
Since this fried rice recipe is highly seasoned and rich in garlic and butter, it pairs well with light, refreshing side dishes. A simple, clear broth soup, such as traditional miso or a light chicken broth, provides a necessary liquid counterpoint. Alternatively, a crunchy cucumber or cabbage salad, tossed lightly in a ginger-vinegar dressing, offers acidity and a cooling crunch that perfectly complements the savory depth of the garlic rice. This dish is versatile enough to be a robust standalone lunch or the star carbohydrate component of a larger East Asian inspired feast.
Learning how to perfect this style of fried rice means you are only ever 15 minutes away from a deeply satisfying, restaurant-quality meal. Once you master the technique of using chilled rice and layering the garlic flavor, you’ll never settle for sticky, poorly-textured fried rice again.
The Accidental Discovery of Sunshine on a Plate
My foray into makingJapanese Garlic Fried Ricebegan purely by accident one miserable Tuesday. I was trying to empty a leftover container of rice when I realized I was out of my usual seasonings. Relying solely on a dangerously large amount of fresh garlic, the resulting Yakimeshi was shockingly vibrant, instant comfort, and truly tasted like sunshine.
The Case for Cold Rice and High Heat
We all know the culinary laws: Thou shalt not use fresh rice for fried rice. It sounds like a punishment, but stale rice is the secret weapon here. Freshly cooked rice is too moist and steamy; it will turn your beautiful wok creation into a gluey, regrettable porridge. We want separate, distinct grains dancing around the pan, each coated in garlicky goodness, not a sticky lump refusing to cooperate.
Achieving that coveted fluffy texture requires rice that has spent at least 24 hours chilling out in the refrigerator. This drying process is non-negotiable. When those dry grains hit the scorching heat of the wok—and I mean scorching, we are not gently warming anything here—they quickly crisp up without clumping. Think of it as preparing rice for a spa treatment involving oil and extreme temperatures.
Furthermore, this recipe truly thrives on speed and high temperatures. If your pan isn’t hot enough, the vegetables will weep, the rice will steam, and the garlic will simply simmer instead of developing that gorgeous caramelized crust. We are aiming for flavor development through intense heat, ensuring every component contributes maximum crunch and aroma. Trust me, the sheer audacity of adding a mountain of minced garlic to a sizzling hot pan is the moment this dish transforms from dinner into an obsession.
Ingredients: What You’ll Need for Garlicky Bliss
Prep Time, Cook Time, Servings
- Prep Time:15 minutes
- Cook Time:10 minutes
- Servings:4 happy people
The Essential Components
Forget subtle seasoning; this is the Japanese Garlic Fried Rice equivalent of a full rock concert. If you feel you have too much garlic, you are probably doing it right. I often double the suggested amount just because the smell alone is worth the effort.
- 3 cups day-old, chilled cooked white rice (short grain is ideal)
- 4 tablespoons neutral oil (such as canola or vegetable)
- 2 tablespoons butter or vegan alternative
- 6 cloves garlic, finely minced (use 8 if you dare)
- 1 medium chicken breast, diced small (optional, substitute with beef or turkey)
- 2 large eggs, whisked
- 1 cup frozen mixed vegetables (peas, carrots, corn)
- 3 tablespoons soy sauce (use tamari for a gluten-free option)
- 1 teaspoon beef or vegetable broth concentrate (optional, for depth)
- 1 teaspoon toasted sesame oil
- 1/2 teaspoon white pepper
- 3 scallions (green parts only), sliced for garnish
Step-by-Step Instructions: Mastering the Wok
Remember, speed is your friend. Have all your ingredients prepped and lined up before you turn on the heat. This process moves faster than a squirrel avoiding a falling acorn.
- Prep the Protein:If using chicken, heat 1 tablespoon of neutral oil in your wok or large skillet over high heat. Cook the chicken until fully browned and cooked through, about 3-4 minutes. Remove the chicken from the pan and set it aside, leaving the remaining oil behind.
- Eggs First:Add 1 tablespoon of oil to the wok. Pour in the whisked eggs and quickly scramble them, breaking them into small pieces as they cook. This should take less than a minute. Push the cooked eggs to the side of the pan or remove them entirely.
- The Garlic Bomb:Reduce the heat slightly to medium-high. Add the remaining 2 tablespoons of oil and the butter. Once shimmering, add the minced garlic. Stir continuously for about 60 seconds until fragrant and lightly golden. Do NOT let the garlic burn; burnt garlic tastes bitter and ruins the whole endeavor.
- Rice Introduction:Increase the heat back to high. Add the cold rice to the pan. Using the back of a spatula, break up any clumps immediately. Toss and stir-fry vigorously for 3 to 4 minutes until the rice begins to sound dry and slightly crispy.
- The Flavor Layers:Add the frozen mixed vegetables and the cooked chicken and eggs back into the pan. Stir-fry for 1 minute until the vegetables are heated through.
- Seasoning Finish:Pour the soy sauce, beef broth concentrate, and white pepper directly onto the rice. Continue to toss rapidly until the rice is uniformly coated in the sauce—this should take about 30 seconds.
- The Finale:Remove the pan from the heat. Drizzle with sesame oil and toss one last time. Serve immediately, garnished generously with fresh green scallions.
Perfecting the Cooking Process
The optimal sequence starts with searing the diced chicken until caramelized before removing it. Next, cook the scrambled eggs rapidly, then clear the pan to fry the substantial garlic in butter and oil. Finally, incorporate the chilled rice and seasoning rapidly under maximum heat for that professional, fluffy texture.
One common pitfall for beginner fried rice cooks is pan overcrowding. When you are making Japanese Garlic Fried Rice, think of your wok as a dance floor—it needs space. If you dump too much rice or too many cold ingredients into the pan at once, the temperature plummets instantly. This leads to steaming, not frying, which is a tragedy we must avoid. If you are doubling the recipe, absolutely divide the rice and cook it in two batches. A perfect fried rice outcome depends on giving those grains enough breathing room to crisp up against the searing metal.
Another crucial element is the timing of the seasoning. Never pour soy sauce or any liquid seasoning in too early. Liquids introduce moisture, which disrupts the frying process. You should only add the soy sauce once the rice is fully separated, hot, and slightly crispy—right at the very end. This ensures the seasoning coats the grains beautifully without turning them mushy. The quick introduction of seasoning followed by rapid mixing is what seals the deal on perfect texture and flavor distribution.
Add Your Touch
Elevate your Japanese Garlic Fried Rice experience by swapping chicken for finely diced lamb or adding shredded carrots for color. Replace the standard mixed vegetables with shiitake mushrooms and bamboo shoots for an earthy twist. A teaspoon of rice vinegar added with the soy sauce can provide a delightful, bright acidity.
This recipe is highly adaptable to whatever vegetables are languishing sadly in your produce drawer. Instead of standard frozen peas and carrots, try thinly sliced bell peppers, shredded cabbage, or even some quick-blanched broccoli florets. Just ensure that whatever vegetable you add is cut small enough to cook quickly or is pre-cooked, preventing unnecessary moisture release. For an extra layer of umami, try adding a tablespoon of nutritional yeast flakes alongside the soy sauce for a savory depth that surprises everyone.
Storing & Reheating
Store any leftover Japanese Garlic Fried Rice in an airtight container in the refrigerator for up to three days. To reheat, sprinkle a tablespoon of water or broth over the rice, cover loosely, and microwave until hot. Alternatively, sauté it quickly in a hot pan with a dash of oil to restore some of that lovely crispness.
Reheating fried rice effectively is often a science experiment gone wrong, resulting in dry, sad clumps. The key trick is moisture replenishment. When using the pan method, add a tiny bit of oil back into the wok and ensure it’s blazing hot. The addition of the liquid (water or broth) helps the rice steam slightly before it fries, preventing it from drying out further and restoring its initial fluffiness. Avoid low heat reheating at all costs, as that will simply dry out the grains without crisping them up.
Expert Tips for Fluffy Perfection
- Use only day-old, cold rice. If you must use fresh, spread it thinly on a sheet pan and freeze it for 30 minutes to reduce moisture content drastically.
- Keep the heat aggressively high throughout the frying process, especially when the rice is in the pan, to achieve a dry, separated, and slightly crispy texture.
- Wait until the very end to add the seasonings; this prevents moisture buildup and ensures the rice grains retain their beautiful, individual structure during the crucial cooking phase.
My younger cousin, who typically rejects anything that isn’t cheese pizza, once ate three bowls of this Japanese Garlic Fried Rice and declared it “the only acceptable rice dish in existence.”
Conclusion for Japanese Garlic Fried Rice
Japanese Garlic Fried Rice is more than just a speedy weeknight meal; it’s a celebration of simple ingredients transformed by high heat and bold flavor. We have established that the secret weapon lies in using ultra-cold, day-old rice and maintaining fiercely high temperatures throughout the process to ensure every grain achieves maximum fluffiness and crispness. By mastering the sequence—searing the protein, scrambling the eggs, and then rapidly introducing the aromatic garlic and cold rice—you unlock the depth of flavor this dish is famous for.
Whether you stick to the classic formulation or introduce your own vegetable variations and extra spices, this recipe guarantees a deeply satisfying and wonderfully aromatic plate of food. It proves that sometimes, the most profoundly comforting culinary experiences arise from the most straightforward techniques, relying heavily on that irresistible, sizzling garlic aroma to win the day.
Print
Japanese Garlic Fried Rice
Master this butter-infused Japanese Garlic Fried Rice, rich with eight cloves of aromatic, crispy golden garlic. This umami-packed Gohan is a weeknight miracle.
- Total Time: 35 minutes
- Yield: 4 servings
Ingredients
- Day-old cooked short-grain white rice: 4 cups
- Garlic cloves: 8, finely minced (or thinly sliced)
- Unsalted butter: 2 tablespoons
- Vegetable oil (or neutral oil): 1 tablespoon
- Soy sauce (Shoyu): 2 tablespoons
- Salt: 1/2 teaspoon
- Black pepper: 1/4 teaspoon
- Green onions (scallions): 2, thinly sliced
Instructions
- Step 1: Heat a wok or large frying pan over medium-low heat. Add the vegetable oil and 1 tablespoon of the butter. Once melted, add all of the minced garlic and sauté slowly until fragrant and golden brown (about 2-3 minutes). Do not let the garlic burn.
- Step 2: Carefully scoop the crispy garlic out of the pan and set it aside on a small plate, leaving the infused oil/butter mixture in the pan. Increase the heat to medium-high.
- Step 3: Add the remaining 1 tablespoon of butter and the day-old rice to the pan. Using a spatula, quickly break up any clumps of rice and stir-fry for 3-4 minutes until the rice is heated through and begins to lightly pop.
- Step 4: Create a space in the center of the wok and pour in the soy sauce; let it sizzle for 5 seconds before tossing it rapidly with the rice to ensure even coating. Season the rice with salt and black pepper.
- Step 5: Return the reserved crispy garlic to the wok along with three-quarters of the sliced green onions. Toss everything together vigorously for one final minute, then remove from heat and serve immediately, garnished with the remaining fresh green onions.
Notes
- The key to authentic flavor is reserving the slowly browned, crispy garlic pieces from Step 2; this prevents them from burning during the high-heat stir-frying phase and ensures a textural crunch at the end.
- For a substantial meal, serve the fried rice topped with a runny fried egg (onsen tamago style) or alongside thinly sliced, ginger-marinated beef (shogayaki) for an authentic pairing.
- If you have leftovers, cool the fried rice rapidly (within 1 hour) and store it in an airtight container in the refrigerator, where it will keep well for up to 3 days.
- To restore the best texture, reheat leftovers on the stovetop in a hot wok or skillet with a small splash of neutral oil or a pat of fresh butter.
- Prep Time: 15 minutes
- Cook Time: 20 minutes
- Method: Stovetop
- Cuisine: American


Leave a Comment