


Imagine tiny, cheesy squares of pure, unadulterated joy, each one practically begging to be devoured. We’re talking about the kind of snack that makes you forget all your troubles, at least until the last crumb is gone.
These Homemade Cheese-Its are not your average store-bought crackers; they’re a symphony of sharp cheddar and buttery goodness, baked to crispy, golden perfection. Get ready to elevate your snacking game!
- Effortlessly crafted with simple ingredients you likely already have in your pantry, making them a perfect spontaneous treat.
- The intense cheesy flavor, combined with a satisfying crunch, creates an irresistible snack that everyone will adore.
- Their golden-brown hue and perfectly puffed texture make them visually appealing and a delightful addition to any snack platter.
- Perfect for satisfying cravings or pairing with soups and salads; these crackers adapt to any culinary occasion with ease.
Ingredients for Homemade Cheese-Its
Here’s what you’ll need to make this delicious dish:
The full ingredients list, including measurements, is provided in the recipe card directly below.
How to Make Homemade Cheese-Its
Follow these simple steps to prepare this delicious dish:
Step 1: Combine Dry Ingredients
In a large bowl, whisk together the flour, salt, and paprika. This ensures that the spices are evenly distributed throughout the dough.
Step 2: Incorporate Cheese and Butter
Grate the sharp cheddar cheese and add it to the flour mixture. Cut in the cold butter using a pastry blender or your fingertips until the mixture resembles coarse crumbs. This step is crucial for creating a flaky texture.
Step 3: Add Water and Form Dough
Gradually add cold water to the mixture, mixing until a dough forms. Be careful not to overmix. The dough should be slightly sticky but not overly wet.
Step 4: Chill the Dough
Wrap the dough in plastic wrap and chill in the refrigerator for at least 30 minutes. Chilling helps the butter solidify, resulting in a crispier cracker.
Step 5: Roll and Cut
Preheat oven to 375°F (190°C). On a lightly floured surface, roll out the dough to about 1/8 inch thickness. Use a pizza cutter or knife to cut the dough into small squares.
Step 6: Bake
Transfer the cheese-its to a baking sheet lined with parchment paper. Bake for 12-15 minutes, or until golden brown and crispy. Let them cool on the baking sheet before serving.
Homemade Cheese-Its are perfect for snacking, adding to charcuterie boards, or enjoying with your favorite dips.
Variations on Homemade Cheese-Its (formated as H2 subheading)
While the classic Homemade Cheese-Its are undeniably amazing, why not shake things up a bit? Let’s explore some fun and flavorful variations that will keep your taste buds singing!
Spice It Up! (formated as H3 subheading)
Feeling a little daring? Add a pinch of cayenne pepper or red pepper flakes to the dough for a spicy kick. You could even throw in some finely chopped jalapeños for an extra burst of flavor and heat. Just remember, a little goes a long way! For a smoky twist, consider adding some chipotle powder.
Herbaceous Happiness (formated as H3 subheading)
Fresh herbs can elevate your Homemade Cheese-Its to a whole new level. Rosemary, thyme, or even a little bit of dried oregano can add a wonderful aromatic dimension. Finely chop the herbs and mix them into the dough before chilling. Imagine the savory aroma filling your kitchen as these bake – pure bliss!
Everything Bagel Cheese-Its (formated as H3 subheading)
Transform your cheese crackers into everything bagel-flavored delights. After cutting the squares, brush them with a little bit of water and sprinkle with everything bagel seasoning. The combination of sesame seeds, poppy seeds, dried garlic, and dried onion will create a truly addictive snack.
Parmesan Power (formated as H3 subheading)
Swap out half of the cheddar cheese with grated Parmesan cheese for a nutty and salty flavor. Parmesan adds a lovely depth and complexity to the crackers, making them even more irresistible. You might need to adjust the salt slightly, as Parmesan is naturally saltier than cheddar.
Garlic Goodness (formated as H3 subheading)
For garlic lovers, adding a touch of garlic powder or even some roasted garlic cloves to the dough is a surefire win. Roasted garlic will give the crackers a mellow and sweet garlic flavor that’s simply divine. Just be careful not to add too much garlic powder, as it can be quite potent.
Seed Sensations (formated as H3 subheading)
Incorporate seeds into your Homemade Cheese-Its for added texture and nutritional value. Sesame seeds, poppy seeds, or even sunflower seeds can be mixed into the dough or sprinkled on top before baking. Not only do they add a delightful crunch, but they also provide healthy fats and nutrients.
Different Cheese Combos (formated as H3 subheading)
Experiment with different cheese combinations to create unique flavor profiles. Gruyere, Monterey Jack, or even a touch of goat cheese can add complexity and interest to your Homemade Cheese-Its. Just make sure that the cheeses you choose melt well and complement each other in flavor.
Tips for Perfect Homemade Cheese-Its (formated as H2 subheading)
Making Homemade Cheese-Its is pretty straightforward, but a few key tips can help you achieve cracker perfection.
Use Cold Ingredients (formated as H3 subheading)
This is probably the most important tip of all. Cold butter and cold water are essential for creating a flaky and tender dough. The cold butter creates pockets of steam during baking, which results in a light and crispy cracker.
Don’t Overmix the Dough (formated as H3 subheading)
Overmixing the dough will develop the gluten, resulting in tough crackers. Mix just until the ingredients come together, and don’t worry if the dough is a little shaggy.
Chill the Dough (formated as H3 subheading)
Chilling the dough allows the butter to solidify, making it easier to roll out and preventing the crackers from spreading too much in the oven.
Roll the Dough Thinly (formated as H3 subheading)
The thinner you roll the dough, the crispier the crackers will be. Aim for about 1/8 inch thickness.
Monitor the Baking Time (formated as H3 subheading)
Baking times can vary depending on your oven, so keep a close eye on the crackers. They are done when they are golden brown and crispy around the edges.
Let Them Cool Completely (formated as H3 subheading)
Resist the urge to devour the crackers straight from the oven. Letting them cool completely on the baking sheet will allow them to crisp up further and prevent them from becoming soggy.
Serving Suggestions for Homemade Cheese-Its (formated as H2 subheading)
Now that you’ve baked a batch of these cheesy wonders, it’s time to figure out how to enjoy them!
Snacking Solo (formated as H3 subheading)
Sometimes, the simplest pleasures are the best. Grab a handful of Homemade Cheese-Its and enjoy them straight from the bag. They’re the perfect snack for movie nights, road trips, or just satisfying a cheesy craving.
Charcuterie Board Star (formated as H3 subheading)
Elevate your charcuterie board with a bowl of Homemade Cheese-Its. Their crispy texture and cheesy flavor pair perfectly with a variety of cheeses, meats, and olives. They also add a touch of homemade goodness to any spread.
Soup’s Best Friend (formated as H3 subheading)
Homemade Cheese-Its are the perfect accompaniment to a warm bowl of soup. Crumble them on top for added texture and flavor, or dunk them in for a cheesy bite. They’re especially delicious with tomato soup, cream of broccoli soup, or even a hearty chili.
Salad Topper (formated as H3 subheading)
Add some crunch and flavor to your salads with Homemade Cheese-Its. Crumble them on top of your favorite greens, along with other toppings like nuts, seeds, and dried fruit. They’re a great way to add a savory element to your salad and make it more satisfying.
Dip It! (formated as H3 subheading)
Pair your Homemade Cheese-Its with your favorite dips for a truly irresistible snack. They’re delicious with hummus, guacamole, salsa, or even a creamy cheese dip. Get creative and experiment with different flavor combinations.
How to Store Homemade Cheese-Its (formated as H2 subheading)
To keep your Homemade Cheese-Its fresh and crispy, store them in an airtight container at room temperature. They should last for up to a week, but let’s be honest, they probably won’t last that long!
For longer storage, you can freeze the crackers in a freezer-safe bag or container. They can be frozen for up to 2 months. When you’re ready to enjoy them, simply thaw them at room temperature and they’ll be as good as new.
Why You Should Make Homemade Cheese-Its (formated as H2 subheading)
So, why should you ditch the store-bought crackers and make your own Homemade Cheese-Its?
Better Ingredients (formated as H3 subheading)
When you make your own crackers, you know exactly what’s going into them. No artificial flavors, preservatives, or weird additives. Just simple, wholesome ingredients that you can feel good about.
Customizable Flavors (formated as H3 subheading)
As we discussed earlier, the flavor possibilities are endless. You can customize your Homemade Cheese-Its to suit your taste preferences, whether you like them spicy, herbaceous, or garlicky.
Fun and Rewarding (formated as H3 subheading)
Making your own crackers is a fun and rewarding experience. It’s a great way to get creative in the kitchen and impress your friends and family with your culinary skills.
Superior Taste (formated as H3 subheading)
Let’s be real, Homemade Cheese-Its just taste better than the store-bought version. They’re crispier, cheesier, and bursting with flavor. Once you try them, you’ll never go back!
So there you have it – everything you need to know to make the most amazing Homemade Cheese-Its of your life. Happy baking!
Homemade Cheese-Its: The Ultimate Guide to Crispy, Cheesy Goodness
Homemade Cheese-Its: A Cheesy Odyssey
Let’s face it, we’ve all been there. Staring longingly at that little orange box in the grocery store, the siren song of cheesy, crunchy goodness echoing in our souls. But what if I told you that you could ditch the processed stuff and create an even *more* addictive version right in your very own kitchen? That’s right, we’re talking Homemade Cheese-Its, and they’re about to become your new obsession.
Forget those store-bought squares. We’re embarking on a cheesy adventure, a journey into the heart of cracker perfection. Prepare yourself for a flavor explosion so intense, so undeniably *cheesy*, that you’ll wonder why you ever settled for the imposters in the first place. This isn’t just a recipe; it’s a declaration of independence from bland snacks. It’s a commitment to crispy, savory satisfaction.
Think of the possibilities! Movie nights elevated to gourmet status. Lunchboxes transformed into treasure chests of deliciousness. Afternoon snacking redefined. With these Homemade Cheese-Its, you’re not just making crackers; you’re crafting experiences.
Why Homemade Cheese-Its? (Besides the Obvious Cheesy Awesomeness)
Okay, so the main reason is obviously that they’re incredibly delicious. But there’s more to it than that!
- **Control Your Ingredients:** You know exactly what goes into these bad boys. No mystery additives or preservatives lurking in the shadows.
- **Flavor Freedom:** Want to kick up the heat with some chili powder? Go for it! Craving a more sophisticated flavor with smoked paprika? The world is your cheesy oyster!
- **Impress Your Friends (and Yourself):** Nothing says “I’m a culinary genius” like whipping up a batch of homemade crackers. Prepare for the compliments to roll in.
- **Therapeutic Baking:** Kneading dough is surprisingly stress-relieving. Plus, you get delicious crackers at the end. It’s a win-win!
The Secret to Cheesy Cracker Perfection: Ingredients
Now, let’s get down to the nitty-gritty: the ingredients. This isn’t just a “throw everything in a bowl and hope for the best” kind of situation. We’re aiming for cheesy perfection, so we need to be strategic.
- **Sharp Cheddar Cheese:** This is the star of the show, so don’t skimp! Go for a good quality, aged sharp cheddar. The sharper, the better. We want that bold, cheesy flavor to shine through.
- **All-Purpose Flour:** The foundation of our crackers.
- **Unsalted Butter:** Adds richness and helps create that flaky, melt-in-your-mouth texture. Make sure it’s cold!
- **Salt:** Enhances the cheesy flavor and balances the sweetness.
- **Cold Water:** The glue that holds everything together. Keep it ice cold for the best results.
- **Optional Seasonings:** Here’s where you can get creative! Garlic powder, onion powder, smoked paprika, cayenne pepper… the possibilities are endless!
Ingredient Swaps and Substitutions
- **Cheese:** While sharp cheddar is the classic choice, feel free to experiment with other hard cheeses like Gruyere, Parmesan, or even a blend!
- **Flour:** For a slightly healthier option, you can substitute up to half of the all-purpose flour with whole wheat flour.
- **Spices:** This is your chance to unleash your inner flavor artist! Consider adding a pinch of red pepper flakes for some heat, or a dash of dried herbs like rosemary or thyme for a more sophisticated flavor.
Crafting Your Cracker Masterpiece: The Method
Alright, now for the fun part! Time to transform those humble ingredients into crispy, cheesy goodness.
1. **Grate the Cheese: ** This is crucial. You want finely grated cheese so it incorporates evenly into the dough. I like to use a food processor for this step, but a box grater works just fine too.
2. **Combine Dry Ingredients: ** In a large bowl, whisk together the flour and salt.
3. **Cut in the Butter: ** Add the cold butter to the flour mixture and use a pastry blender (or your fingers) to cut it in until the mixture resembles coarse crumbs. This is key to creating a flaky texture.
4. **Add the Cheese: ** Toss the grated cheese into the flour mixture and combine well.
5. **Add Water: ** Gradually add the cold water, mixing until the dough just comes together. Be careful not to overmix!
6. **Chill the Dough: ** Wrap the dough in plastic wrap and chill for at least 30 minutes. This allows the gluten to relax and makes the dough easier to roll out.
7. **Roll Out the Dough: ** On a lightly floured surface, roll out the dough to a very thin rectangle (about 1/8 inch thick). The thinner, the crispier!
8. **Cut into Squares: ** Use a pizza cutter or a sharp knife to cut the dough into small squares.
9. **Poke with a Fork: ** This prevents the crackers from puffing up too much in the oven.
10. **Bake: ** Bake in a preheated oven at 350°F (175°C) for 12-15 minutes, or until golden brown and crispy.
11. **Cool: ** Let the crackers cool completely on a wire rack before devouring them.
Troubleshooting Your Cheese-Its
- **Crackers aren’t crispy enough:** Make sure you’re rolling the dough out thin enough and baking them long enough. You can also try increasing the oven temperature slightly.
- **Crackers are too puffy:** Make sure you’re poking them with a fork before baking. You might also be overmixing the dough.
- **Crackers are too dry:** You may have added too much flour. Try adding a little more water to the dough next time.
Tips for Crispy, Cheesy Perfection
The secret to truly amazing Homemade Cheese-Its lies in a few key techniques.
- **Keep Everything Cold:** Cold ingredients are essential for creating a flaky, tender cracker. Make sure your butter and water are ice cold.
- **Don’t Overmix the Dough:** Overmixing develops the gluten in the flour, which can result in tough crackers. Mix just until the dough comes together.
- **Roll the Dough Thin:** The thinner the dough, the crispier the crackers. Aim for about 1/8 inch thick.
- **Watch Carefully While Baking:** Crackers can go from golden brown to burnt in a matter of minutes. Keep a close eye on them while they’re baking.
- **Let Them Cool Completely:** This is crucial for achieving maximum crispness.
Perfecting the Cooking Process

To maximize efficiency, preheat your oven while chilling the dough. This ensures the oven is ready as soon as you’ve cut the crackers, streamlining the baking process for perfectly timed cheesy snacks.
Add Your Touch
Consider experimenting with different cheese types, like pepper jack for a spicy kick, or adding a sprinkle of everything bagel seasoning before baking. These simple tweaks can elevate your Homemade Cheese-Its.
Storing & Reheating
Store your Homemade Cheese-Its in an airtight container at room temperature for up to a week. To maintain their crispness, avoid storing them in humid environments, but reheating is generally unnecessary.
- **Use a food processor:** This will make grating the cheese and cutting in the butter much easier and faster.
- **Sprinkle with coarse sea salt:** This adds a lovely texture and enhances the cheesy flavor even further.
- **Experiment with different shapes:** Get creative and use cookie cutters to create fun and festive cracker shapes.
(Personal anecdote)
My family devoured a batch of these in under 10 minutes flat during a movie night. The only regret was that I hadn’t made a double batch! They’ve become a staple in our house.
Conclusion for Homemade Cheese-Its
Making Homemade Cheese-Its is a fun and rewarding experience that delivers a superior snack compared to anything you can buy in the store. You can control the ingredients, customize the flavor, and enjoy the satisfaction of creating something delicious from scratch. These cheesy crackers are easy to make, customizable, and perfect for any occasion. So, ditch the store-bought stuff and embrace the cheesy goodness of Homemade Cheese-Its. Get baking, and prepare to be amazed!
Print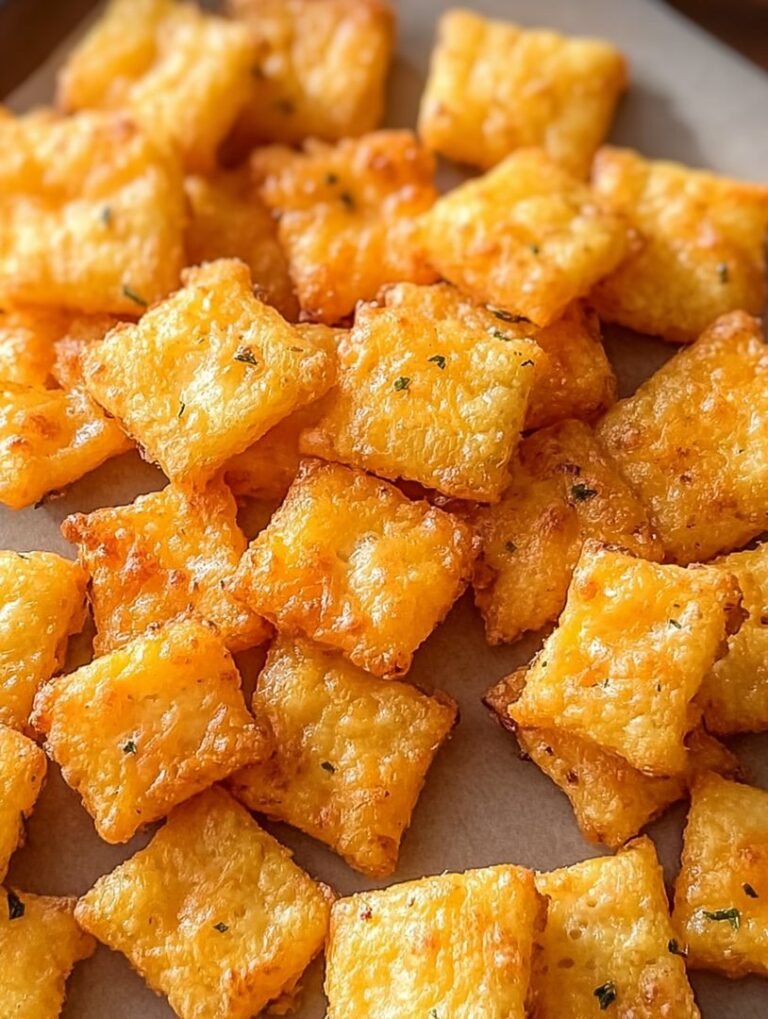
Homemade Cheese-Its
Delicious homemade cheese-its recipe with detailed instructions and nutritional information.
- Total Time: 35 minutes
- Yield: 4 servings 1x
Ingredients
- 1 cup all-purpose flour
- 4 ounces (1 stick) cold unsalted butter, cubed
- 4 ounces sharp cheddar cheese, finely grated
- 1/4 teaspoon salt
- 1/4 teaspoon paprika
- 2 tablespoons ice water
- Coarse sea salt, for sprinkling (optional)
Instructions
- Step 1: In a food processor, combine the flour, butter, cheddar cheese, salt, and paprika. Pulse until the mixture resembles coarse crumbs.
- Step 2: With the food processor running, slowly add the ice water until the dough just comes together. Do not overmix.
- Step 3: Turn the dough out onto a lightly floured surface and form it into a disk. Wrap the dough in plastic wrap and refrigerate for at least 30 minutes.
- Step 4: Preheat oven to 375°F (190°C). Line a baking sheet with parchment paper.
- Step 5: On a lightly floured surface, roll out the dough to about 1/8 inch thickness. Use a knife or pizza cutter to cut the dough into small squares (about 1 inch). Transfer the squares to the prepared baking sheet.
- Step 6: Using a toothpick or skewer, poke a hole in the center of each square. Sprinkle with coarse sea salt, if desired. Bake for 12-15 minutes, or until golden brown around the edges. Let cool completely on the baking sheet before serving.
Notes
- Store cooled Cheese-Its in an airtight container at room temperature for up to a week.
- To re-crisp slightly softened Cheese-Its, warm them in a 300°F oven for a few minutes.
- Serve these tasty little squares with a bowl of tomato soup for dipping.
- For extra cheesy flavor, use an extra-sharp cheddar and be sure to grate it very finely before mixing.
- Prep Time: 15 minutes
- Cook Time: 20 minutes
- Method: Stovetop
- Cuisine: American
FAQs
Are Homemade Cheese-Its difficult to make?
Absolutely not! If you can mix ingredients and wield a rolling pin (or even just push dough around with your hands, no judgment here!), you can conquer these cheesy squares. Don’t let the word “homemade” intimidate you. This recipe is surprisingly simple and straightforward, perfect for beginner bakers or seasoned pros looking for a fun, cheesy project. Forget complicated pastries; we’re talking cheesy goodness in easily achievable steps. Prepare for a rewarding baking experience that ends with a mountain of addictively delicious cheese crackers.
Can I customize the flavor of these Homemade Cheese-Its?
Oh, absolutely! The basic recipe is a blank canvas for your cheesy desires. Want a spicier kick? Add a pinch of cayenne pepper or some smoked paprika. Yearning for a more savory flavor? Try adding some garlic powder or onion powder. Feel free to experiment with different types of cheeses too! A blend of cheddar and parmesan, or even a touch of Gruyere, can take your Homemade Cheese-Its to the next level. Don’t be afraid to get creative and make them truly your own. It’s your cheesy kingdom; rule it with flavor!
How do I store these incredible Homemade Cheese-Its?
Storing these cheesy delights is simple but crucial (if they last that long!). Once completely cooled, stash them in an airtight container at room temperature. They’ll stay delightfully crisp for about a week, though honestly, they’ll probably disappear much faster. If you live in a particularly humid climate, adding a desiccant packet to the container can help maintain their crunch. Just be sure to keep them out of direct sunlight and away from any moisture. Properly stored, these Homemade Cheese-Its will be your anytime snack savior!
What do I serve with these Homemade Cheese-Its?
These Homemade Cheese-Its are incredibly versatile! They’re fantastic on their own for a quick and satisfying snack. Serve them with a bowl of your favorite soup for a comforting lunch. They’re also perfect for cheese boards, adding a delightful crunch and cheesy flavor to your spread. Pair them with hummus, guacamole, or your favorite dips. Or, if you’re feeling fancy, crumble them over a salad for an extra cheesy boost. The possibilities are endless! Let your creativity guide you and enjoy these Homemade Cheese-Its in countless ways.


Leave a Comment