

Remember the heartbreak? That moment you flip a delicate, lacy circle of batter, only to watch it crumble tragically back into the pan. We are done with crepe failures. We’re chasing that perfect, thin, buttery whisper of dough, perfectly pliable and ready for endless fillings. This recipe for amazingGluten Free Crepesensures you achieve breakfast perfection every time, ditching the typical flour angst for pure, golden, effortless deliciousness. They truly are the ideal treat.
- Effortlessly achievable, thin batter that spreads easily across the pan, drastically simplifying your morning cooking routine.
- Rich, slightly sweet flavor profile, offering a perfect neutral canvas for savory chicken fillings or decadent chocolate hazelnut spreads.
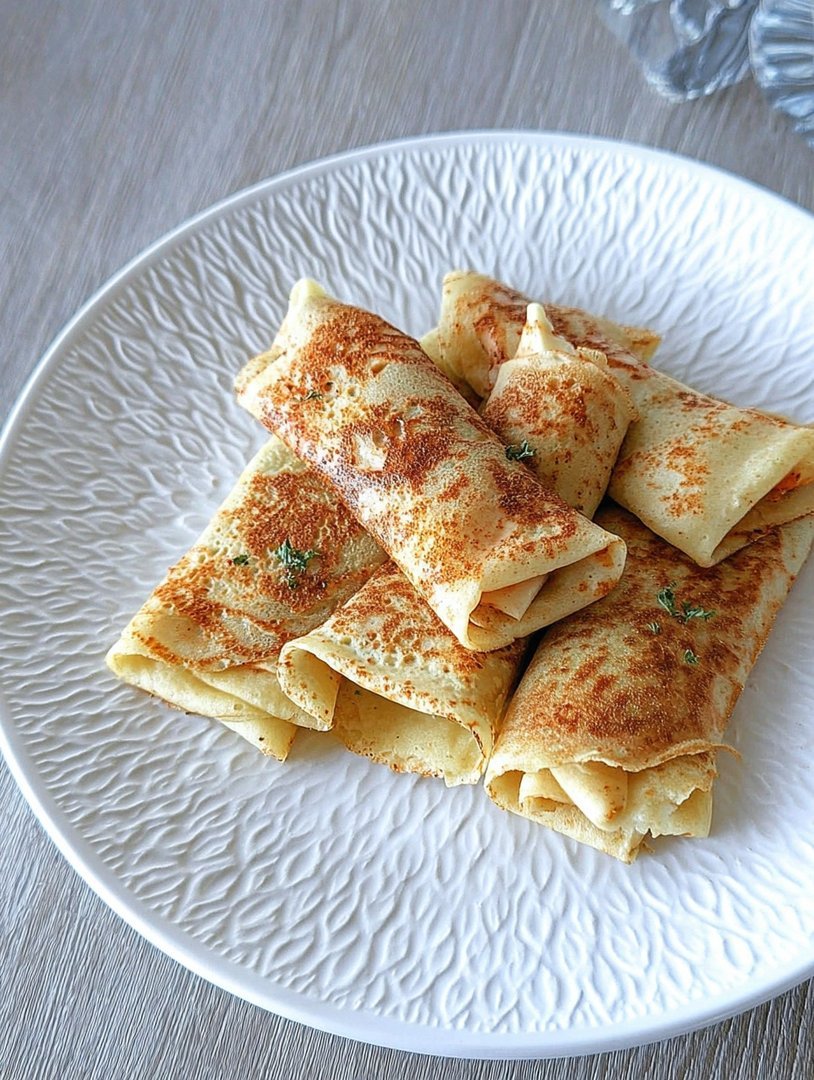
- Achieve that signature golden-brown, lacy edge and delicate texture, making these thin pancakes look professionally prepared and utterly tempting.
- Incredibly versatile foundation suitable for breakfast, dessert, or a sophisticated dinner, utilizing fruit, cream, or lean ground turkey.
The Quest for the Perfect Non-Crumbly Batter
When you attempt to make crepes without traditional wheat flour, you are essentially asking your ingredients to perform a magic trick without their main stage assistant: gluten. Gluten provides the stretchy structure that allows you to swirl, flip, and fold the crepe without it collapsing into a sad pile of shrapnel. Standard gluten-free flour blends often produce a result that is either too gritty or frustratingly gummy, leaving you feeling defeated before brunch even begins.
I spent years perfecting this recipe, mostly because I love crepes but despise frustration. My early attempts resulted in what my husband affectionately called “rice paper casualties”—crepes so brittle they shattered upon contact. The secret, it turns out, is a balanced combination of moisture, fats, and a tiny structural assistant. We are not just substituting flour; we are rebuilding the entire molecular architecture of the thin pancake. Using dairy products and a specific starch (like tapioca or cornstarch) is non-negotiable for achieving that essential elasticity and delicate, melt-in-your-mouth texture.
The batter preparation isn’t just mixing; it’s a careful orchestration designed to allow the starches to hydrate fully, which is crucial for preventing tears during cooking. If you rush this step, you risk dry, brittle edges. If you get it right, you end up with golden, pliable envelopes ready to cradle anything from fresh berries and whipped cream to savory fillings involving seasoned ground beef or creamy ricotta. Don’t worry about needing specialized equipment; a simple blender or immersion stick makes the mixing process quick and completely lump-free. Just remember the fundamental rule of crepe making: patience is the primary ingredient.
Choosing the Right Gluten-Free Flour Blend
The quality of your finalGluten Free Crepeshinges significantly on the flour blend you choose. Not all gluten-free blends are created equal. Avoid blends that rely heavily on bean flours, as these can impart a distinct, sometimes heavy flavor. Look for blends marketed as “all-purpose” that contain a mix of rice flour (white or brown), potato starch, and tapioca starch. The tapioca starch is a key player here, mimicking some of the stretchiness typically provided by wheat flour, which gives the crepe its necessary flexibility.
If your chosen blend does not contain a binder like xanthan gum, you must add a small amount—a half teaspoon per cup of flour is usually sufficient. Without this binder, the crepes will absolutely fall apart when you attempt to flip them. Think of xanthan gum as the invisible scaffolding holding the delicate structure together. When you combine the right blend with adequate rest time, you guarantee a smooth, homogenous batter that delivers perfect, lacy results every time you pour it onto the hot pan.
The Importance of the Chill Cycle
I know, I know. You are excited, and you want crepesnow. However, ignoring the chill time is the single greatest mistake you can make when preparing gluten-free batter. Once the ingredients are fully blended—until they look smooth like heavy cream—you must refrigerate the batter for at least 30 minutes, though an hour is ideal. Why the enforced nap?
This rest period allows the starches in the gluten-free flour to fully absorb the liquid. If you cook the batter immediately, the flour hasn’t had time to hydrate properly, resulting in thick, uneven crepes that stick fiercely to the pan because the liquid separates too quickly. When chilled, the batter thickens slightly and the proteins settle, ensuring consistent flow and even browning. Think of it as mandatory meditation for your batter; it comes out calm, composed, and ready to perform flawlessly under pressure.
Ingredients for Gluten Free Crepes
Here’s what you’ll need to make this delicious dish:
- Gluten-Free All-Purpose Flour BlendChoose a high-quality blend that includes a mix of starches and rice flour; ensure it contains xanthan gum or plan to add it separately.
- EggsUse large eggs at room temperature, which integrate into the batter more smoothly than cold eggs, aiding in emulsification.
- MilkWhole milk is recommended for richness, but any dairy or non-dairy equivalent like almond milk works well, though it may slightly affect the final texture.
- Melted Unsalted Butter or Neutral OilProvides necessary fat for richness and pliability; if using butter, melt it slowly and allow it to cool slightly before adding to the mix.
- Granulated SugarJust a tablespoon to enhance the flavor without making the crepes overly sweet, making them suitable for savory applications too.
- SaltA pinch of fine sea salt is essential to balance the sweetness and amplify the overall flavor profile of the delicate dough.
- Vanilla Bean Paste (Optional)Highly recommended for sweeter crepes, adding a warm depth of flavor that complements fruit and chocolate fillings beautifully.
The full ingredients list, including measurements, is provided in the recipe card directly below.
How to Make Gluten Free Crepes
Follow these simple steps to prepare this delicious dish:
Step 1: Create the Liquid Base
In a large bowl, whisk together the eggs, milk, and vanilla bean paste until completely combined. Alternatively, use a high-speed blender for ultimate smoothness. Ensure your eggs are not straight from the refrigerator for best results.
Step 2: Incorporate Dry Ingredients
In a separate bowl, whisk together the gluten-free flour blend, sugar, and salt. Gradually add the dry mixture to the wet mixture, whisking constantly to prevent lumps. If you are using a blender, simply pulse until the batter is smooth. Scrape down the sides of the blender bowl to ensure all flour is incorporated.
Step 3: Add Fat and Chill the Batter
Stream in the cooled melted butter or oil and whisk until fully incorporated. The batter will be very thin, similar to heavy cream. Cover the bowl with plastic wrap or transfer the batter to a container, and refrigerate for a minimum of 30 minutes. This mandatory rest time is non-negotiable for flexible, non-sticking crepes.
Step 4: Prepare and Heat the Pan
Place an 8-inch nonstick crepe pan or skillet over medium heat. Lightly grease the pan with a tiny bit of butter or oil, wiping away any excess with a paper towel. The pan must be consistently hot before adding the batter, but not smoking, to achieve an even golden color.
Step 5: Pour and Swirl
Pour about 1/4 cup of the chilled batter into the center of the hot pan. Immediately lift the pan and tilt it in a circular motion, swirling the batter until it thinly coats the entire bottom surface. Return the pan to the heat and cook for about 60 to 90 seconds until the edges look dry and slightly brown.
Step 6: Flip and Finish
Gently slide a thin spatula underneath the crepe and flip it carefully. Cook the second side for only about 30 seconds, just until lightly browned spots appear. Slide the finished crepe onto a plate. Cover the stack with a clean kitchen towel to keep them warm and moist while you continue cooking the remaining batter.
Transfer the finished crepes to plates and fill immediately with your chosen sweet or savory ingredients for the perfect finishing touch.
Filling and Serving Suggestions
The true joy of making delicate crepes is their adaptability. Because the base recipe is light and mildly sweet, these thin pancakes work equally well for all three meals of the day. Choosing the filling can be the hardest part, but here are some inspiration points to get your culinary creativity flowing.
Sweet Ideas for Breakfast or Dessert
For a classic French-style dessert, spread a thin layer of hazelnut chocolate spread across the warm crepe, fold it into a triangle, and dust generously with powdered sugar. If you prefer fruit, warm some frozen mixed berries with a splash of orange juice and a bit of brown sugar until syrupy, then spoon the mixture into the center and top with fresh whipped cream or vanilla bean ice cream. For a lighter touch, a simple squeeze of fresh lemon juice and a scattering of sugar is surprisingly refreshing. If you want a more luxurious feel, try filling them with sweet ricotta cheese blended with orange zest and a touch of maple syrup.
Savory Options for Lunch or Dinner
Crepes are often overlooked as a savory main course, but they excel in this role. You need hearty, moisture-rich fillings that won’t make the delicate wrappers soggy. A fantastic option is a rich, creamy chicken and mushroom filling. Sauté thinly sliced chicken breast strips with garlic, thyme, and cremini mushrooms, then bind the mixture with a light béchamel sauce or a dairy-free cream sauce. Spoon the filling down the center, roll the crepe like an enchilada, and optionally bake briefly with a light dusting of parmesan-style vegan cheese alternative.
Another excellent savory choice is a ground beef mixture seasoned with smoked paprika and mild chilis, perhaps mixed with a bit of corn and bell peppers. This creates a satisfying, hearty wrap that feels far more decadent than its preparation suggests. Remember to keep the fillings moist but not overly liquid, ensuring they complement the thin, ethereal texture of theGluten Free Crepesbeautifully.
The first time I attempted to make crepes, the results were less “delicate French pastry” and more “leathery breakfast coaster.” They were thick, brittle, and frankly, offensive to the culinary arts. Then came the added challenge: mastering the art of theGluten Free Crepes. This wasn’t just about substituting flour; it was about retraining the entire physics of the batter. Gluten-free flours, bless their heart, often lack the elasticity needed to create that signature thin, pliable sheet that can cradle a mountain of berries or a rich savory filling.
For months, I waged a quiet war against tapioca starch and rice flour. I endured broken crepes, gummy crepes, and even one batch so dense they bounced off the counter—a true testament to their resilience, if not their edibility. My family started hiding when they saw me pull out the whisk, fearing another round of experimental breakfast failures. But failure, as they say, is just an ingredient waiting to be fixed. What I eventually discovered was that making these delicate pancakes without wheat requires two critical components: proper hydration time and a perfect blend of alternative flours that mimic gluten’s stretch.
I finally settled on a combination of white rice flour and tapioca starch, bound together with just the right amount of egg and milk. The key is balance, creating a batter that pours like thin cream but doesn’t tear when you flip it. Forget those complicated pre-mixes; this recipe is simple, utilizing readily available ingredients, and it produces a stack of golden, lacy delights that will make even the most die-hard traditionalist swear they don’t miss the wheat.
The Essential Ingredients for Gluten Free Crepes
You probably have most of these items hiding in your pantry right now. The magic really lies in the ratios and the resting period, which we will discuss in detail. Do not skimp on the resting—it’s non-negotiable if you want perfection.
- 1 cup milk (dairy or preferred plant-based alternative)
- 3 large eggs
- 2 tablespoons melted unsalted butter (or refined coconut oil for dairy-free)
- 1 teaspoon pure vanilla bean paste
- ½ cup white rice flour (must be finely ground)
- ¼ cup tapioca starch (also known as tapioca flour)
- 1 tablespoon granulated sugar
- ¼ teaspoon fine salt
- Extra butter or oil for the pan
Whipping Up the Flawless Batter
Making the batter is almost too simple, which is often where people get impatient. Resist the urge to use it immediately. Think of this batter as a sleepy teenager; it needs time to wake up and perform properly.
- In a large bowl, whisk together the milk, eggs, melted butter, and vanilla bean paste until fully combined and slightly frothy.
- In a separate bowl, whisk together the dry ingredients: rice flour, tapioca starch, sugar, and salt. This step prevents clumps from forming when mixing with the wet ingredients.
- Gradually pour the wet ingredients into the dry mixture, whisking constantly until the batter looks smooth and homogenous. It should be very thin, like heavy cream.
- Crucially, cover the bowl and refrigerate the batter for at least one hour, and preferably up to two hours. This hydration period allows the starches to absorb the liquid fully, preventing breakage during cooking and resulting in those flexible, delicateGluten Free Crepeswe are aiming for.
The Art of the Swirl and Flip
This is where the excitement happens. Using the right pan is half the battle. A dedicated 8-inch non-stick skillet or a proper crepe pan works best. Ensure the pan is properly heated before adding any batter.
- Heat your pan over medium heat. Add a tiny knob of butter or a spray of oil. Wipe excess grease with a paper towel—you want a very thin coating.
- Once the pan is hot (a drop of water should sizzle instantly), remove it from the heat momentarily. Pour ¼ cup of batter into the center.
- Immediately tilt and swirl the pan quickly in circular motions until the batter thinly and evenly coats the entire bottom surface.
- Return the pan to the heat. Cook for 1 to 2 minutes, or until the edges begin to look dry and lift easily from the pan. The top surface should look set and slightly matte.
- Carefully slide a thin spatula underneath the crepe and flip it. Cook for another 30 to 60 seconds on the second side, just until lightly golden.
- Slide the finished crepe onto a plate. Repeat the buttering and cooking process, stacking the finished crepes to keep them warm. Serve immediately with your favorite fillings!
The Accidental Discovery of Sunshine on a Plate

I accidentally left the batter resting in the fridge for six hours instead of the recommended thirty minutes. When I finally poured it, the resulting thin pancakes were incredibly tender and flexible—not a single tear! It was a moment of unexpected culinary brilliance that tasted like pure sunshine.
Perfecting the Cooking Process
Whisk the batter first, ensuring it rests for at least one hour to hydrate the flours fully. While the batter chills, prepare all your fillings, whether sweet fruit preserves or savory beef mixtures. Cooking is fast: heat the pan, butter lightly, pour, swirl quickly, and flip precisely when the edges look dry.
One common mistake people make is using a pan that isn’t hot enough. If the pan is merely warm, the batter won’t set instantly, leading to a doughy or uneven texture. You want that quick flash-cook that gives the crepes their signature lacy edges and delicate structure. Using high-quality vanilla bean paste also elevates the flavor profile dramatically, especially when serving these simply dusted with powdered sugar and lemon juice. Remember, patience in the resting period pays off tenfold in the final product. If your first crepe is a disaster, do not despair! The first one is always sacrificed to the “heat calibration gods.” Adjust your heat, try again, and the subsequent crepes will likely be flawless.
Savory Fillings & Flavor Enhancements
While sweetGluten Free Crepesare divine with lemon curd and fresh raspberries, these delicate rounds handle savory preparations beautifully. For dinner, try filling them with shredded rotisserie chicken mixed with mild, creamy cottage cheese and finely chopped spinach. Roll them up tightly, top them with a light béchamel sauce, and bake them until bubbling. Alternatively, sauté finely ground beef with onions, mushrooms, and rich beef broth seasoned with thyme, then roll this mixture inside the crepes. These substitutions ensure the dish remains hearty and satisfying without sacrificing adherence to dietary needs.
Add Your Touch
TheseGluten Free Crepesare wildly versatile. Swap half a cup of the milk for strong, chilled black coffee for a mocha twist. For savory options, incorporate dried herbs like thyme or chives directly into the batter before resting. Fill them with shredded turkey and a creamy white sauce for a quick dinner.
If you prefer a slightly denser, more substantial crepe, you can substitute a few tablespoons of the rice flour with certified gluten-free oat flour. This adds a subtle nuttiness and increased structure. For a beautifully golden color, increase the amount of vanilla slightly, or if you want a subtle citrus aroma, add a tablespoon of fresh orange juice to the batter mixture. Remember, the goal is always a smooth, thin consistency, so adjust liquid quantities as needed if you make substitutions in the dry ingredients.
Storing & Reheating
Stack cooled crepes between layers of parchment paper, seal them tightly in an airtight container, and refrigerate for up to four days. To reheat, warm them gently in a dry nonstick pan for 30 seconds per side, or microwave them briefly, covered with a damp paper towel to prevent drying.
I once had a friend who claimed she could never make a thin pancake. I showed her this method, and she now makes them every Sunday, often prepping large batches and freezing them. To freeze, simply stack the parchment-separated crepes in a freezer bag and thaw them overnight in the fridge before reheating. They maintain their excellent texture perfectly, making them ideal for quick weekday breakfasts or spontaneous dessert cravings.
-
Ensure your pan is sizzling hot before pouring the batter; instant setting is essential for lacy edges and preventing the crepes from sticking or becoming gummy.
-
Use a full ¼ cup measuring scoop every time for uniformity, and swirl quickly and deliberately to achieve the thinnest possible layer of batter.
-
If your batter seems too thick after resting, stir in an extra tablespoon of milk until it achieves the consistency of thin, runny cream—this avoids tearing.
My grandmother, who insists nothing beats a traditional wheat crepe, tasted these and immediately asked for the recipe. That was the highest culinary compliment I could ever receive, validating all those frustrating hours of trial and error in the kitchen.
Conclusion for Gluten Free Crepes
Mastering the art ofGluten Free Crepesrequires abandoning traditional wheat expectations and embracing the magic of hydration and precise technique. We learned that the long rest time in the fridge is key, allowing the rice and tapioca flours to fully absorb the liquids, resulting in a batter that is thin, elastic, and resistant to tearing. Whether you fill them with tangy lemon curd, fresh seasonal fruit, or savory beef and mushroom filling, these crepes offer a light, delightful foundation. By focusing on consistent heat and that essential pan-swirl motion, you will easily achieve stacks of perfect, delicate circles. This recipe proves that going wheat-free doesn’t mean sacrificing the delicate joy of a truly spectacular French pancake.
Print
Gluten Free Crepes
Achieve flawless, delicate gluten-free crepes using our simple whisk-and-blend technique. Three large eggs ensure maximum flexibility, while melted butter adds richness.
- Total Time: 35 minutes
- Yield: 4 servings
Ingredients
- Gluten-free all-purpose flour blend (with xanthan gum): 1 cup
- Milk (dairy or non-dairy substitute): 1 1/2 cups
- Large eggs: 3
- Unsalted butter, melted and cooled: 2 tablespoons
- Granulated sugar: 1 tablespoon
- alcohol-free vanilla extract: 1 teaspoon
- Salt: 1/4 teaspoon
Instructions
- Step 1: Combine the wet ingredients (eggs, milk, melted butter, and vanilla powder) in a medium bowl or the jar of a blender, whisking until well combined.
- Step 2: In a separate bowl, whisk together the gluten-free flour, sugar, and salt. Gradually add the dry mixture to the wet mixture, whisking until a smooth, thin batter forms without any visible lumps.
- Step 3: Cover the bowl or blender container and refrigerate the batter for at least 30 minutes (up to 2 hours); this resting period is crucial for the gluten-free flours to properly hydrate and prevent tearing.
- Step 4: Heat an 8-inch non-stick skillet or crepe pan over medium heat. Lightly coat the pan with a small amount of butter or cooking spray. Pour 1/4 cup of the batter into the center of the hot pan, immediately tilting and swirling the pan quickly to spread the batter thinly and evenly.
- Step 5: Cook the crepe for 1 to 2 minutes until the edges are golden brown and the surface looks dry. Gently slide a thin spatula underneath and flip the crepe, cooking the second side for only about 30 seconds.
- Step 6: Remove the finished crepe to a plate and repeat the process with the remaining batter, lightly greasing the pan between every few crepes. Serve immediately with your preferred fillings.
Notes
- For maximum flexibility and to prevent tearing, ensure your batter rests for the full 30 minutes, allowing the gluten-free flour and xanthan gum to hydrate completely before hitting the pan.
- Store leftover cooled crepes stacked between sheets of parchment paper in an airtight container; they will keep well in the refrigerator for up to three days or can be frozen for up to two months.
- To reheat, place a small stack of crepes loosely wrapped in foil in a 300°F oven for about seven minutes, or flash-warm them individually in a dry skillet for 15 seconds per side.
- Try serving these delicate crepes French style: spread generously with berry jam and a touch of crème fraîche, then fold them into quarters before serving.
- Prep Time: 15 minutes
- Cook Time: 20 minutes
- Method: Stovetop
- Cuisine: American


Leave a Comment