

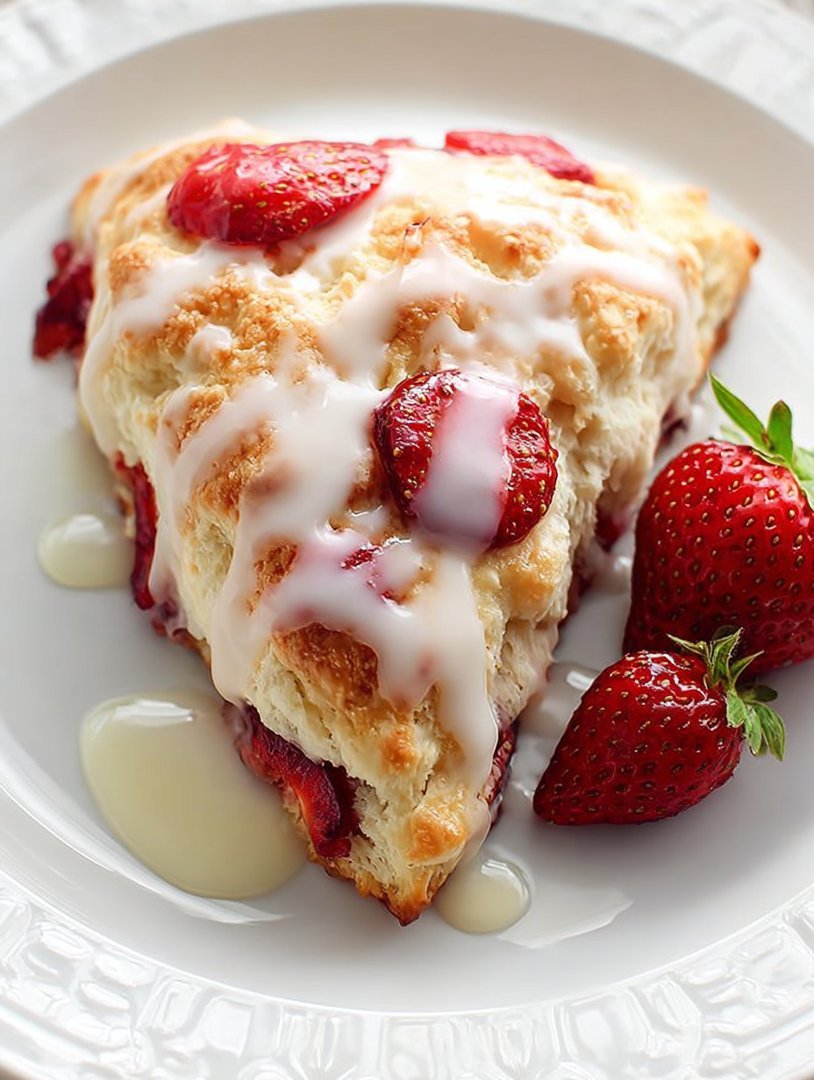
When the oven heat hits the kitchen air, and that sweet, buttery aroma starts wafting around, you know magic is happening. Forget fancy pastries; the real star of any brunch is a simple, rustic bite that tastes like pure sunshine and nostalgia all rolled into one delightful package. There is nothing quite like biting into a tender, crumbly crust followed by bursts of juicy fruit, warm and comforting right out of the oven. Today, we conquer the kitchen challenge and learn how to make the most magnificentFresh Strawberry Sconesyou’ve ever encountered, perfect for your next lazy weekend brunch or afternoon tea party.
- Effortlessly simple dough preparation makes this recipe perfect for beginner bakers looking for impressive, satisfying results.
- The perfect balance of flaky, tender texture and sweet, tart strawberry bursts creates an unforgettable flavor profile that is utterly addicting.
- Achieve that wonderfully rustic, craggy top and beautiful golden hue that makes these baked treats look like they belong in a gourmet bakery display.
- These delightful fruit-studded biscuits are incredibly versatile, pairing beautifully with morning coffee, afternoon tea, or even a dollop of clotted cream.
The Scone Saga: Why These Are the Best
I must confess, for years I avoided making scones. They seemed like the fussy cousins of biscuits, prone to dryness, demanding too much precision, and generally judgmental about my life choices. I believed scones were strictly reserved for formal tea parties involving tiny sandwiches and perhaps a mild fear of spilling something on the good china. But then I realized the glorious, fundamental truth: a proper scone is nothing more than a glorified vehicle for butter and fresh fruit, requiring minimal fuss and maximum flavor payoff.
The secret to unlocking the true potential of these tender baked triangles is embracing the rustic quality. We are not aiming for smooth perfection; we want craggy edges, peaks and valleys of buttery goodness, and dough that looks like it just survived a minor kitchen brawl. This recipe avoids the pitfalls of tough, hockey-puck textures by focusing on temperature and minimal handling. We want light, airy interiors and deeply golden exteriors, guaranteeing that every bite collapses beautifully rather than resisting your teeth.
Mastering the Cold Butter Technique
If you take one piece of advice from this entire scone saga, let it be this: cold, cold, cold. The butter must be absolutely frigid, almost painfully so. Why this obsession with temperature? When cold butter pieces melt rapidly in the hot oven, they release steam, creating tiny pockets of air within the dough structure. This results in that hallmark flaky, layered texture that defines a perfect scone. If the butter is too warm, it mixes entirely into the flour, resulting in a dense, cake-like texture that misses the point entirely. I often recommend grating frozen butter directly into the flour mixture, which ensures uniform distribution and guarantees the butter stays cold throughout the mixing process. Think of the butter as tiny architects building little steam ovens inside your pastry—don’t melt the builders before they start the job!
Beyond the butter, the liquid component—heavy cream or buttermilk—also needs to be chilled. Work quickly, integrating the liquid until the dough just comes together, shaggy and messy. Over-mixing activates the gluten, and activated gluten is the enemy of tenderness. If you look at your dough and think, “That looks slightly under-mixed,” you’ve probably nailed it. Resist the urge to knead it into submission; gentle shaping is key to preserving those lovely butter pockets.
Ingredients for Fresh Strawberry Scones
Here’s what you’ll need to make this delicious dish:
- All-Purpose FlourThe foundation of our scones; ensure it is properly measured by spooning it lightly into the measuring cup and leveling off.
- Granulated SugarProvides necessary sweetness and helps tenderize the dough, balancing the tartness of the berries.
- Baking Powder and SaltThe crucial leavening agents; baking powder ensures a high rise, while salt balances the overall flavors.
- Unsalted ButterMust be frozen or extremely cold and cut into small cubes; this is essential for achieving a flaky texture.
- Heavy Cream or ButtermilkNeeds to be cold; provides richness and necessary moisture to bind the dough without overdeveloping the gluten.
- Fresh StrawberriesUse firm, ripe strawberries, washed, hulled, and diced into small, uniform pieces (no larger than a blueberry).
- Vanilla Powder (optional)A small amount enhances the overall flavor profile of the pastry.
The full ingredients list, including precise measurements, is provided in the recipe card directly below.
How to Make Fresh Strawberry Scones
Follow these simple steps to prepare this delicious dish:
Step 1: Prepare the Dry Ingredients and Oven
Preheat your oven to 400°F (200°C). Line a baking sheet with parchment paper. In a large mixing bowl, whisk together the flour, granulated sugar, baking powder, and salt. Make sure the dry ingredients are thoroughly combined to ensure even leavening throughout the dough.
Step 2: Incorporate the Cold Butter
Cut the extremely cold butter into the dry mixture. You can use a pastry blender, two forks, or your fingertips for this step. Work quickly until the mixture resembles coarse crumbs with some pea-sized pieces of butter still visible. The key is to keep everything as cold as possible to maximize flakiness.
Step 3: Add the Cream and Berries
Pour in the cold heavy cream and vanilla powder. Use a wooden spoon or spatula to mix until the dough just starts to come together in shaggy clumps. Fold in the diced fresh strawberries gently. Do not overmix; the dough should look slightly dry and messy.
Step 4: Shape and Cut the Scones
Turn the dough out onto a lightly floured surface. Pat the dough gently into an 8-inch circle or square, about one inch thick. Using a sharp knife or a round cutter, cut the dough into 8 wedges (if circular) or 9 squares. For classic triangular scones, cut the circle into eight equal pieces.
Step 5: Bake Until Golden
Arrange the cut scones on the prepared baking sheet, ensuring they are placed about one inch apart. Brush the tops lightly with a little extra heavy cream for a deeper golden color and sprinkle with coarse sugar, if desired. Bake for 16 to 20 minutes, or until the tops are beautifully golden brown and the centers are set. A toothpick inserted should come out clean.
Transfer the warmFresh Strawberry Sconesto a wire rack immediately to cool slightly before glazing.
Tips for Perfectly Tender Scones
Achieving a bakery-quality scone involves attention to a few crucial details that often separate the stellar from the merely satisfactory. Firstly, humidity plays a significant role in baking. If you live in a particularly humid climate, you might need to slightly reduce the amount of liquid—perhaps holding back one tablespoon of heavy cream until you see how the dough comes together. A sticky dough requires more flour during shaping, which subsequently toughens the final product, so err on the side of a drier mixture.
Another excellent tip is to avoid twisting the cutter if you are using a round biscuit cutter. Twisting seals the edges of the dough, which prevents the scones from rising straight up, resulting in slightly lopsided baked goods. Instead, press the cutter straight down firmly, lift it directly up, and reshape the remaining scraps only once or twice, using minimal handling. If you prefer the ease and traditional shape, cutting the dough into a circle and then into wedges minimizes handling entirely and guarantees those lovely rustic sides.
Finally, always ensure your strawberries are diced small. Large chunks of fruit release too much moisture too quickly, disrupting the structure and potentially leading to a soggy base. Aim for pieces roughly the size of a standard blueberry to maintain structural integrity while still delivering those necessary bursts of tart, sweet flavor. Allowing the scones to rest for ten minutes in the freezer after cutting, right before baking, can also shock the butter and further ensure an excellent rise.
The Ultimate Glaze Secret
While these beautiful strawberry biscuits are perfect served plain, a simple lemon glaze elevates them to an entirely new level of deliciousness. The glaze provides a beautiful sheen and a tangy counterpoint that cuts through the richness of the butter and the sweetness of the fruit. To achieve the perfect consistency, mix powdered sugar with freshly squeezed lemon juice and a touch of vanilla powder. Start with a very small amount of liquid, adding only half a teaspoon at a time, until the glaze is thick enough to coat the back of a spoon but still thin enough to drizzle luxuriously. Drizzle the glaze over the completely cooled scones—applying glaze to hot scones results in a runny, messy puddle, and nobody wants a sad, melting puddle for breakfast.
Once cooled and glazed, these delightful baked goods become an instant showstopper. Serve them slightly warm alongside a generous dollop of homemade strawberry jam or simply with a cup of strong, hot coffee. They are so satisfying and simple, proving once and for all that sometimes the best pastries are the ones that embrace a little messy, rustic charm.
The Accidental Discovery of Sunshine on a Plate

I stumbled upon this recipe during a catastrophic attempt at jam-making. The jam failed spectacularly, but I salvaged the gorgeous strawberries, desperately mixing them into a leftover biscuit dough. The result? These light, ethereal, delicious Fresh Strawberry Scones, proving sometimes kitchen chaos leads to breakfast brilliance.
The Scone Renaissance: Why Fresh Strawberry Scones Reign Supreme
Let us be honest, the word “scone” often conjures up images of dry, hockey-puck-like pastries that require a gallon of tea just to navigate. I spent years avoiding them, convinced they were merely biscuits that failed their life aspirations. But then I met the fresh strawberry scone, and everything changed. This is not your average, dusty cafe pastry; this is a transformative breakfast experience—a portable slice of summer.
Making outstanding scones fundamentally involves conquering fear and respecting butter. It is a balancing act between having incredibly cold ingredients and a very hot oven. Many bakers overwork the dough, chasing a smooth, perfect surface, but the secret to true scone success lies in embracing rustic imperfection. You want rugged edges and visible flecks of butter, which explode into magnificent, steamy pockets of air as they bake. When those pockets meet plump, juicy strawberries, lightly sweetened, you achieve what I call “Breakfast Nirvana.”
When the season hits, and strawberries are at their peak—vibrant, sweet, and bursting with flavor—you absolutely must harness that power. We are not using lifeless, frozen berries here; we are using the best the garden has to offer, turning simple ingredients into something genuinely spectacular. These Fresh Strawberry Scones manage to be flaky, tender, and moist all at once, offering a sophisticated counterpoint to the often overly sweet world of breakfast pastries. They demand respect, but they reward minimal effort with maximum flavor.
The Science of Fluffiness: Essential Ingredients
The magic happens when simple ingredients are kept exceptionally cold. Think of your butter as tiny, frozen construction workers waiting to create flaky layers. Do not compromise on quality here; using heavy cream over milk is the key to that rich, tender crumb. Ensure your strawberries are finely diced so they distribute evenly without adding excessive moisture to the delicate dough. If they are too large, they will disrupt the structure and prevent proper rising.
Here is what you will need for eight glorious Fresh Strawberry Scones:
-
2 1/2 cups all-purpose flour (plus extra for dusting)
-
1/2 cup granulated sugar
-
1 tablespoon baking powder
-
1/2 teaspoon salt
-
8 tablespoons (1 stick) unsalted butter, grated and frozen
-
1 cup heavy cream (plus 2 tablespoons for brushing)
-
1 teaspoon vanilla powder
-
1 cup fresh strawberries, finely diced
A Simple Guide to Baking Perfection
Before you start, preheat your oven to 400°F (200°C) and line a baking sheet with parchment paper. Remember, speed is your friend; the colder the ingredients stay, the better the scones will rise. This whole mixing process should take less than ten minutes to avoid melting the crucial butter.
Start by combining all the dry ingredients—the flour, sugar, baking powder, and salt—in a large mixing bowl. Whisk everything together thoroughly to ensure the leavening agent is evenly distributed. Next, incorporate the frozen, grated butter using a pastry blender or your fingertips. Work quickly until the mixture resembles coarse crumbs, similar to chunky sand. This step creates the pockets of steam needed for superior flakiness. Do not overmix; pea-sized butter chunks are exactly what you want.
In a separate small bowl, whisk together the heavy cream and vanilla powder. Create a well in the center of the flour and butter mixture, and pour in the cream mixture all at once. Stir only until the dough just barely comes together; it should still look shaggy and slightly dry in spots. Gently fold in the diced fresh strawberries, ensuring they are distributed throughout the dough without crushing them or overworking the mixture. Overmixing develops gluten, which results in tough, dense scones—the exact opposite of our goal.
Turn the dough out onto a lightly floured surface. Knead it gently only 4 or 5 times, just enough to bring the shaggy bits together into a cohesive mass. Pat the dough into an 8-inch circle that is about 1 1/4 inches thick. Use a sharp knife or a large cookie cutter to cut the circle into 8 wedges, like slices of a pizza. Place these wedges onto your prepared baking sheet, spacing them a couple of inches apart.
Brush the tops of the scones lightly with the reserved heavy cream. This ensures they achieve a beautiful, golden-brown crust. If desired, sprinkle a little extra granulated sugar on top for a delightful sparkle and crunch. Bake the Fresh Strawberry Scones for 15 to 18 minutes, or until they are puffed up and deep golden brown. Cool them slightly on a wire rack before serving. They are sublime warm, perhaps with a dollop of clotted cream or a simple drizzle of lemon icing.
Perfecting the Cooking Process
Achieving the best texture starts with freezing the grated butter before combining it with the dry ingredients. Mix gently, then fold in those vibrant Fresh Strawberry Scones additions quickly. Shape the dough, chill it briefly, and only then proceed to baking for maximum lift and flakiness.
Add Your Touch
Swap out the strawberries for blueberries or raspberries to customize your morning treat. For a touch of zing, add lemon zest to the dough, or drizzle a simple orange juice glaze on top after cooling. Try incorporating white chocolate chips for decadent sweetness.
Expert Tips for Scone Sovereignty
-
Always grate your butter and keep it frozen until the very last minute; this maximizes the flakiness potential in the finished pastry.
-
Use a sharp knife when cutting the dough rather than a dull one, which prevents smushing the layers and yields a higher rise.
-
If your kitchen is warm, consider chilling the shaped scones on the baking sheet for 15 minutes before baking, guaranteeing cold starts.
Storing & Reheating
Store cooled scones in an airtight container at room temperature for up to two days, though they are best consumed fresh. To reheat, wrap them in foil and warm them gently in a 300°F oven for five minutes to restore that wonderful, just-baked texture.
My grandmother, the toughest baking critic I know, swore these were better than anything from her favorite European bakery, which truly validated my accidental discovery.
Conclusion for Fresh Strawberry Scones
Embracing the simplicity of these Fresh Strawberry Scones means inviting true summer flavor into your kitchen, regardless of the season outside. The combination of cold, flaky dough and bursts of warm, sweet strawberry is unmatched by any other breakfast pastry. Remember, the key to success lies in minimal handling and maximum chilling, ensuring that the butter performs its magic in the oven. Do not fear the shaggy texture; it is the visual cue that you are on the path to perfect, towering scones. Whether enjoyed with coffee for a quick weekday treat or served as the centerpiece of a luxurious brunch, these flaky berry biscuits offer sunshine on a plate, proving that sometimes the best recipes are the ones born from delightful accidents.
Print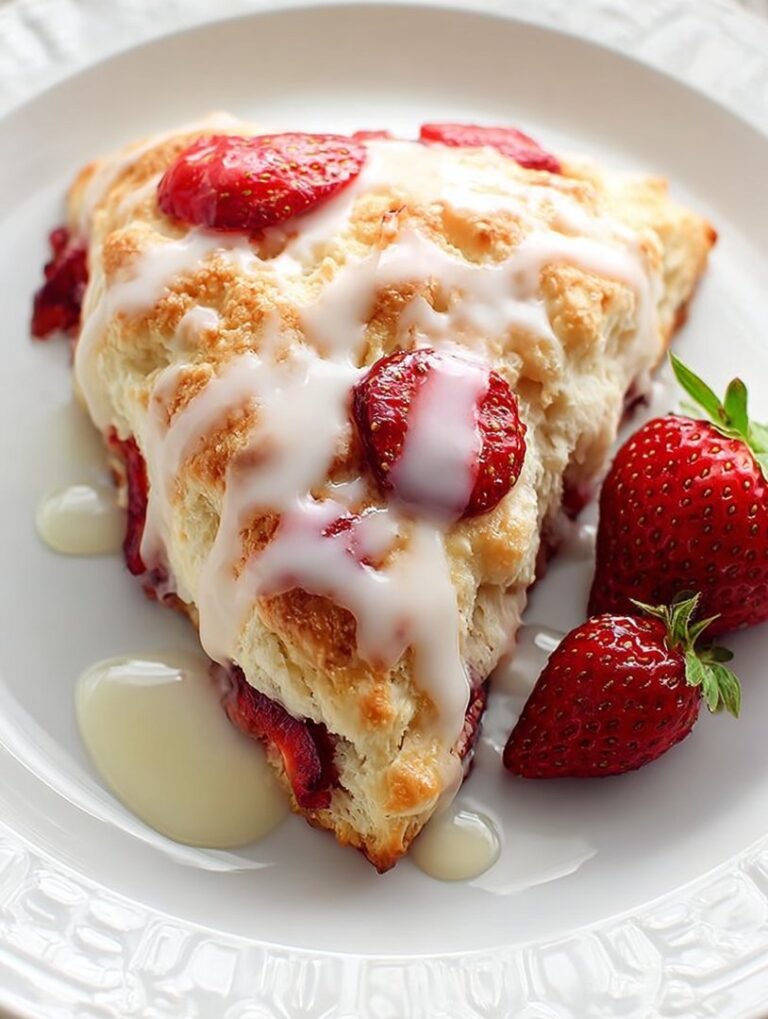
Fresh Strawberry Scones
Achieve that perfect crumb! These tender, buttery Fresh Strawberry Scones use ultra-cold butter cut into the flour base, creating the flakiest texture imaginable.
- Total Time: 35 minutes
- Yield: 4 servings 1x
Ingredients
- 2 cups all-purpose flour
- 1/4 cup granulated sugar, plus extra for topping
- 1 tablespoon baking powder
- 1/2 teaspoon salt
- 1/2 cup (1 stick) unsalted butter, very cold and cubed
- 1/2 cup heavy cream (or whole milk), plus 1 tablespoon for brushing
- 1 cup fresh strawberries, finely chopped
Instructions
- Step 1: Preheat your oven to 400°F (200°C) and line a baking sheet with parchment paper. In a large mixing bowl, whisk together the flour, granulated sugar, baking powder, and salt.
- Step 2: Add the cold, cubed butter to the dry ingredients. Use a pastry blender, two knives, or your fingertips to cut the butter into the flour mixture until the largest pieces are pea-sized and the mixture resembles coarse crumbs.
- Step 3: Pour in the 1/2 cup of heavy cream and mix gently with a fork or spatula until the dough just starts to come together. Do not overmix. Gently fold in the finely chopped fresh strawberries until evenly distributed.
- Step 4: Turn the dough out onto a lightly floured surface and pat it into an 8-inch circle about 1 inch thick. Cut the circle into 8 equal wedges (triangles) using a sharp knife or bench scraper.
- Step 5: Place the wedges on the prepared baking sheet. Brush the tops of the scones lightly with the remaining heavy cream and sprinkle with a touch of extra granulated sugar. Bake for 15–18 minutes, or until the tops are golden brown.
Notes
- Store cooled leftovers in an airtight container at room temperature for up to 2 days, or freeze baked scones for a grab-and-go treat.
- To revive day-old texture, warm the scones loosely tented in foil in a 300°F oven for 5-7 minutes until the crust is crisp again.
- These sweet treats are perfect served warm, split open, and topped simply with clotted cream or a bright lemon curd.
- Remember that cold is key: keep your butter extremely chilled, and try chilling the cut scones on the baking sheet for 10 minutes before baking for a higher rise.
- Prep Time: 15 minutes
- Cook Time: 20 minutes
- Method: Stovetop
- Cuisine: American


Leave a Comment