

Imagine biting into a slice of warm pie, the flaky crust shattering delicately in your mouth, releasing a burst of sweet, comforting filling. The aroma alone, a symphony of butter and warmth, is enough to transport you to a simpler time, perhaps a cozy kitchen filled with laughter and love.
This isn’t just about pie; it’s about creating memories, one delicious slice at a time. Our **easy homemade pie crust** recipe makes it easy for anyone to enjoy the satisfaction of crafting the perfect foundation for any pie filling, turning ordinary meals into extraordinary celebrations.
- Achieve a perfectly flaky and tender crust with minimal effort, even if you’re a baking novice.
- Enjoy a subtly buttery flavor that enhances, not overpowers, your favorite pie fillings.
- Impress your family and friends with a beautifully golden-brown crust that’s visually stunning.
- Customize this versatile recipe for sweet or savory pies, adapting it to your unique culinary desires.
Ingredients for Easy Homemade Pie Crust
Here’s what you’ll need to make this delicious dish:
The full ingredients list, including measurements, is provided in the recipe card directly below.
How to Make Easy Homemade Pie Crust
Follow these simple steps to prepare this delicious dish:
Step 1: Prepare the Dry Ingredients
In a large bowl, whisk together the flour and salt. This ensures the salt is evenly distributed throughout the crust.
Step 2: Cut in the Fat
Add the cold butter and vegetable shortening to the flour mixture. Use a pastry blender or your fingertips to cut the fat into the flour until the mixture resembles coarse crumbs. The smaller the pieces of fat, the flakier the crust will be.
Step 3: Add the Wet Ingredients
Gradually add the ice water and apple cider vinegar, one tablespoon at a time, mixing gently after each addition. Mix until the dough just comes together. Be careful not to overmix, as this will develop the gluten and result in a tough crust.
Step 4: Chill the Dough
Divide the dough in half, flatten each half into a disc, wrap tightly in plastic wrap, and refrigerate for at least 30 minutes (or up to 2 days). This allows the gluten to relax and the fat to firm up, resulting in a flakier crust.
Step 5: Roll Out the Dough
On a lightly floured surface, roll out one disc of dough into a 12-inch circle. Transfer the dough to a 9-inch pie plate. Trim and crimp the edges as desired.
Step 6: Bake the Pie Crust
Follow your specific pie filling recipe’s baking instructions. For a blind-baked crust, preheat your oven to 375°F (190°C). Line the crust with parchment paper and fill with pie weights or dried beans. Bake for 15-20 minutes, then remove the weights and parchment paper and bake for another 5-10 minutes, or until lightly golden brown.
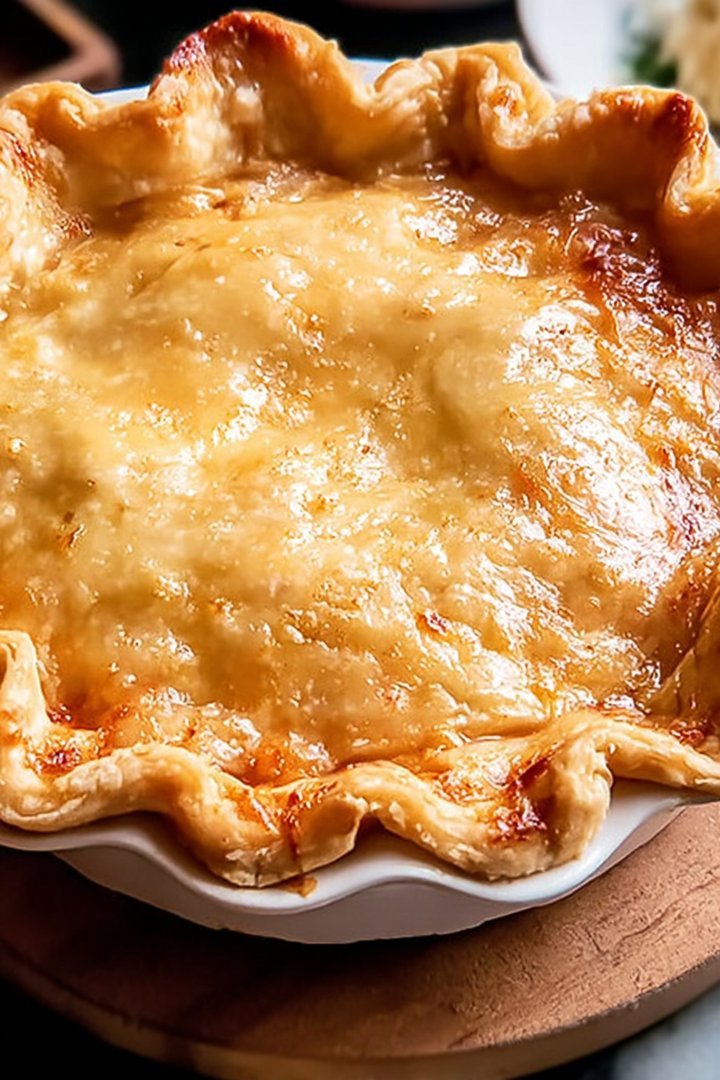
Use your perfectly baked **easy homemade pie crust** as the foundation for your favorite sweet or savory pie filling for a delightful dessert or main course.
Perfecting the Cooking Process
The best way to make this recipe efficiently is to first prepare the dough, allowing it to chill while you gather your ingredients. This gives the gluten time to relax and prevents a tough crust. Roll it out, fill it, and then bake to golden perfection!
Add Your Touch
Get creative with your fillings! Experiment with different fruits, spices, or even a crumble topping. For a savory twist, try adding herbs like rosemary or thyme to the dough for an aromatic crust that complements a savory filling.
Storing & Reheating
Store leftover pie in the refrigerator, covered, for up to three days. To reheat, warm individual slices in the microwave or bake the whole pie in a low oven until heated through. This keeps the crust flaky.
Baking Secrets for Pie Perfection
- Chill your butter and water thoroughly before starting; cold ingredients are the key to a flaky crust.
- Avoid overworking the dough; mix until just combined to prevent a tough texture.
- Blind bake the crust before filling it to prevent a soggy bottom.
(Personal anecdote formated as paragraph subheading (very important! don’t write any title for this paragraph))
My grandmother always said the secret to a good pie was to make it with love. I always laughed, but the first time I made this for my family, their smiles made me realize she was right.
Making the Dreamy Crust
Let’s talk pie crust. Making a truly great pie crust isn’t just about following a recipe; it’s about understanding the science behind the ingredients. And maybe a little bit about channeling your inner grandma, even if your grandma never baked a pie in her life. Mine tried once. It involved smoke alarms and a very confused cat. But I digress. A truly outstanding, unbelievably delicious, melt-in-your-mouth pie begins with the perfect foundation, a spectacular crust. This is an easy homemade pie crust journey.
The Star Ingredients
First, you’ll need all-purpose flour. This is your base, the foundation upon which all crusty dreams are built. Next, cold, unsalted butter. And I mean *cold*. Like, just-came-out-of-the-freezer cold. Cold butter is critical for creating those flaky layers we all crave. Then, a bit of sugar. Just a touch, to add a hint of sweetness and help with browning. Salt, to balance the flavors. And finally, ice water. Yes, ice. Everything must be cold! It’s like a polar bear convention in your mixing bowl.
Putting it All Together
In a large bowl, whisk together the flour, sugar, and salt. Cut the cold butter into small cubes. This is where you can get out any pent-up aggression. Or, you know, just carefully cut the butter. Your choice. Add the butter to the flour mixture and use a pastry blender or your fingertips to cut the butter into the flour until the mixture resembles coarse crumbs.
Gradually add the ice water, one tablespoon at a time, mixing gently after each addition. The dough should just start to come together. Be careful not to add too much water; you want a shaggy dough, not a sticky one.
Turn the dough out onto a lightly floured surface and gently form it into a disc. Wrap it tightly in plastic wrap and refrigerate for at least 30 minutes, or even better, an hour. This chilling time is crucial, so don’t skip it! This allows the gluten to relax, which is necessary for a tender, flaky crust.
The Foolproof Recipe: Easy Homemade Pie Crust
Alright, here’s where we get down to brass tacks. Forget the store-bought stuff (unless you’re in a serious pinch, I won’t judge). This recipe for easy homemade pie crust is so simple, so reliable, that you’ll wonder why you ever bothered with the pre-made stuff.
Ingredients You’ll Need
- 2 1/2 cups all-purpose flour
- 1 teaspoon salt
- 1 tablespoon sugar
- 1 cup (2 sticks) cold unsalted butter, cut into small cubes
- 6-8 tablespoons ice water
Steps to Pie Crust Glory
1. In a large bowl, whisk together the flour, salt, and sugar.
2. Add the cold butter to the flour mixture and use a pastry blender or your fingertips to cut the butter into the flour until the mixture resembles coarse crumbs. The mixture should look a bit like cornmeal with some pea-sized pieces of butter scattered throughout. This is good!
3. Gradually add the ice water, one tablespoon at a time, mixing gently after each addition. Mix until the dough just starts to come together. Be careful not to add too much water; you want a shaggy dough, not a sticky one.
4. Turn the dough out onto a lightly floured surface and gently form it into a disc. Wrap it tightly in plastic wrap and refrigerate for at least 30 minutes, or up to 2 hours.
5. When ready to use, roll the dough out on a lightly floured surface to a 12-inch circle. Transfer the dough to a 9-inch pie plate. Trim and crimp the edges as desired.
The Secret to Flaky Layers
The real secret to a truly flaky crust is keeping everything cold and avoiding overmixing. When the butter melts in the oven, it creates steam, which separates the layers of dough and results in that irresistible flakiness we all adore. So, handle the dough with care, don’t overwork it, and remember: cold, cold, cold!
Troubleshooting Your Crust
Even the best bakers encounter pie crust mishaps from time to time. Don’t worry, it happens! Here are a few common problems and how to fix them.
The Dreaded Soggy Bottom
A soggy bottom is a pie’s worst nightmare. To prevent it, blind bake your crust before adding the filling. This means pre-baking the crust partially or fully before adding the filling. To do this, prick the bottom of the crust with a fork (this prevents it from puffing up), line it with parchment paper, and fill it with pie weights or dried beans. Bake at 375°F (190°C) for 15-20 minutes, or until the edges are lightly golden. Remove the parchment paper and weights and bake for another 5-10 minutes, or until the bottom is set.
A Tough, Dense Crust
A tough crust is usually the result of overmixing the dough or adding too much water. Remember, mix until just combined and be conservative with the water. Also, make sure you’re chilling the dough for the recommended time.
Crust Cracking While Rolling
If your crust cracks while rolling, it’s likely too cold or too dry. Let it sit at room temperature for a few minutes to soften slightly. If it’s still cracking, sprinkle a tiny bit of water on the dough and gently knead it a few times before rolling again.
Versatile Pies: Endless Filling Possibilities
The beauty of a great pie crust is its versatility. Once you’ve mastered the basic crust recipe, the filling possibilities are endless!
Fruity Delights
Apple pie, cherry pie, blueberry pie, peach pie… the list goes on! Use fresh, frozen, or canned fruit (drained, of course) and adjust the sugar and spices to your liking. A little cinnamon, nutmeg, or lemon zest can go a long way.
Savory Sensations
Don’t think pie is just for dessert! A savory pie can be a hearty and satisfying meal. Try a chicken pot pie with a creamy vegetable filling, a shepherd’s pie with a mashed potato topping, or a quiche with cheese and vegetables.
Creamy Confections
For a decadent treat, try a creamy pie like chocolate cream pie, coconut cream pie, or banana cream pie. These pies are typically made with a cooked custard filling and topped with whipped cream or meringue.
Mastering the Roll: Rolling Out Your Dough
Rolling out pie dough can be intimidating, but with a few simple tips, you’ll be a pro in no time.
Prep Your Workspace
Make sure your work surface is clean, dry, and lightly floured. This will prevent the dough from sticking.
Roll from the Center
Start rolling from the center of the dough outward, rotating the dough a quarter turn after each roll. This helps to keep the circle even.
Don’t Press Too Hard
Use gentle pressure and avoid pressing too hard, which can make the dough tough.
Patching Up Tears
If you get a tear in the dough, don’t panic! Simply patch it up with a small piece of dough and press it gently to seal. No one will ever know!
(Personal anecdote formated as paragraph subheading (very important! don’t write any title for this paragraph))
I once spent three hours making a pie for a bake sale, only to drop it upside down in the car. It was a disaster. But hey, I learned a valuable lesson: always bring backup!
Frequently Asked Questions
Let’s tackle some of those burning pie crust questions that keep you up at night.
Can I make the dough ahead of time?
Absolutely! In fact, I encourage it. The dough can be made up to 2 days in advance and stored in the refrigerator, or up to 3 months in the freezer. Just make sure to wrap it tightly in plastic wrap.
Can I use a food processor to make the dough?
Yes, you can. Just be careful not to overprocess the dough. Pulse the ingredients until the mixture resembles coarse crumbs, then gradually add the ice water until the dough just starts to come together.
Why is my crust shrinking during baking?
Crust shrinkage is usually caused by stretching the dough too much when placing it in the pie plate. Be gentle and let the dough relax. You can also try chilling the filled pie for 30 minutes before baking.
What can I use if I don’t have pie weights?
Dried beans or rice work great as pie weights. Just line the crust with parchment paper and fill it with the beans or rice. You can reuse them for blind baking in the future.
Elevate Your Pie Game
Ready to take your pie baking skills to the next level? Here are a few tips and tricks to elevate your pie game and impress your friends and family.
Egg Wash Magic
For a beautiful golden brown crust, brush the top of the pie with an egg wash before baking. An egg wash is simply a beaten egg (or egg yolk) mixed with a tablespoon of water or milk.
Sugar Sprinkle Sparkle
Sprinkle the top of the pie with coarse sugar (like turbinado or sanding sugar) for a festive sparkle and a touch of sweetness.
Decorative Crust Designs
Get creative with your crust designs! Use cookie cutters to create shapes and arrange them on top of the pie, or try a lattice crust for a classic look.
Herbed Crust for Savory Pies
Incorporate fresh herbs like rosemary, thyme, or sage into the dough for a savory pie. This adds a delicious flavor and aroma that complements the filling.
(Personal anecdote formated as paragraph subheading (very important! don’t write any title for this paragraph))
My first attempt at a lattice crust looked more like a toddler’s art project than a pie. But hey, it still tasted good! Practice makes perfect, right?
Conclusion for Easy Homemade Pie Crust
Making an easy homemade pie crust might seem daunting, but with a few simple tricks, anyone can conquer it. Remember to keep your ingredients cold, handle the dough gently, and chill it before baking. These steps will help you achieve a flaky, tender crust that’s sure to impress. With this knowledge, you’re now equipped to create delicious pies that will be the star of any occasion. Happy baking!
Print
Easy Homemade Pie Crust
Delicious easy homemade pie crust recipe with detailed instructions and nutritional information.
- Total Time: 35 minutes
- Yield: 4 servings
Ingredients
- All-purpose flour: 2 1/2 cups
- Salt: 1 teaspoon
- Sugar: 1 tablespoon
- Cold unsalted butter: 1 cup (2 sticks), cut into cubes
- Vegetable shortening: 1/4 cup, chilled
- Ice water: 6-8 tablespoons
- Apple cider vinegar: 1 teaspoon (optional, for extra flakiness)
Instructions
- Step 1: In a large bowl, whisk together the flour, salt, and sugar.
- Step 2: Add the cold butter and shortening to the flour mixture. Use a pastry blender or your fingers to cut the fat into the flour until the mixture resembles coarse crumbs with some pea-sized pieces of butter remaining.
- Step 3: Gradually add the ice water, 1 tablespoon at a time, mixing gently after each addition. Stir just until the dough comes together. Add the apple cider vinegar along with the first tablespoon of water, if using. Be careful not to overmix.
- Step 4: Divide the dough in half. Flatten each half into a disk, wrap in plastic wrap, and refrigerate for at least 30 minutes (or up to 2 days).
- Step 5: On a lightly floured surface, roll out one disk of dough to fit your pie plate. Transfer the dough to the pie plate, trim the edges, and crimp as desired.
Notes
- For a super tender crust, make sure your butter and shortening are very cold before starting.
- Unbaked pie crusts can be stored in the freezer for up to 3 months, tightly wrapped in plastic wrap and then in a freezer bag.
- Serve your warm pie with a scoop of vanilla ice cream or a dollop of whipped cream for a classic treat.
- If your pie crust edges brown too quickly in the oven, gently cover them with foil or a pie shield.
- Prep Time: 15 minutes
- Cook Time: 20 minutes
- Method: Stovetop
- Cuisine: American
FAQs
What if my Easy Homemade Pie Crust is too dry?
Ah, the dreaded dry crust! Don’t fret, we’ve all been there. A dry pie crust usually indicates a lack of moisture. To fix this in the future, make sure you are using cold butter and ice water. The cold ingredients help prevent the gluten from developing too much, which leads to a tough, dry crust. If your dough is already made and dry, try adding a teaspoon or two of ice water at a time, mixing gently until it just comes together. Remember, patience is key! You want a dough that’s moist but not sticky.
How can I prevent my Easy Homemade Pie Crust from shrinking?
Shrinking pie crusts are the bane of many bakers. The secret weapon here is chilling! After you’ve rolled out your crust and placed it in your pie dish, chill it for at least 30 minutes before baking. This relaxes the gluten and helps prevent shrinkage. Also, avoid overworking the dough during the mixing and rolling process. Overworked gluten is a shrink-happy gluten. You might consider blind baking your pie crust, which involves baking the crust partially before adding the filling.
Can I make Easy Homemade Pie Crust ahead of time?
Absolutely! Making pie crust ahead of time is a total game-changer for busy bakers. Wrap your pie dough tightly in plastic wrap and store it in the refrigerator for up to three days. You can also freeze it for up to three months. Just make sure to thaw it in the refrigerator overnight before rolling it out. When you’re ready to bake, let the dough sit at room temperature for a few minutes to soften slightly before rolling. This makes the process so much easier.
Why is my Easy Homemade Pie Crust tough?
A tough pie crust is often the result of overdeveloped gluten. Gluten is the protein in flour that gives dough its elasticity. Too much mixing, too much water, or using warm butter can all contribute to a tough crust. The solution? Handle the dough as little as possible. Use cold ingredients, and mix just until everything comes together. Avoid kneading it like bread dough. Think gentle nudges, not aggressive massages. Your pie crust will thank you for it!


Leave a Comment