


If you have ever stared longingly at a bakery window, imagining that perfect balance of sweet, salty, and chewy, today is your day. Get ready for the most satisfying texture and flavor explosion imaginable with theseDelectable Easy Salted Caramel Cookies. We are skipping the fuss and diving straight into bliss. We all deserve a moment of pure, unadulterated comfort that tastes far more complex than the effort required to create it. This recipe isn’t just easy; it’s practically a magic trick that yields golden, gooey perfection with zero drama.
- Effortless Baking: Requires minimal chilling time and uses standard pantry staples, proving that ultimate decadence does not require advanced culinary degrees.
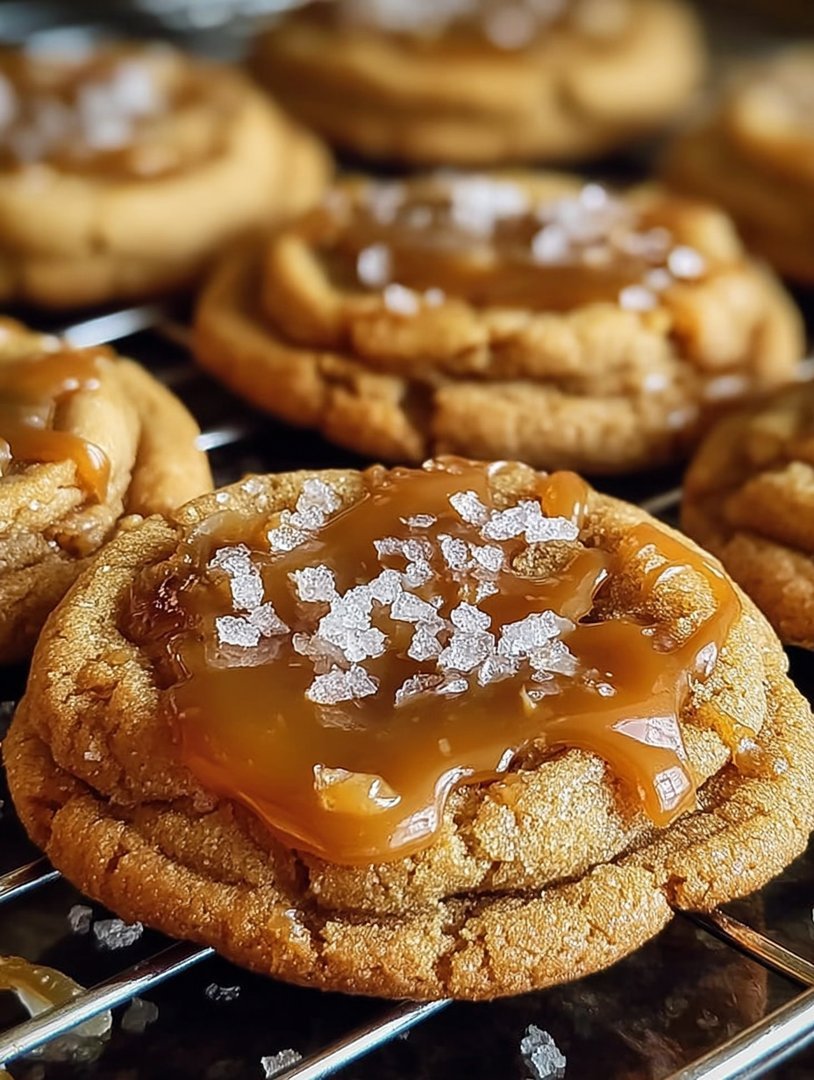
- Flavor Symphony: Achieve the perfect trifecta of buttery dough, rich caramel pockets, and the crucial finishing kiss of flaky sea salt.
- Irresistible Texture: These cookies boast a crispy edge, a delightfully soft, chewy center, and molten caramel ripples throughout every heavenly bite.
- Versatile Enjoyment: Perfect for holiday gift boxes, impressing skeptical neighbors, or just indulging in a late-night treat with a cup of strong coffee.
The Sweet Science of Salty Perfection
My relationship with caramel began as a deeply skeptical affair. For years, the word “caramel” conjured images of burnt sugar stuck to the bottom of an expensive copper pot, or worse, that oddly synthetic chewiness found in mediocre store-bought sweets. I wanted the real deal: creamy, deep, complex, and slightly unruly, the kind of caramel that makes you temporarily forget your own name. I finally cracked the code, realizing the secret wasn’t in complexity, but in contrast.
The juxtaposition of sweet and salty is arguably one of the greatest inventions in culinary history, right up there with sliced bread and the introduction of extra-sharp cheddar cheese. The salt doesn’t just cut through the sugar; it elevates it, deepening the flavor profile of the caramel from merely sweet to profoundly rich. When you introduce this dynamic duo into a perfectly chewy butter cookie, the result is truly transcendent. These aren’t just cookies; they are small, edible declarations of joy that are surprisingly simple to execute.
Why These Caramel Cookies Are Your New Signature Bake
Many recipes for salted caramel cookies rely on injecting liquid caramel into the dough after baking, which can lead to a messy, sticky disaster. Others demand hours of chilling or highly specific temperature control. We are doing none of that. This recipe is designed for the enthusiastic but impatient baker—the one who decides at 7 PM that they absolutely must have fresh cookies by 7:45 PM. We achieve this speed by using store-bought soft caramel candies, which, when chopped and folded into the dough, melt perfectly into gooey puddles without turning into rock-hard bullets upon cooling. It is the ultimate shortcut to professional-level results.
Think of the aroma that will soon be filling your kitchen—a warm, buttery cloud of vanilla mingling with the almost smoky depth of melting caramel. This recipe moves quickly. You mix the dry ingredients, cream the butter and sugars until fluffy, integrate the eggs and vanilla, and then comes the fun part: folding in those tiny, chopped caramel jewels. These pieces are crucial because they ensure every bite delivers a molten surprise. Remember, achieving chewy centers requires slightly under-baking, so resist the urge to leave them in until they look completely set. A tiny bit of wobble is your friend.
Mastering the Salt Sprinkle: Finishing Touches
The finishing salt is non-negotiable for theseDelectable Easy Salted Caramel Cookies. Do not use standard table salt; it’s too fine and too aggressive. You need flaky sea salt—Maldon or a similar variety—which provides tiny, crunchy bursts of salinity exactly when you need them. Apply the salt immediately after pulling the hot sheets from the oven. The residual heat from the cookie ensures the salt adheres perfectly, creating that essential sparkling, savory counterpoint to the sweetness.
A common mistake people make is skipping this step, believing the caramel provides enough saltiness. It doesn’t. The flaky sea salt performs a textural job as well as a flavor job. It adds a satisfying crunch right on the surface. Plus, let’s be honest, those little flecks of white salt look incredibly professional. They signal to anyone looking at your plate that this is a carefully considered dessert, not just another sugar bomb. Mastering this final sprinkle elevates the entire experience from good cookie to exceptional dessert.
Ingredients for Delectable Easy Salted Caramel Cookies
Here’s what you’ll need to make this delicious dish:
- All-Purpose FlourUse standard bleached or unbleached flour, ensuring it is properly measured using the spoon-and-level method for the right cookie texture.
- Baking Soda and Baking PowderA combination of these two leavening agents ensures a thick, puffy cookie with a soft chewiness and perfect rise.
- Unsalted ButterNeeds to be softened to room temperature, which is essential for creaming properly with the sugars to incorporate enough air.
- Granulated Sugar and Light Brown SugarThe blend of white sugar for spread and brown sugar for moisture and a deep molasses flavor creates the classic chewy cookie base.
- Eggs and Vanilla Bean PasteUse large eggs at room temperature for better emulsion, and high-quality vanilla bean paste to enhance the overall flavor profile.
- Soft Caramel CandiesUse individually wrapped, soft caramels; avoid hard candies. Chop these into small, pea-sized pieces to ensure even melting throughout the cookie dough.
- Flaky Sea SaltAbsolutely essential for sprinkling on top immediately after baking to provide the necessary flavor contrast and beautiful visual appeal.
The full ingredients list, including measurements, is provided in the recipe card directly below.
How to Make Delectable Easy Salted Caramel Cookies
Follow these simple steps to prepare this delicious dish:
Step 1: Prepare the Ingredients and Preheat
Preheat your oven to 350°F (175°C). Line two large baking sheets with parchment paper or silicone baking mats. In a medium bowl, whisk together the all-purpose flour, baking soda, and baking powder. Set the dry mixture aside while you start preparing the wet ingredients. Take the soft caramel candies and chop them into small, uneven pieces—this randomness is key to achieving wonderful, molten pools later.
Step 2: Cream the Butter and Sugars
In a large mixing bowl or the bowl of a stand mixer fitted with the paddle attachment, cream together the softened unsalted butter, granulated sugar, and light brown sugar on medium speed. Beat the mixture for a full 3 to 4 minutes until it is light, pale, and fluffy. This step incorporates essential air, contributing significantly to the final cookie texture.
Step 3: Integrate Wet and Dry Components
Reduce the mixer speed to low and beat in the eggs one at a time, ensuring each is fully incorporated before adding the next. Stir in the vanilla bean paste. Gradually add the reserved flour mixture, mixing only until just combined. Stop mixing the moment the last streaks of flour disappear; overmixing develops the gluten and results in tough cookies.
Step 4: Fold in the Caramel Pieces
Remove the bowl from the mixer and use a rubber spatula to gently fold in the chopped caramel pieces. Be sure they are distributed throughout the dough. The dough should be soft but manageable. Use a cookie scoop (about 2 tablespoons capacity) to drop rounded scoops of dough onto the prepared baking sheets, leaving about 2 inches of space between each cookie.
Step 5: Bake Until Golden and Gooey
Bake the cookies for 9 to 11 minutes. They are ready when the edges are set and lightly golden, but the centers still look slightly pale and maybe even a little underbaked or puffy. If you wait until the centers look fully set, the cookies will be hard once cooled. Immediately upon removing the baking sheet from the oven, sprinkle a generous pinch of flaky sea salt over the top of each hot cookie.
Step 6: Cool and Enjoy
Allow the cookies to cool on the baking sheet for 5 minutes; this setting time prevents them from falling apart. Transfer the cookies to a wire rack to cool completely. Note that the caramel inside will be extremely hot immediately after baking, so exercise patience for the best eating experience. Transfer to plates and drizzle with a little extra melted caramel if you feel particularly decadent for the perfect finishing touch.
Troubleshooting and Perfecting Your Caramel Treats
Baking can sometimes feel like a high-stakes chemistry experiment, especially when caramel is involved. However, armed with a few simple tips, you can ensure success every single time you make these simple salted sweets. The biggest hurdle people face when making any drop cookie is texture—either they spread too much and become flat crisps, or they end up dry and cakey. Both issues are easily solvable, usually by adjusting temperature or ingredient measurements.
The Case of the Flat Cookie
If your cookies are spreading excessively, the culprit is almost always butter that is too warm, or an incorrect ratio of fat to flour. Ensure your butter is merely soft, not melted or greasy. If you find your dough is excessively soft after mixing, the solution is a quick, mandatory chill. Pop the scooped dough balls onto a plate and refrigerate them for 15 to 20 minutes before baking. The cold dough resists spreading in the hot oven, leading to a thicker, chewier final product. Also, check your oven temperature. If your oven runs cool, the cookies take longer to set, giving the butter more time to melt and spread.
Storing and Reheating for Maximum Freshness
These caramel delights taste best within the first two days, though they will store well in an airtight container at room temperature for up to five days. If you want to experience that gooey, molten caramel texture again days later, simply pop a cookie into the microwave for about 10 to 15 seconds. The gentle heat will reactivate the caramel and soften the center, making it taste like it just came out of the oven. If you plan on freezing the cookies, it is best to freeze the unbaked dough balls. Scoop the dough, place the balls on a baking sheet to freeze solid, and then transfer them to a freezer-safe bag. When you want a fresh cookie, bake directly from frozen, adding about two minutes to the total baking time.
Enhancing the Delectable Easy Salted Caramel Cookies
While these cookies are perfect in their original form, they also serve as an excellent canvas for minor customizations. For a textural contrast, try adding half a cup of toasted pecans or walnuts along with the caramel pieces. The nutty crunch pairs beautifully with the sweet, sticky caramel. If you are feeling extra adventurous, you can slightly intensify the chocolate notes. Replace a quarter cup of the all-purpose flour with unsweetened cocoa powder; this introduces a subtle depth that plays wonderfully against the salt and sugar. Just remember, whatever you add, the final sprinkle of flaky sea salt must remain—it is the signature flourish that makes these treats truly irresistible.
There is immense satisfaction in creating something truly delicious with minimal effort. These cookies are a testament to that principle. They deliver the wow factor of a high-end bakery without the high-end fuss, making them the perfect bake for a Tuesday evening or a special weekend gathering. Go ahead, treat yourself—you deserve the molten bliss only a perfect salted caramel cookie can provide.
The Accidental Discovery of Sunshine on a Plate
I stumbled upon this recipe during a chaotic baking failure involving sticky hands and a misplaced salt shaker. What began as a disaster quickly morphed into pure gold, resulting in the fudgy, chewy, sweet, and salty masterpiece that is the delectable easy salted caramel cookies you are about to bake.
I’m going to be completely honest with you: I used to view salted caramel as something only high-end patisseries could produce. It sounded fancy, pretentious even. It felt like the kind of dessert that required three years of culinary school and a PhD in Sugar Melting Dynamics. Why bother when a simple chocolate chip cookie exists?
My perspective shifted entirely one rainy Tuesday when I attempted to make plain vanilla cookies and spilled half a container of coarse sea salt onto my cooling rack. I tried to salvage the batch by adding a hurried, improvised caramel drizzle—because apparently, sugar and fat fix everything. The result was not just good; it was revolutionary. It proved that sometimes the best desserts are born from panic and clumsy kitchen mistakes. Forget complexity; we are aiming for pure, unadulterated comfort with these delectable easy salted caramel cookies.
The Battle Between Sweet and Salty
There is a profound psychological satisfaction in combining opposites, especially in desserts. It’s like watching a romantic comedy where two people initially hate each other, but you know they are destined for greatness. Sweetness alone is satisfying, but paired with a sharp, crystalline salt, it becomes complex and compelling. The salt cuts through the richness, preventing the sweetness from becoming cloying, inviting you back for bite after glorious bite of these amazing treats.
This method ensures every element contributes perfectly. The chewy, brown-sugar cookie base provides the comforting texture, the homemade caramel delivers the intense sweetness, and the flaky sea salt provides the necessary high-contrast punch. Making your own caramel, though it requires attention, pays dividends in flavor that store-bought sauces simply cannot match, guaranteeing these salted caramel cookies will be the star of any dessert spread.
The Essential Ingredients for Caramel Gold
Creating caramel might seem intimidating, but if you have a saucepan and a pulse, you are already halfway there. The secret to effortless, rich caramel is patience and attention, especially when dealing with hot sugar. We want a deep, nutty color, not the pale imitation you find in cheap syrups.
Gathering the Caramel Conundrum Crew
Before you begin your cookie odyssey, ensure everything is measured out. Miscounting flour or forgetting baking soda is a rookie mistake we won’t be repeating. This recipe hinges on the quality of your butter and the intensity of your caramel, so spring for the good stuff if your budget allows. Remember, a cookie is only as good as its foundation.
- For the Cookies:
- 2 1/4 cups all-purpose flour
- 1 teaspoon baking soda
- 1 teaspoon salt (fine grain)
- 1 cup (2 sticks) unsalted butter, softened
- 3/4 cup granulated sugar
- 3/4 cup packed light brown sugar
- 1 tablespoon pure vanilla bean paste
- 2 large eggs
- For the Salted Caramel Drizzle:
- 1 cup granulated sugar
- 1/4 cup water
- 1/2 cup heavy cream (room temperature is key!)
- 1/4 cup unsalted butter, cubed
- 1/2 teaspoon fine sea salt (or more, to taste)
- Flaky sea salt (for finishing)
The Path to Delectable Easy Salted Caramel Cookies
We are tackling this recipe in three straightforward stages: the cookie base, the rich caramel, and the triumphant assembly. While waiting for dough to chill or caramel to cool, do yourself a favor and clean up—future you will appreciate it when the counter isn’t coated in flour dust.
Mixing the Buttery Base
Preheat your oven to 375°F (190°C). In a medium bowl, whisk together the flour, baking soda, and fine salt. Set this dry mix aside. In a separate, larger bowl, use an electric mixer to cream together the softened butter, granulated sugar, and brown sugar until the mixture is light and fluffy. This step is critical; it incorporates air, which gives your cookies their structure and softness. Beat in the eggs one at a time, followed by the vanilla bean paste. Gradually incorporate the dry ingredients until just combined. Overmixing at this stage can lead to tough cookies, and nobody wants a tough cookie.
Scoop the dough onto a baking sheet lined with parchment paper. Aim for about two tablespoons per cookie. These treats spread beautifully, so ensure ample spacing. Bake for 10 to 12 minutes, or until the edges are golden brown and the centers are still slightly pale. Let them cool on the sheet for five minutes before transferring them to a wire rack. This helps prevent them from collapsing while they finish setting up.
Mastering the Salted Caramel
The caramel process is the part where you need laser focus. Combine the sugar and water in a medium, heavy-bottomed saucepan over medium heat. Do not stir it! You can gently swirl the pan if necessary, but introducing a spoon often encourages crystallization, leading to grainy caramel. Let the mixture boil until it turns a deep amber color, resembling dark honey. This usually takes 8 to 10 minutes.
Immediately remove the pan from the heat. Carefully whisk in the room-temperature heavy cream—it will bubble vigorously, so stand back! Once the bubbling subsides, add the cubed butter and the fine sea salt, stirring until everything is smooth and glossy. Pour the caramel into a heatproof bowl and let it cool completely. If you drizzle hot caramel, it will simply slide right off your cookies and pool into a sticky mess.
The Final, Glorious Assembly
Once the cookies are completely cooled and the caramel has thickened to a luxurious, pourable consistency, it’s time for the grand finale. You can use a spoon to drizzle the caramel artfully across each cookie, or transfer the caramel into a piping bag or zip-top bag with a tiny corner snipped off for more control. Apply a generous swirl of caramel over the top of each cookie.
The final, non-negotiable step is the salt. Right after drizzling, sprinkle a few flakes of the chunky, flaky sea salt over the wet caramel. That burst of salty texture against the chewy cookie and the sticky, sweet caramel is what transforms these simple biscuits into the ultimate addiction. That contrast is precisely why these delectable easy salted caramel cookies truly shine.
Perfecting the Cooking Process
First, whip up the cookie dough and chill it promptly—this prevents flatness. While the dough firms up, focus on crafting that silky caramel. Reserve the final sprinkling of flaky sea salt until the cookies are warm from the oven, ensuring maximum salty crunch.
Add Your Touch
Feel free to fold in mini chocolate chips for extra depth, or swap out the pure vanilla bean paste for almond paste if you prefer a nuttier flavor profile. For a holiday twist, dust them lightly with cinnamon before baking. Experimentation is the key to perfect personalization!
Storing & Reheating
Store these perfect buttery caramel cookies in an airtight container at room temperature for up to five days, separating layers with parchment paper. If they lose their chewiness, microwave them for 10 seconds to restore that molten caramel center and soft texture.
Remember these helpful tips to ensure your batch is perfection:
-
Always use room temperature ingredients for the dough, especially the butter and eggs. This helps them emulsify properly, yielding a smoother and more consistent cookie texture.
-
When making caramel, resist the urge to stir the sugar and water mixture. If you need to equalize the heating, gently swirl the pan instead to prevent crystallization and graininess.
-
Do not skip the chilling of the dough; even a quick 30 minutes in the freezer dramatically prevents spreading, ensuring your cookies retain a perfect, thick shape.
My neighbor tasted one of these right out of the oven, closed her eyes, and declared that her mortgage worries had momentarily vanished. That is the kind of baking magic these treats hold.
Conclusion for Delectable Easy Salted Caramel Cookies
These delectable easy salted caramel cookies prove that the most complicated-sounding treats can often be the simplest to execute. By focusing on quality ingredients, mastering the chilling time, and embracing that final flaky salt dusting, you achieve bakery-level results at home. They deliver that perfect balance of chewy, buttery, sweet, and salty bliss every single time. Stop dreaming about these perfect buttery caramel cookies and start baking them; your taste buds will thank you profusely for this moment of salty-sweet indulgence.
Print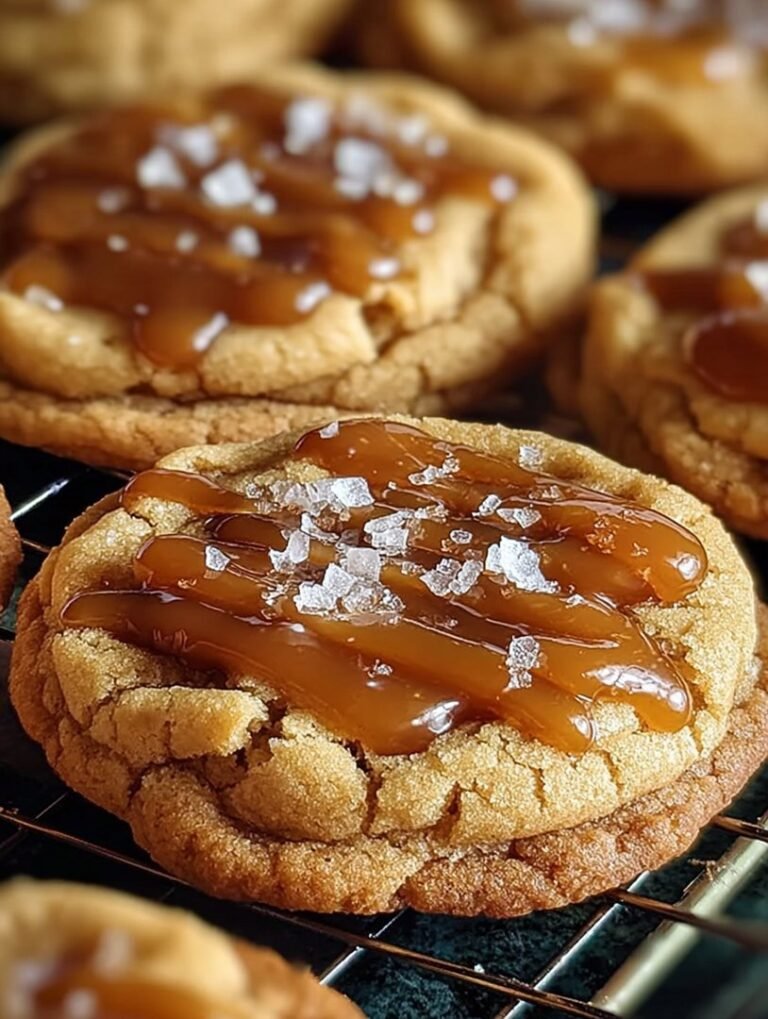
Delectable Easy Salted Caramel Cookies
Chewy, buttery heaven! These salted caramel cookies feature rich brown sugar, perfect creaming, and a flaky sea salt finish.
- Total Time: 35 minutes
- Yield: 4 servings 1x
Ingredients
- 1 cup (2 sticks) unsalted butter, softened
- 1 1/4 cups packed light brown sugar
- 1/4 cup granulated sugar
- 2 1/4 cups all-purpose flour
- 1 large egg
- 1 teaspoon baking soda
- 1 teaspoon alcohol-free vanilla extract
- 1 cup soft caramel bits (like Kraft Caramels, unwrapped)
- 1/2 teaspoon flaky sea salt (plus extra for topping)
Instructions
- Step 1: Preheat oven to 375°F (190°C). In a large bowl or stand mixer, cream together the softened butter, brown sugar, and granulated sugar on medium speed until light and fluffy (about 3 minutes). Beat in the egg and alcohol-free vanilla extract until just combined.
- Step 2: In a separate bowl, whisk together the flour, baking soda, and the 1/2 teaspoon of flaky sea salt. Gradually add the dry mixture to the wet mixture, mixing on low speed until the dough just comes together. Be careful not to overmix.
- Step 3: Gently fold in the caramel bits using a spatula. Scoop the dough into 1.5-inch balls and place them 2 inches apart on baking sheets lined with parchment paper. Optionally, press 2-3 extra caramel bits onto the top of each dough ball for extra caramel pull.
- Step 4: Bake for 9 to 11 minutes, or until the edges are golden brown but the centers are still soft and slightly undercooked. Baking time may vary slightly depending on oven temperature.
- Step 5: Immediately upon removing the cookies from the oven, sprinkle a pinch of the extra flaky sea salt over the top of each cookie. Let the cookies cool on the baking sheet for 5 minutes before transferring them to a wire rack to cool completely.
Notes
- Store cooled cookies in an airtight container for up to 4 days, layering them with parchment paper so the soft caramel bits don’t stick together.
- For an instant gooey caramel experience, briefly microwave cooled cookies for 8-10 seconds right before serving.
- Serve these warm cookies paired with a scoop of vanilla bean ice cream or a mug of strong coffee to perfectly balance the rich salted caramel sweetness.
- The crucial step is to cream the softened butter and sugars thoroughly (3 minutes is ideal) until they are visibly light and fluffy, ensuring a tender cookie structure.
- Prep Time: 15 minutes
- Cook Time: 20 minutes
- Method: Stovetop
- Cuisine: American


Leave a Comment