

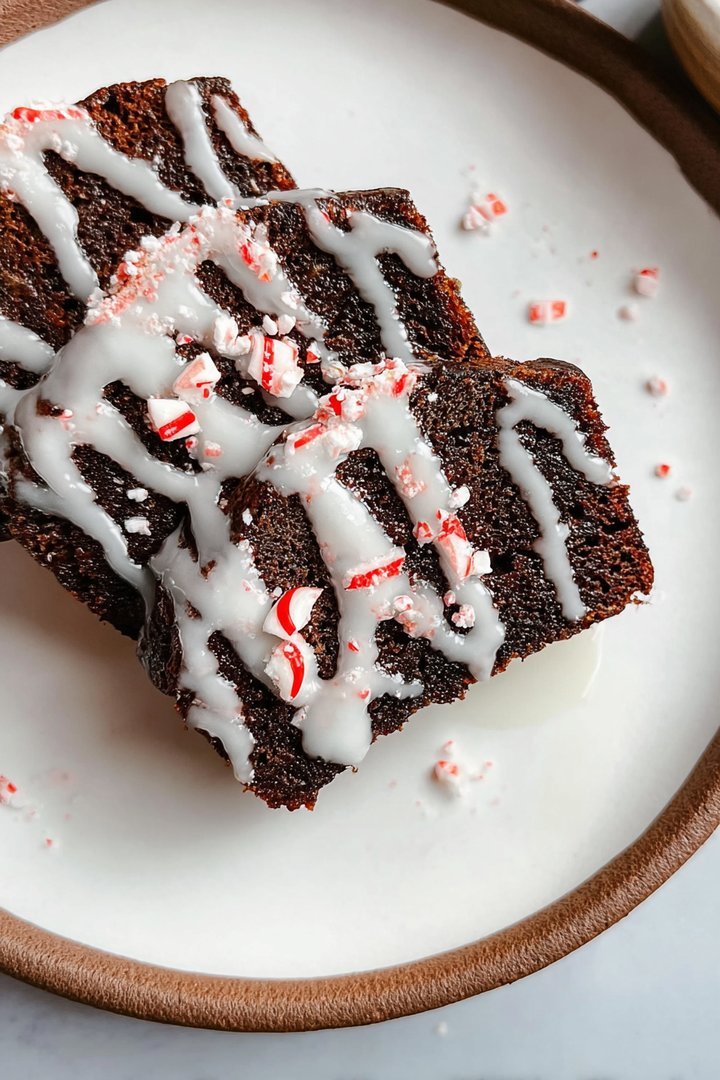
Ah, the aroma of freshly baked bread, mingling with the cool, invigorating scent of peppermint and rich, dark chocolate. It’s a symphony of flavors that sings of cozy evenings and festive cheer, a warm hug in every slice.
This isn’t just bread; it’s a Chocolate Peppermint Bread experience, a delightful indulgence that transforms any ordinary day into a mini-celebration. Trust me, your taste buds will thank you for this peppermint-chocolatey hug.
Here’s why this Chocolate Peppermint Bread will become your new favorite:
- Easy to prepare, even if your baking skills are questionable (like mine!).
- The combination of dark chocolate and peppermint creates a flavor explosion that’s both decadent and refreshing.
- Its beautiful swirl pattern makes it a stunning centerpiece for any gathering, guaranteed to impress.
- Versatile enough to enjoy for breakfast, dessert, or a midnight snack (we won’t judge!).
Ingredients for Chocolate Peppermint Bread
Here’s what you’ll need to make this delicious dish:
The full ingredients list, including measurements, is provided in the recipe card directly below.
How to Make Chocolate Peppermint Bread
Follow these simple steps to prepare this delicious dish:
Step 1: Preheat and Prep
Preheat your oven to 350°F (175°C). Grease and flour a 9×5 inch loaf pan. This prevents the bread from sticking and ensures easy removal.
Step 2: Combine Dry Ingredients
In a large bowl, whisk together the flour, sugar, cocoa powder, baking soda, and salt. Make sure everything is evenly distributed for a consistent bake.
Step 3: Mix Wet Ingredients
In a separate bowl, whisk together the eggs, vegetable oil, buttermilk, and peppermint extract. This creates a smooth and emulsified base for the batter.
Step 4: Combine Wet and Dry
Gradually add the wet ingredients to the dry ingredients, mixing until just combined. Be careful not to overmix, as this can result in a tough bread.
Step 5: Add Chocolate and Peppermint
Fold in the chocolate chips and crushed peppermint candies. Distribute them evenly throughout the batter for maximum flavor in every bite.
Step 6: Bake
Pour the batter into the prepared loaf pan and bake for 50-60 minutes, or until a wooden skewer inserted into the center comes out clean. Let the bread cool in the pan for 10 minutes before transferring it to a wire rack to cool completely.
Slice and serve this delightful Chocolate Peppermint Bread with a dollop of whipped cream or a scoop of vanilla ice cream for an extra special treat.
Perfecting the Cooking Process
To maximize your baking experience, begin by precisely measuring your ingredients. Cream the butter and sugar until light and fluffy before gradually adding the dry ingredients. This ensures a uniform texture and prevents a tough crumb.
Add Your Touch
Feel free to experiment with different types of chocolate or peppermint extracts. Consider adding chopped nuts for extra crunch or a swirl of cream cheese frosting for added decadence. Use cocoa powder to deepen the chocolate flavor.
Storing & Reheating
Store your Chocolate Peppermint Bread in an airtight container at room temperature for up to three days. To reheat, slice and microwave for a few seconds or toast lightly for a warm, comforting treat.
Here are some expert tips to elevate your Chocolate Peppermint Bread:
- For intense peppermint flavor, use peppermint extract sparingly, as it can be overpowering. A little goes a long way!
- Prevent a dry loaf by ensuring you don’t overbake it. Insert a toothpick into the center; it should come out with a few moist crumbs attached.
- Enhance the chocolate notes by using high-quality dark chocolate and adding a pinch of sea salt to the batter.
(Personal anecdote formated as paragraph subheading)
My grandma once told me that a secret ingredient of every good bread is a dash of love and patience. Seems cheesy, but every time I bake, I remember her and that bit of wisdom!
Chocolate Peppermint Bread: A Slice of Holiday Magic (Without the Hangover)
Okay, folks, let’s talk about Chocolate Peppermint Bread. Not just *any* bread, but the kind that makes you want to throw on a pair of fuzzy socks, crank up the holiday tunes, and maybe, just maybe, forgive your Aunt Mildred for that passive-aggressive comment about your career choice. Because seriously, this bread is THAT good. It’s like a hug in loaf form, only with more chocolate and less awkward small talk.
Forget those bland, store-bought excuses for festive treats. We’re diving headfirst into a homemade adventure that will leave your kitchen smelling like a winter wonderland and your taste buds singing carols. And the best part? No crazy ingredients, no complicated techniques, and definitely no regrets (except maybe eating the entire loaf in one sitting, but hey, we’ve all been there).
So, grab your apron, preheat that oven, and let’s get baking! This isn’t just a recipe; it’s a journey to a happy place filled with warm, chocolatey, pepperminty goodness. Trust me, your inner child (and your outer adult) will thank you.
Why Chocolate Peppermint Bread? Because Life’s Too Short for Boring Bread
Let’s be honest, there are a million dessert recipes out there. So why should you dedicate your precious time and oven space to this particular loaf of deliciousness? Well, my friend, let me enlighten you:
- **It’s ridiculously easy:** Seriously, if you can stir ingredients together, you can make this bread. No fancy equipment required, no complicated steps to memorize. It’s baking for the rest of us.
- **It’s a crowd-pleaser:** Whether you’re bringing it to a holiday party, gifting it to neighbors, or just indulging in a quiet night at home, this bread is guaranteed to disappear faster than free pizza.
- **It’s infinitely customizable:** Want to add nuts? Go for it! Craving more chocolate? Pile it on! Feel like swirling in some cream cheese frosting? Be my guest! This recipe is your blank canvas.
- **It’s the perfect holiday stress-reliever:** There’s something incredibly therapeutic about mixing ingredients and watching a simple batter transform into a warm, fragrant loaf of bread. Forget yoga, baking is my new Zen.
Basically, Chocolate Peppermint Bread is the Swiss Army knife of holiday desserts. It’s versatile, reliable, and always a hit. What more could you ask for?
The Ingredients: Keeping it Clean and Delicious
Before we get to the fun part (aka the actual baking), let’s gather our ingredients. And don’t worry, we’re keeping it simple and wholesome.
- **Flour:** All-purpose flour is your trusty base.
- **Sugar:** Granulated sugar for sweetness and light brown sugar for a hint of molasses flavor.
- **Baking Powder & Baking Soda:** The dynamic duo that makes our bread rise to fluffy perfection.
- **Salt:** Just a pinch to balance the sweetness and enhance the flavors.
- **Eggs:** To bind everything together and add richness.
- **Oil:** Vegetable oil keeps the bread moist and tender.
- **Buttermilk:** The secret ingredient for a tangy flavor and tender crumb. You can substitute with milk mixed with a tablespoon of vinegar if needed.
- **Alcohol-free vanilla extract:** A splash of vanilla adds depth and complexity to the flavor profile.
- **Peppermint Extract:** The star of the show! Use good quality extract for the best pepperminty punch.
- **Unsweetened Cocoa Powder:** For that rich, chocolatey goodness.
- **Chocolate Chips:** Because more chocolate is always better. Semi-sweet or dark chocolate chips work best.
- **Peppermint Candies:** Crushed peppermint candies add a festive touch and a burst of peppermint flavor.
Let’s Get Baking: The Step-by-Step Guide to Chocolate Peppermint Perfection
Alright, apron on? Oven preheated? Let’s do this!
1. **Prep Your Pans: ** Grease and flour a loaf pan.
2. **Dry Ingredients: ** In a large bowl, whisk together the flour, sugars, baking powder, baking soda, salt, and cocoa powder.
3. **Wet Ingredients: ** In a separate bowl, whisk together the eggs, oil, buttermilk, Alcohol-free vanilla extract, and peppermint extract.
4. **Combine: ** Pour the wet ingredients into the dry ingredients and stir until just combined. Don’t overmix!
5. **Chocolate & Peppermint: ** Fold in the chocolate chips and crushed peppermint candies.
6. **Pour & Bake: ** Pour the batter into the prepared loaf pan and bake for 50-60 minutes, or until a toothpick inserted into the center comes out with a few moist crumbs.
7. **Cool & Enjoy: ** Let the bread cool in the pan for 10 minutes before transferring it to a wire rack to cool completely.
Troubleshooting: Because Baking Isn’t Always a Piece of Cake
Even with the best recipes, sometimes things don’t go according to plan. Here are a few common issues and how to fix them:
- **Bread is dry:** You may have overbaked it. Check the bread frequently after 45 minutes and remove it from the oven as soon as a toothpick comes out with a few moist crumbs. Adding a tablespoon of applesauce to the batter can also help retain moisture.
- **Bread is too dense:** You may have overmixed the batter. Be careful not to overmix the wet and dry ingredients. Also, make sure your baking powder and baking soda are fresh.
- **Bread is not rising:** Your baking powder or baking soda may be expired. Always check the expiration date before using them. Also, make sure your oven is properly preheated.
Chocolate Peppermint Bread Variations: Unleash Your Inner Baker!
This recipe is fantastic as is, but don’t be afraid to experiment and make it your own! Here are a few ideas to get you started:
- **Cream Cheese Swirl:** Beat together cream cheese, sugar, and an egg yolk. Swirl it into the batter before baking for a decadent treat.
- **Nutty Delight:** Add chopped walnuts, pecans, or almonds to the batter for extra crunch and flavor.
- **Espresso Infusion:** Add a teaspoon of espresso powder to the dry ingredients to enhance the chocolate flavor.
- **Mint Chocolate Chip:** Use mint chocolate chips instead of regular chocolate chips for an extra dose of peppermint.
- **Glaze it Up:** Drizzle a simple powdered sugar glaze over the cooled bread for added sweetness and visual appeal.
The Final Slice: Enjoying Your Chocolate Peppermint Masterpiece
Congratulations, you’ve baked a loaf of pure holiday magic! Now it’s time to sit back, relax, and enjoy the fruits of your labor.
Slice a generous piece of Chocolate Peppermint Bread, grab a cup of hot cocoa, and savor every bite. Share it with friends and family, or keep it all to yourself (we won’t judge!).
This bread is perfect for:
- Breakfast, brunch, or dessert
- Holiday parties and gatherings
- Gifting to neighbors and friends
- A cozy night in by the fire
No matter how you choose to enjoy it, this Chocolate Peppermint Bread is sure to bring a smile to your face and a little bit of holiday cheer to your day. Happy baking!
Conclusion for Chocolate Peppermint Bread :
This Chocolate Peppermint Bread is more than just a recipe; it’s an experience. The combination of rich chocolate and refreshing peppermint creates a delightful treat that’s perfect for any occasion. Whether you’re baking for a holiday gathering or simply want to indulge in something special, this bread is sure to impress. Don’t be afraid to get creative with the recipe and add your own personal touch. Enjoy the process and savor every delicious bite!
Print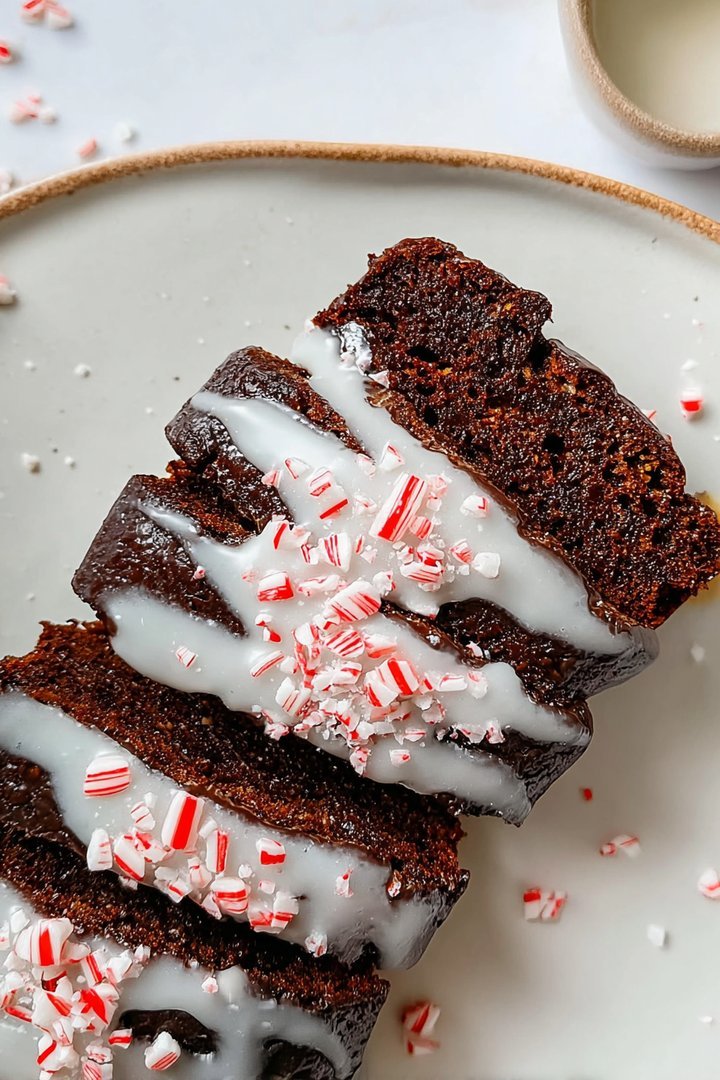
Chocolate Peppermint Bread
Delicious chocolate peppermint bread recipe with detailed instructions and nutritional information.
- Total Time: 35 minutes
- Yield: 4 servings
Ingredients
- All-purpose flour: 2 1/2 cups
- Granulated sugar: 1 cup
- Unsweetened cocoa powder: 1/2 cup
- Baking soda: 1 teaspoon
- Salt: 1/2 teaspoon
- Buttermilk: 1 cup
- Vegetable oil: 1/4 cup
- Peppermint extract: 1 teaspoon
Instructions
- Step 1: Preheat oven to 350°F (175°C). Grease and flour a 9×5 inch loaf pan.
- Step 2: In a large bowl, whisk together flour, sugar, cocoa powder, baking soda, and salt.
- Step 3: In a separate bowl, combine buttermilk, oil, and peppermint extract.
- Step 4: Add the wet ingredients to the dry ingredients and mix until just combined. Do not overmix.
- Step 5: Pour batter into the prepared loaf pan and bake for 50-60 minutes, or until a wooden skewer inserted into the center comes out clean.
- Step 6: Let cool in the pan for 10 minutes before transferring to a wire rack to cool completely.
Notes
- To keep your bread moist, store it tightly wrapped at room temperature for up to 3 days, or in the refrigerator for longer storage.
- For a warm, comforting treat, slice the bread and gently toast it before serving.
- This bread is delightful on its own, but a dollop of whipped cream or a scoop of vanilla ice cream elevates it to a decadent dessert.
- Don't overmix the batter—a few streaks of flour are okay to ensure a tender loaf.
- Prep Time: 15 minutes
- Cook Time: 20 minutes
- Method: Stovetop
- Cuisine: American
FAQs :
What Makes This Chocolate Peppermint Bread So Irresistible?
Let me tell you, this isn’t your grandma’s plain old bread. We’re talking about a flavor explosion! Imagine rich, dark chocolate swirled into a fluffy, moist bread, punctuated by bursts of cool, refreshing peppermint. The contrast is simply divine! It’s like a cozy winter hug in every slice. Perfect for a chilly evening or a festive holiday brunch. Plus, the aroma alone will have your neighbors wondering what delicious magic you’re conjuring up in your kitchen. Seriously, prepare for compliments. This bread is a showstopper.
Can I Customize This Chocolate Peppermint Bread Recipe?
Absolutely! That’s the beauty of baking. Feel free to get creative. If you’re not a fan of dark chocolate, milk chocolate chips work just as well. Want more peppermint intensity? Add a few drops of peppermint extract to the batter. Nuts, like chopped walnuts or pecans, can add a delightful crunch. You could even swirl in some cream cheese frosting for an extra decadent treat. Just remember to adjust baking time if you’re adding substantial ingredients. Experiment and make it your own signature bread!
How Do I Store Chocolate Peppermint Bread for Maximum Freshness?
To keep your masterpiece moist and delicious, proper storage is key. Once the bread has cooled completely, wrap it tightly in plastic wrap or foil. Then, store it at room temperature for up to three days. For longer storage, you can freeze it for up to two months. When freezing, slice the bread first for easier thawing. To thaw, simply remove the desired number of slices and let them sit at room temperature for about 30 minutes. A quick zap in the microwave will also do the trick!
Is this Chocolate Peppermint Bread Difficult to Make?
Fear not, novice bakers! This recipe is surprisingly simple. Even if you’ve never baked bread before, you can totally conquer this. The instructions are straightforward, and the ingredients are readily available. The most important thing is to be patient and follow the steps carefully. Don’t be intimidated by the swirling technique; it’s easier than it looks! And remember, even if it doesn’t turn out perfectly the first time, it will still taste amazing. Baking is all about practice and having fun, so embrace the process.


Leave a Comment