

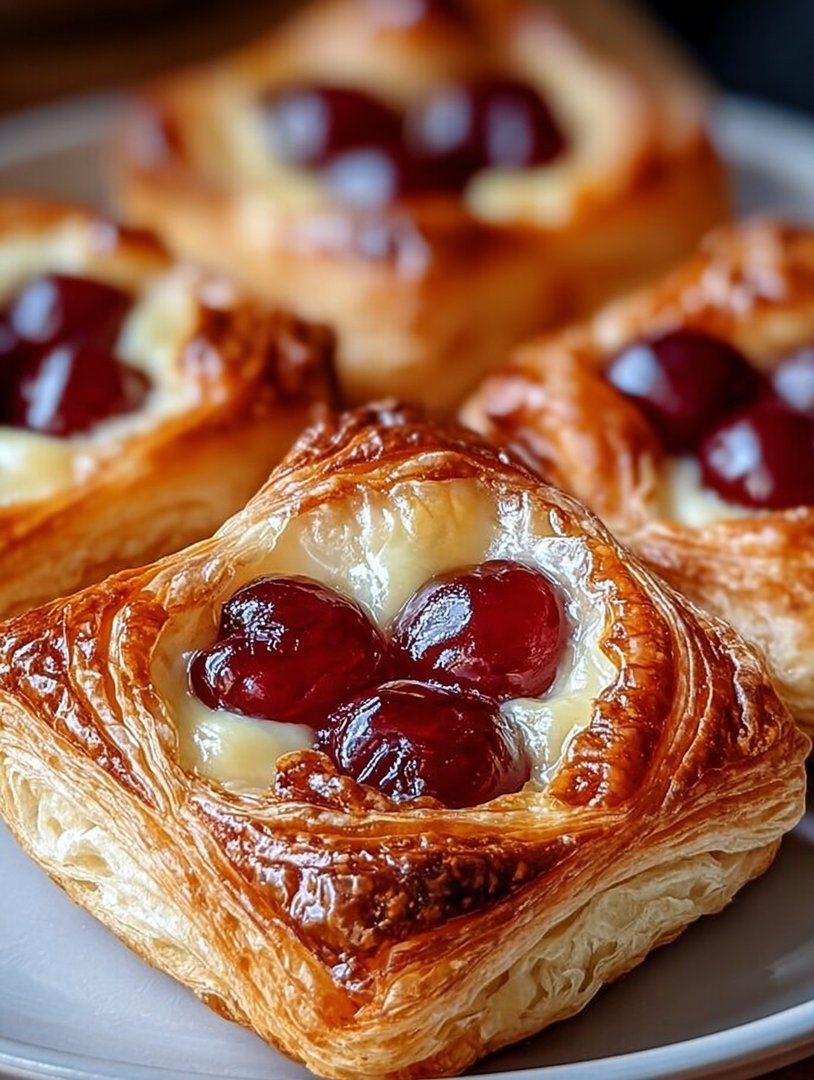
Imagine flaky layers collapsing gently under the pressure of sweet cherry filling and creamy, tangy cheese—it’s breakfast bliss.
Forget the drive-thru; mastering the perfectCherry Cheese Danish Reciperight at home is easier than you think and tastes infinitely better.
- Utilizing store-bought puff pastry drastically cuts down preparation time, making this an ideal gourmet treat for busy mornings.
- The vibrant tartness of real cherries perfectly complements the rich, slightly sweet, and zesty cream cheese filling.
- Achieving that golden, puffed pastry crust surrounding the jewel-toned cherry glaze makes this dessert look professionally baked.
- Serve these delightful pastries warm for breakfast, as an elegant brunch centerpiece, or even chilled as a simple dessert.
The Secret Weapon of Brunch: Why Danishes Rule
There was a time, not so long ago, when I believed a Danish pastry could only originate from a highly specialized bakery staffed by dough wizards. The thought of creating those perfect, airy layers at home seemed ambitious, bordering on delusional, especially before 8 AM. My friend Susan, who once attempted to make laminated dough from scratch and ended up with something resembling a very dense throw pillow, confirmed my fears. Then, I discovered the secret weapon of the modern home baker: quality store-bought puff pastry.
Suddenly, the impossible became the incredibly easy. This realization didn’t just save my Sunday brunches; it elevated them to legendary status. You see, the magic of this pastry isn’t in spending three days folding butter; it’s in the sublime combination of the crunchy, golden shell cradling a cloud-like cream cheese center and that burst of fruit complexity. The Danes might have popularized it, but this delicious baked good has become a global favorite for good reason. It’s rich without being heavy, sweet without being cloying, and undeniably impressive when served warm.
This particularCherry Cheese Danish Recipefocuses on maximum flavor with minimal effort. We skip the hassle of yeast and complex proofing, dedicating all our energy instead to perfecting that luscious cream cheese filling. We are going for the kind of pastry that makes your guests whisper, “Did you *really* make this?” Yes, we did. And we had time for a second cup of coffee while the oven did all the heavy lifting. Trust me, once you master this simple technique, you’ll never look at a frozen breakfast pastry the same way again.
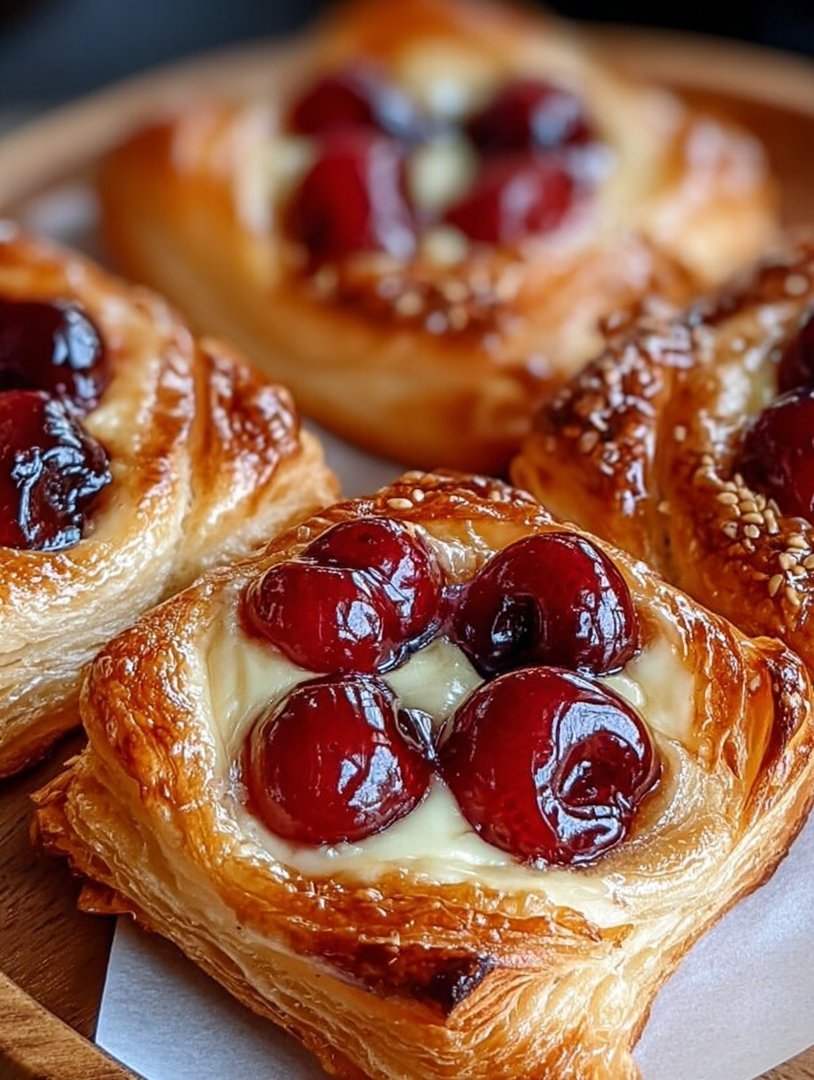
The beauty of the Danish, whether enjoyed as a celebratory treat or a simple weekend indulgence, lies in its textural contrasts. You bite through that crisp, yielding pastry into the soft, tangy cheese, followed by the bright sweetness of the cherries. It’s a symphony of textures and flavors that truly defines comfort baking, and preparing it at home fills your kitchen with the most irresistible aroma imaginable. Stop fearing the pastry case and start creating your own masterpiece.
Ingredients for Cherry Cheese Danish Recipe
Here’s what you’ll need to make this delicious dish:
- Puff Pastry SheetsUse two sheets of high-quality, all-butter puff pastry, thawed according to package instructions but kept cold until use.
- Cream CheeseUse full-fat brick cream cheese, softened to room temperature for smooth mixing and avoiding lumps in the filling.
- Granulated SugarThis adds sweetness to the filling and helps stabilize the cream cheese structure during baking.
- Egg YolkUsed in the cream cheese filling to bind the ingredients and provide richness, ensuring the filling sets nicely.
- Lemon ZestA crucial ingredient that cuts through the richness of the cheese, adding a bright, necessary tanginess.
- Vanilla Powder or EssenceProvides aromatic depth to the filling; ensure you use non-alcoholic essence if preferred, or pure extract.
- All-Purpose FlourA small amount is used in the filling to prevent weeping and keep the cream filling firm.
- Cherry Pie FillingChoose a good quality canned cherry filling; alternatively, you can make a quick homemade cherry compote thickened with cornstarch or pectin.
- Egg WashA mixture of one egg beaten with one tablespoon of water, essential for creating that signature golden-brown, glossy crust.
- Powdered Sugar (Optional Glaze)For dusting or mixing with a small amount of milk or lemon juice to create a simple icing drizzle after baking.
The full ingredients list, including measurements, is provided in the recipe card directly below.
How to Make Cherry Cheese Danish Recipe
Follow these simple steps to prepare this delicious dish:
Step 1: Prep the Pastry and Preheat the Oven
Preheat your oven to 400°F (200°C). Line two large baking sheets with parchment paper. Carefully unfold one sheet of cold puff pastry onto a lightly floured surface. Slice the pastry sheet into nine equally sized squares. Repeat this process with the second sheet. Use a small, sharp knife to score a smaller square inside each large square, about half an inch from the edges, being careful not to cut all the way through the dough. This scoring creates the framework that allows the edges to puff up dramatically while containing the filling.
Step 2: Prepare the Cream Cheese Filling
In a medium bowl, beat the softened cream cheese until it is smooth and lump-free. Add the granulated sugar, egg yolk, vanilla powder, lemon zest, and flour. Mix everything thoroughly until the filling is perfectly incorporated and creamy. The mixture should be thick enough to hold its shape when spooned. Taste the mixture and adjust the sweetness or lemon zest if desired before moving on.
Step 3: Assemble and Fill the Danishes
Place one tablespoon of the cream cheese mixture onto the center of each scored pastry square, ensuring you keep the filling strictly within the scored inner box. Gently spread the cheese filling evenly. Next, carefully spoon about one teaspoon of the cherry pie filling right on top of the cream cheese layer. Ensure you don’t overfill the pastries, as excessive filling can spill over and cause the puff pastry to stick to the parchment paper, hindering the puff.
Step 4: Bake for Golden Perfection
Brush the exposed outer edges of the puff pastry with the egg wash. This step gives the Danish that beautiful, rich golden sheen and helps the edges crisp up beautifully. Place the baking sheets in the preheated oven and bake for 15 to 18 minutes. The Danishes are done when the edges are puffed high, beautifully golden brown, and the cream cheese center looks set and slightly caramelized. Transfer the Danishes immediately to a wire rack to cool completely before glazing.
Transfer to plates and drizzle with a simple powdered sugar glaze for the perfect finishing touch.
Achieving Pastry Perfection
Baking Danish pastries might sound intimidating, but the primary factors determining success are temperature control and patience. Puff pastry works best when it is very cold, but not frozen solid. If the dough gets too warm, the butter layers melt prematurely, resulting in a flat, greasy pastry instead of the light, airy lift we crave. If you find your kitchen is particularly warm, work quickly, or place the assembled pastries back into the refrigerator for 10 minutes before applying the egg wash and baking. This rapid chilling shock can help ensure maximum puff.
Another common mistake is applying too much cherry filling. While tempting, excessive filling adds too much moisture to the center and can prevent the pastry below it from fully cooking through. It can also bubble out, creating a messy, burnt edge. Remember, we are aiming for a balanced ratio—a generous dollop of cream cheese with a modest crowning of cherries provides the best structure and flavor distribution. Mastering this technique means your homemadeCherry Cheese Danish Recipewill look every bit as good as it tastes.
Troubleshooting Your Cheese Danish
If your danishes look great but the filling is too runny, you likely needed a bit more flour in the cream cheese mixture, or your cream cheese was too warm when you started. Always ensure the cheese is only softened enough to mix, not melted. If the pastry seems too pale after the designated baking time, check your oven calibration; a few extra minutes at the correct temperature can achieve that desirable deep golden color without burning.
For those dealing with filling that tries to escape during the bake, ensuring the edges are sealed well with the egg wash and that the score marks are sufficient to define the barrier will help. Some leakage is normal, but excessive spillage means your initial cuts were too shallow or the filling quantity was too high. Practice makes perfect, and even the “failed” Danishes still taste incredible, providing a happy, albeit messy, learning experience.
Creative Twists and Presentation
While the classic cherry cheese combination is undoubtedly a masterpiece, this recipe is highly adaptable. You can easily swap out the fruit filling to match seasonal flavors or personal preference. Consider using a blueberry or raspberry preserve, or even a spiced apple butter in the fall. If you use fresh fruit, like sliced peaches or strawberries, toss them lightly with a teaspoon of granulated sugar and a squeeze of fresh lemon juice before placing them on the cheese mixture. Just be mindful that fresh fruit releases more moisture, so the baking time might extend slightly.
For a slightly different presentation, you don’t have to stick to the square shape. You could cut the pastry into triangles or even small rounds using a cookie cutter for bite-sized mini danishes. These smaller portions are fantastic for catering events or serving alongside coffee during a large gathering. The key to consistency is ensuring all shapes are roughly the same size so they bake evenly.
Flavor Swaps for Your Danish Filling
To enhance the flavor profile of the cream cheese itself, try incorporating different extracts. A hint of alcohol-free almond extract works beautifully with the cherry flavor, creating a subtle complexity. Alternatively, a tiny amount of rosewater can transform this simple baked good into an elegant, floral treat. Always add extracts sparingly, tasting as you go, to avoid overwhelming the delicate balance of the cheese and fruit.
When it comes to the glaze, creativity is encouraged. Instead of the basic powdered sugar drizzle, melt a small amount of apricot jam and brush it over the warm Danishes immediately after they come out of the oven for a deep, professional-looking shine. This glaze not only adds visual appeal but also locks in moisture, keeping the Danish pastry tasting fresh longer. Garnish with a sprinkle of chopped pistachios or a light dusting of coarse turbinado sugar before baking for added crunch and visual texture.
Frequently Asked Questions About Baking Danishes
Can I prepare the Danishes ahead of time?
Yes, you absolutely can prepare them a day in advance. Assemble the Danishes entirely, including the filling and cherries, but do not apply the egg wash. Cover the baking sheet loosely with plastic wrap and refrigerate them overnight. In the morning, brush with the egg wash, and bake as directed, possibly adding one or two minutes to the baking time since they are starting from a colder temperature.
How do I store leftover Danish pastries?
Store leftoverCherry Cheese Danish Recipepastries in an airtight container at room temperature for up to two days. If you need to keep them longer, refrigerate them for up to five days. To refresh them, place them in a preheated oven or toaster oven at 350°F (175°C) for a few minutes until the pastry re-crisps.
Why didn’t my puff pastry puff up properly?
Puff pastry fails to rise typically because the dough was too warm before baking, causing the butter to melt out instead of creating steam. Ensure your oven is fully preheated and that the dough is very cold when it goes in. Also, avoid using a dull knife to cut the pastry, as squishing the edges can seal the layers and prevent them from rising properly.
Can I use frozen cherries instead of canned?
You can use frozen cherries, but you must first thaw them completely and drain them thoroughly to remove excess liquid. Cook them down briefly in a saucepan with a little sugar and cornstarch until they thicken into a compote. Using them frozen or un-thickened will result in a watery filling that will make the pastry soggy.
The quest for the perfect breakfast pastry often feels like chasing a mythical unicorn—beautiful in theory, but impossible to find outside of a high-end European bakery. Forget those bland, cardboard-textured supermarket imposters. We are here today to create a truly flaky, creamy, and ridiculously flavorful pastry that will make your mornings feel instantly sophisticated, even if you are still wearing yesterday’s mismatched socks.
I spent years intimidated by puff pastry, fearing it required professional training and a temperature-controlled kitchen. But here is the secret: store-bought puff pastry is a miracle of modern cooking, and mastering thisCherry Cheese Danish Recipeis far easier than folding a fitted sheet. This recipe delivers big flavor with minimal fuss, transforming simple ingredients into a brunch showstopper.
Perfecting the Cooking Process
Achieve excellence by prepping the cream cheese filling first, as it needs time to chill and firm up properly. While the filling is chilling, prepare the vibrant cherry mixture. finally, roll out the puff pastry, assemble the danishes quickly, and bake immediately for maximum lift and flakiness.
Add Your Touch
Swap cherries for sliced peaches or blueberries for a seasonal variation. Enhance the cream cheese by adding a pinch of lemon zest or a dash of vanilla bean paste for depth. For a nuttier crust, sprinkle chopped toasted almonds over the glaze before it sets, giving extra crunch.
Storing & Reheating
Store cooled danishes in an airtight container at room temperature for up to two days, or refrigerate for five days. To reheat, place them in a preheated 300°F oven for five to seven minutes. Avoid microwaving, as it softens the flaky pastry, making it soggy and disappointing.
I brought a batch of these danishes to a recent brunch, and my friend Sarah—a notoriously harsh food critic—demanded the recipe immediately, claiming it was better than the local bakery’s offering. That’s when I knew this recipe was golden.
- Ensure your cream cheese is completely softened before mixing; this prevents lumps and guarantees a velvety smooth, professional filling texture.
- Brush the edges of the pastry lightly with egg wash, sealing the filling inside and ensuring a beautiful, golden brown, glossy finish.
- Puff pastry requires very cold temperatures, so work swiftly and return scraps to the freezer if you need to re-roll them for perfect layering.
The Anatomy of a Flaky Danish
Danish pastry, orwienerbrødas it’s known in its homeland, relies entirely on the magic of lamination—layers of butter and dough creating steam pockets in the oven. While traditional Danish requires hours of folding and chilling, our simplified approach uses pre-made puff pastry, granting you the same luxurious flakiness without the existential dread of messing up your folds. The true challenge here is avoiding the urge to eat the cream cheese filling with a spoon before it makes it onto the pastry.
This recipe balances the tartness of the cherries with the sweet, slightly tangy richness of the cheese filling. It’s the perfect marriage of flavors, providing a delightful contrast to the buttery crunch of the crust. We dive into the components that make this dessert unforgettable.
Ingredients for Your Pastry Masterpiece
The beauty of theCherry Cheese Danish Recipelies in its simplicity. You don’t need obscure ingredients; just high-quality dairy and frozen puff pastry will do the trick.
For the Cream Cheese Filling:
- 8 oz full-fat cream cheese, softened
- 1/4 cup granulated sugar
- 1 large egg yolk
- 1 teaspoon pure vanilla powder
- Pinch of fine salt
For the Cherry Topping:
- 1 cup fresh or frozen pitted cherries (if frozen, do not thaw)
- 1/4 cup granulated sugar
- 1 tablespoon lemon juice (or apple cider vinegar for sharpness)
- 1 teaspoon cornstarch or potato starch
- 2 tablespoons water
For the Danish Assembly:
- 1 sheet (about 14.1 oz) quality frozen puff pastry, thawed overnight in the refrigerator
- 1 large egg, beaten (for egg wash)
For the Glaze (Optional):
- 1 cup powdered sugar
- 2 tablespoons milk or cream
- 1/2 teaspoon alcohol-free almond extract
Creating the Creamy Foundation
The filling is the soul of this pastry. If it’s lumpy or runny, the entire danish experience falls apart. Remember that key tip: softened cream cheese is non-negotiable. Don’t rush this step by microwaving it, or you’ll end up with a separation disaster. Simply leave it out on the counter for about an hour before starting.
In a medium bowl, combine the softened cream cheese, granulated sugar, egg yolk, vanilla powder, and salt. Beat the mixture using an electric mixer until it is incredibly smooth and light, resembling fluffy cloud matter. Once achieved, cover the bowl and place it in the refrigerator. Allowing it to chill for at least 30 minutes prevents the filling from running out of the pastry while baking, keeping everything neatly contained.
The Burst of Cherry Flavor
While the filling is chilling, tackle the luscious cherry topping. This quick compote provides the necessary tart contrast. Combine the cherries, sugar, lemon juice, and water in a small saucepan. Bring the mixture to a gentle simmer over medium heat. If you use frozen cherries, this will take slightly longer as the liquid releases.
In a separate small dish, mix the cornstarch with a tablespoon of cold water to create a smooth slurry. Once the cherries are bubbling and softening slightly (about five minutes), pour the cornstarch slurry into the saucepan while stirring constantly. The mixture will thicken almost immediately. Remove the pan from the heat and allow the compote to cool completely. Cooling is essential; hot filling will melt your puff pastry and ruin the lamination.
Assembling Your Cherry Cheese Danish Recipe
This is where the magic happens, and speed is your ally. Preheat your oven to 400°F (200°C) and line two large baking sheets with parchment paper. Ensure your puff pastry is properly thawed but still cold to the touch. Unfold the pastry sheet carefully onto a lightly floured surface. You need to cut the sheet into nine equal squares.
Using a sharp knife or pizza cutter, divide the pastry into a three-by-three grid, resulting in nine individual squares. Transfer these squares to your prepared baking sheets, leaving plenty of space between them for expansion. Now, take a small knife and lightly score a border about half an inch inside the perimeter of each square. Do not cut all the way through; this border will ensure the edges rise dramatically while keeping the center relatively flat for the filling.
Filling and Baking Instructions
Once the squares are scored, spoon one generous tablespoon of the chilled cream cheese mixture onto the center of each pastry square, keeping it inside the scored border. Follow this with a teaspoon of the cooled cherry compote placed directly on top of the cream cheese. Avoid overfilling, which causes messy leaks during baking.
In a small bowl, whisk your remaining large egg with a tablespoon of water to create the egg wash. Gently brush the exposed pastry edges—the half-inch border—with the egg wash. This gives the danishes their signature glossy, golden appearance. Place the trays in the oven and bake for 18 to 22 minutes, rotating the trays halfway through, until the pastries are puffed up, deeply golden brown, and smell absolutely irresistible.
The Final Flourish: Drizzle and Delight
While the danishes cool slightly on a wire rack, prepare the optional but highly recommended glaze. Whisk together the powdered sugar, milk, and alcohol-free almond extract until smooth and drizzle-worthy. The alcohol-free almond extract complements the cherry flavor beautifully, adding a hidden complexity that elevates the final product.
Once the pastries have cooled for about 10 minutes, use a fork or spoon to liberally drizzle the glaze over the tops. If you prefer a lighter glaze, simply dip the fork tines into the mixture and flick it gently across the pastries for a decorative, threadlike effect. Serve these incredible pastries warm or at room temperature. They are perfect for breakfast, brunch, or a late-night dessert emergency.
Troubleshooting Common Danish Dilemmas
Even simple recipes can hit snags. Understanding why something went wrong is the first step toward becoming a true pastry master. Often, the culprit is heat control, either in the pastry itself or the oven temperature. If your Danish is flat, your oven might be running cold, or your puff pastry warmed up too much before baking.
If your filling seems to have vanished or run all over the pan, it was likely too warm or too wet. Ensure the cream cheese filling is firm before assembly and that the cherry compote has sufficiently thickened and cooled. Following these simple guidelines ensures a successful, bakery-worthy treat every single time you attempt this delightful pastry.
Frequently Asked Questions About Pastries
How can I ensure my puff pastry is flaky?
Flakiness depends entirely on cold temperatures. Keep the pastry refrigerated until the last possible moment, work quickly during assembly, and ensure your oven is fully preheated to the specified high temperature for immediate puffing.
Can I freeze these danishes?
Yes, you can freeze the danishes after they are baked but before they are glazed. Allow them to cool completely, then wrap them individually in plastic wrap and foil. They can be stored for up to three months and reheated straight from the freezer.
What non-dairy substitute can I use for the cream cheese filling?
You can successfully use high-quality vegan cream cheese alternatives. Ensure they are the block style, as the tub varieties often contain too much water and will make your filling runny during baking.
Conclusion for Cherry Cheese Danish Recipe
If you followed this guide, you now possess the secret to the perfect Cherry Cheese Danish. Forget those dry, disappointing store-bought pastries; this homemade version offers a cloud of creamy filling and a tart, vibrant fruit topping nestled on gloriously flaky puff pastry. It’s a guaranteed hit for Sunday brunch or an unexpected Tuesday evening treat. Baking doesn’t need to be overly complicated, just utterly delicious. So grab your ingredients, turn up the oven, and prepare for some serious pastry perfection. This specific Cherry Cheese Danish Recipe is truly a keeper, offering a touch of bakery magic right in your own kitchen.
Print
Cherry Cheese Danish Recipe
Flaky puff pastry meets luscious, vanilla-scented cream cheese filling in this 400°F Danish delight. Includes complete cooking instructions and detailed nutritional breakdown.
- Total Time: 35 minutes
- Yield: 4 servings 1x
Ingredients
- 1 sheet (about 10 oz) store-bought puff pastry, thawed
- 8 ounces cream cheese, softened
- 1/4 cup granulated sugar
- 1 large egg, separated (yolk for filling, white for egg wash)
- 1/2 teaspoon alcohol-free vanilla extract
- 1 (21 ounce) can cherry pie filling
- 1/2 cup powdered sugar (for glaze)
Instructions
- Step 1: Preheat the oven to 400°F (200°C) and line a baking sheet with parchment paper. Unfold the thawed puff pastry and cut it into 4 equal squares. Place the squares on the prepared baking sheet.
- Step 2: Prepare the cream cheese filling by beating the softened cream cheese, granulated sugar, egg yolk, and alcohol-free vanilla extract in a medium bowl until the mixture is completely smooth and creamy.
- Step 3: Assemble the danishes by lightly scoring a 1/2-inch border around the edge of each pastry square, making sure not to cut all the way through the bottom. Place about 2-3 tablespoons of the cream cheese filling in the center of the scored area on each square.
- Step 4: Prepare the egg wash by lightly whisking the reserved egg white with 1 tablespoon of water or milk. Brush the edges of the puff pastry squares with the egg wash for a golden sheen.
- Step 5: Bake for 15-18 minutes, or until the pastry is puffed and the edges are deep golden brown. Carefully remove the danishes from the oven and immediately spoon 1-2 tablespoons of the cherry pie filling onto the warm cream cheese center of each danish.
- Step 6: Allow the danishes to cool slightly. Whisk the powdered sugar with 2-3 teaspoons of milk or water until a smooth glaze forms, then drizzle the glaze over the danishes before serving.
Notes
- Keep any leftover danishes in an airtight container in the fridge for up to three days, though the pastry is best enjoyed the day they are baked.
- For the crispiest texture, avoid microwaving and reheat cooled danishes in a preheated 300°F oven for 5-7 minutes.
- Serve these delicious danishes slightly warm, perhaps with a side of strong espresso or a small bowl of fresh whipped cream for an indulgent brunch.
- For a beautifully puffed edge, score the pastry lightly but ensure your knife does not cut completely through the bottom layer, which keeps the filling contained during baking.
- Prep Time: 15 minutes
- Cook Time: 20 minutes
- Method: Stovetop
- Cuisine: American
FAQs
Why does my dough stick, and how long does it take to make the Cherry Cheese Danish Recipe?
Dough stickiness usually signals that it’s too warm. If you are using pre-made puff pastry, ensure you chill it thoroughly between steps—a cold dough equals flakier results. This specific homemade Danish requires minimal active mixing time, maybe 20 minutes, plus 25 minutes for baking. The waiting is the hardest part! Prepping the cream cheese filling is quick, but allowing the baked pastries to cool slightly before dusting them with powdered sugar ensures maximum enjoyment and prevents the sugar from melting immediately. You will find that this Cherry Cheese Danish Recipe is surprisingly fast to assemble, perfect for a weekend morning.
Can I prepare the cream cheese filling ahead of time for this sweet pastry?
Absolutely! The cream cheese filling is incredibly forgiving and thrives when prepared in advance. Mix your cream cheese, sugar, and vanilla, then store it covered tightly in the refrigerator for up to 48 hours. When you are ready to assemble your pastries, simply give the mixture a quick stir to loosen it up. This saves precious time during the assembly process, letting you get those fresh Danish into the oven faster. This preparation method is ideal for busy mornings when you crave a freshly baked breakfast treat but need to minimize the steps right before serving.
What is the best type of cherry to use in this homemade Cherry Cheese Danish Recipe?
We recommend using high-quality preserved or frozen cherries for the most consistent flavor and texture, especially when they are out of season. If using frozen cherries, thaw them completely and drain any excess liquid before cooking them down for the topping. If you find fresh sour cherries, they provide the authentic tartness often associated with Danish pastries, but you may need to increase the sugar slightly in your cherry glaze. Canned cherry pie filling also works wonderfully if you are aiming for maximum speed, though the texture will be thicker. Always prioritize a vibrant, slightly tart cherry to perfectly complement the rich cream cheese center of this delicacy.
How should I store leftover Cherry Cheese Danish?
To keep your freshly baked Danish tasting great, store the leftovers in an airtight container at room temperature for up to two days. However, due to the dairy in the cream cheese filling, refrigeration is recommended if you plan to keep them longer than 48 hours. If refrigerated, gently warm them in the oven for a few minutes before serving—this helps revive the flaky texture and ensures a delightful experience. Freezing is possible, but it may compromise the puff pastry’s extreme flakiness slightly. Enjoy this delightful homemade sweet cheese treat while it is still fresh for the best flavor profile.


Leave a Comment