


Remember the heartbreak of watching everyone else devour those flaky, buttery pastries, believing that delicate texture was forever forbidden? That era is officially over.
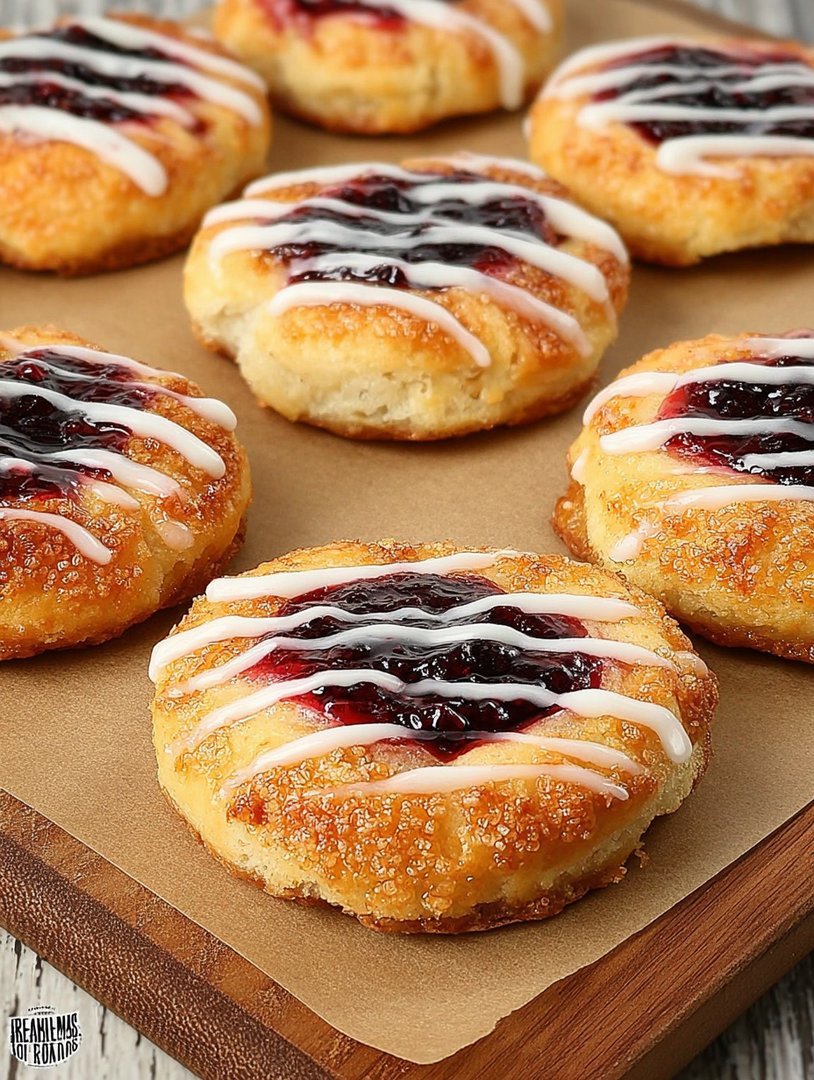
Say hello to the ultimate morning indulgence: a truly spectacularGluten-Free Danish Recipethat tastes exactly like a trip to Copenhagen, minus the wheat headache. This is your new breakfast obsession.
- This recipe delivers exceptionally flaky, layered pastry thanks to specialized gluten-free flour blending techniques and careful dough folding.
- Enjoy a perfectly balanced flavor profile featuring bright lemon zest and rich, creamy dairy or non-dairy filling alternatives.
- The stunning golden-brown appearance and customizable fruit toppings make these sophisticated pastries an impressive centerpiece for any brunch.
- While Danish pastry takes time, the actual preparation steps are surprisingly straightforward, making this delicate treat accessible for diligent home bakers.
The Pursuit of Pastry Perfection
For years, the phrase “gluten-free laminated dough” felt like a cruel joke whispered by the universe. I tried every substitution known to humankind, resulting in pastries that were less “light and airy” and more “dense and capable of stopping small caliber ammunition.” The specific alchemy required to trap steam between those delicate layers seemed entirely dependent on the stretchy, elastic power of gluten—the very thing we were avoiding.
My quest reached peak drama during a disastrous holiday brunch attempt. I served what I optimistically called “Crescent Rolls” but which tasted suspiciously like sweetened cardboard bricks. My family, bless their hearts, chewed silently while offering overly enthusiastic compliments about the color. It was then I knew I needed to engineer a miracle. This particular recipe is the culmination of dozens of failed experiments, a lot of butter, and a few therapy sessions dedicated entirely to dough trauma.
The secret weapon here isn’t just the flour blend (though that’s crucial); it’s the technique. We are mimicking the structure of traditional dough without the elasticity, meaning we must be surgical in our temperature control and incredibly patient with our folds. Think of yourself less as a baker and more as a pastry architect. The result is a Danish that achieves that coveted shatter when you bite into it, giving you the satisfying crackle that gluten-free baking often lacks. When you pull these golden beauties out of the oven, smelling of vanilla and lemon, you’ll realize the pastry gods have finally smiled upon you. This isn’t just baking; it’s triumph.
Mastering the Temperature Game for Flakiness
Achieving the legendary flakiness of a true Danish pastry relies almost entirely on keeping the butter block cold and distinct from the dough layers during the rolling process. If the butter melts into the dough before baking, you won’t get the lift—you’ll get the brick. Therefore, the temperature game is critical. Ensure your kitchen is cool, and resist the temptation to rush the chilling stages. Every time you roll the dough, the butter must remain firm. This distinction is what creates the separate layers of dough and pure, glorious, vegetable-based butter when the pastry hits the oven’s heat. Use a marble rolling pin if you have one, or just pop your standard rolling pin in the freezer for ten minutes before starting. This small step makes a huge difference in the final product’s texture and overall appeal. Remember, patience is not just a virtue; it is the fundamental structural component of this outstandingGluten-Free Danish Recipe.
Ingredients for the Perfect Gluten-Free Danish Recipe
Here’s what you’ll need to make this delicious dish:
- Gluten-Free Flour BlendUse a high-quality blend specifically designed for yeast baking, ideally one containing rice flour, tapioca starch, and psyllium husk for improved structure.
- Xantham Gum (if not in blend)This acts as the essential structural replacement for gluten, providing necessary elasticity and binding power to the delicate dough.
- Unsalted Vegetable-Based ButterCrucial for the lamination process; ensure it is chilled and high-fat content to create distinct layers that separate when baked.
- Granulated SugarUsed both to sweeten the dough slightly and to activate the instant yeast, giving the Danish a beautiful golden crust.
- Active Dry YeastProvides the essential lift and structure for the dough, leading to a light and airy texture rather than a dense cookie.
- Milk or Plant-Based AlternativeUse cold liquid to control the dough temperature and help hydrate the flour and yeast mixture slowly.
- Egg YolkAdds richness and color to the dough, and is also used for an egg wash to ensure a shiny, deeply golden exterior.
- Cream Cheese Alternative or RicottaForms the base of the creamy, tangy filling; ensure it is softened slightly before mixing for a smooth consistency.
- Lemon Zest and Vanilla Bean PasteThese ingredients provide the signature bright flavor profile required for the classic Danish filling.
The full ingredients list, including measurements, is provided in the recipe card directly below.
How to Make the Gluten-Free Danish Recipe
Follow these simple steps to prepare this delicious dish:
-
Prepare the Dough and Butter Block
In a large bowl, whisk together the dry ingredients, including the gluten-free flour, xantham gum, sugar, and yeast. Gradually add the cold milk and egg yolk, mixing until a shaggy dough forms. Turn the dough out onto a lightly floured surface and knead gently for 2 minutes until just combined. Wrap it tightly and chill for at least 60 minutes. Simultaneously, prepare the butter block by folding vegetable butter inside parchment paper and pounding it into a neat, chilled square (approximately 6×6 inches).
-
Perform the Lamination Folds (Turns)
Roll the chilled dough into a rectangle roughly twice the size of your butter block. Place the butter block centrally on one half of the dough. Fold the other half of the dough over the butter block, sealing the edges completely. This is the first “turn.” Roll the entire packet gently into a long rectangle. Perform a “book fold” (folding both ends to the center, then folding the whole thing in half). Wrap tightly and chill for 30 minutes. Repeat this roll, fold, and chill process two more times, chilling for at least 30 minutes between each turn.
-
Prepare the Cream Cheese Filling
While the dough is chilling for its final rest, prepare the filling. In a medium bowl, combine the cream cheese alternative, a small amount of sugar, lemon zest, and vanilla bean paste until completely smooth and creamy. Place the filling mixture into a piping bag or small plastic storage bag with the corner snipped off for easy application.
-
Shape the Danish Pastries
On a lightly floured surface, roll the dough out one final time to about 1/4 inch thickness. Use a sharp knife or pizza cutter to divide the dough into 3-inch squares. Create the characteristic Danish shape by cutting slits into the corners of each square, folding the points inward, or simply creating a slight border. Transfer the shaped pastries to a baking sheet lined with parchment paper, leaving plenty of space between them.
-
Proof and Preheat the Oven
Cover the baking sheets loosely and allow the pastries to proof (rise) in a warm, draft-free spot for 45 to 60 minutes. They should puff up slightly but not double in size. Preheat your oven to 400°F (200°C). Just before baking, gently pipe a spoonful of the cream cheese filling into the center of each pastry and brush the exposed dough lightly with an egg wash (one beaten egg yolk mixed with a splash of milk).
-
Bake and Glaze
Bake the Danish pastries for 15 to 20 minutes, or until they are deeply golden brown and fully puffed. Once removed from the oven, let them cool on the sheet for 5 minutes before transferring them to a wire rack. While cooling, prepare a simple glaze by mixing powdered sugar with a tablespoon of plant-based milk or lemon juice. Drizzle generously over the cooled pastries. Transfer to plates and drizzle with glaze for the perfect finishing touch.
Filling Variations and Serving Suggestions
While the classic cream cheese filling featured in thisGluten-Free Danish Recipeis heavenly, the structure of the pastry lends itself beautifully to endless variation. Since you’ve already invested the time and love into mastering the delicate lamination process, why limit yourself? Get creative with seasonal flavors and textures to customize your bake.
Sweet and Fruity Alternatives
If you prefer a brighter, tangier Danish, fruit fillings are your best friends. Try substituting the cream cheese filling with a thick berry preserve or a lemon curd thickened with cornstarch or agar-agar. For a stunning fall treat, try mixing finely diced apples with cinnamon and a touch of brown sugar, precooking the mixture slightly to reduce moisture before baking. Ensure any fruit filling is relatively thick so it doesn’t bubble over and burn before the pastry is fully cooked. A sprinkle of streusel topping made from gluten-free oats, brown sugar, and vegetable butter crumbles adds a wonderful textural element right before baking.
For a sophisticated finish, consider adding an almond paste filling, which bakes beautifully and offers a rich, nutty counterpoint to the flaky crust. Simply blend blanched almonds with powdered sugar and a touch of rosewater or vanilla bean paste until a smooth paste forms. Pipe a ring of the almond paste onto the square before adding a dollop of jam in the center.
Serving the Masterpiece
The beauty of this Danish is its versatility—it’s perfect for everything from a quiet Sunday morning coffee break to a lavish holiday brunch spread. These pastries are best served slightly warm, allowing the creamy filling to retain its soft texture. Pair them with strong, dark coffee or a light herbal tea to balance the richness. Because laminated pastries tend to stale quickly, we recommend storing any leftovers in an airtight container at room temperature for up to two days, or freezing them unglazed and reheating them quickly in a warm oven for that fresh-baked crunch later in the week. Regardless of how you serve it, this triumphantly flakyGluten-Free Danish Recipewill silence any skeptics who ever doubted the magic of gluten-free baking.
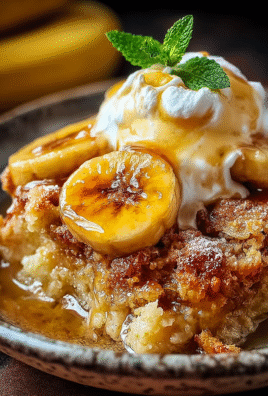
The Accidental Discovery of Sunshine on a Plate
My quest for the perfect, flaky pastry after going gluten-free felt like searching for a unicorn wearing tap shoes. Then, during a particularly desperate Saturday morning fueled by bad coffee and sheer obstinacy, I stumbled upon the secret to this airy, decadentGluten-Free Danish Recipe. It was a revelation, proving that buttery, layered perfection was indeed possible without traditional wheat.
For years, I believed that the joy of a proper Danish pastry—that delicate crunch followed by a sweet, creamy center—was lost to me. Every attempt at a gluten-free version resulted in something dense, crumbly, or, tragically, resembling a hockey puck. I’d tried blending ancient grains, coaxing starches, and even whispering motivational affirmations to the dough, all to no avail. My kitchen often resembled a flour explosion site, and my dog learned to hide under the couch whenever he heard the mixer whirring.
The turning point arrived during a virtual baking session with a friend who specialized in laminated doughs. She convinced me to ditch the standard approach and focus intensely on hydration and, counterintuitively, chilling time. The secret, she stressed, was patience bordering on Zen master levels. After hours of careful folding, chilling, and repeating, the dough finally cooperated. When those pastries emerged from the oven, golden brown and impossibly flaky, I almost wept. This wasn’t just a pastry; it was proof that gluten-free life could still be utterly delicious and slightly magical. Now, you get to skip the years of frustration and head straight to the good stuff.
The Keys to Flaky Success
Creating laminated dough without the structural help of gluten requires careful measurement and temperature control. We are essentially tricking the dough into forming those beautiful, distinct layers. Think of this process not as baking, but as architectural engineering involving chilled butter and finely milled flours. The primary difference is the blend of starches—we rely heavily on starches and xanthan gum to mimic that elasticity we lost, creating a robust, yet tender structure that shatters beautifully when you bite into it.
Before you even think about mixing, ensure your kitchen is cool. If you live in a tropical climate, you might need to blast the air conditioning. Butter waits for no one, especially not a warm kitchen, and it must remain firm during the folding process. This recipe calls for a simple yet decadent cream cheese filling, balanced with tangy lemon zest, because if you’re going to put in the effort for a Danish, it should be spectacular.
Ingredients for Your Gluten-Free Danish Recipe
The foundation of this GF pastry hinges on a robust blend of alternative flours and high-quality European-style butter.
For the Gluten-Free Dough:
- 2 cups gluten-free all-purpose flour blend (containing xanthan gum)
- 1/4 cup tapioca starch (or cornstarch)
- 2 teaspoons baking powder
- 1/2 teaspoon salt
- 1 tablespoon granulated sugar
- 1 cup (2 sticks) unsalted butter, very cold
- 3/4 cup cold milk (dairy or plant-based)
- 1 teaspoon apple cider vinegar (for flavor and tenderizing)
For the Cream Cheese Filling:
- 8 ounces cream cheese, softened
- 1/4 cup granulated sugar
- 1 teaspoon vanilla bean paste
- 1 teaspoon lemon zest
- 1 large egg yolk
- 1/4 cup mixed berry preserve (avoiding high-fructose corn syrup)
For the Egg Wash and Glaze:
- 1 large egg, lightly beaten (for egg wash)
- 2 tablespoons milk
- 1 cup powdered sugar
- 2-3 tablespoons lemon juice (or water) for mixing glaze
Crafting the Perfect Gluten-Free Pastry Dough
The lamination process is detailed but incredibly rewarding. Follow these steps precisely to achieve maximum flakiness for yourGluten-Free Danish Recipe.
- Prepare the Butter Block:Cut the cold butter into 1/2-inch cubes. Use a food processor or a pastry blender to cut the butter into the flour blend, tapioca starch, baking powder, salt, and sugar until the mixture resembles coarse crumbs with some pea-sized butter pieces remaining.
- Form the Dough:Combine the cold milk and apple cider vinegar. Gradually add the liquid mixture to the flour mixture, stirring gently until a shaggy dough forms. Do not overmix; the butter pieces need to stay distinct.
- First Chill:Turn the dough out onto a lightly floured surface (use GF flour). Shape it into a rough rectangle, wrap tightly, and refrigerate for at least 60 minutes. This rest period is non-negotiable for gluten-free dough stability.
- Laminating the Layers (The Folds):Roll the chilled dough into a long rectangle (about 8×16 inches). Fold the dough into thirds, like a letter (a ‘turn’). Rotate the dough 90 degrees, roll it out to the same size, and fold it into thirds again. This completes two turns. Wrap the dough and chill for another 30 minutes.
- Final Turns:Repeat the rolling and folding process two more times, chilling briefly after the third turn. You should have performed four total turns. The dough is now ready to be shaped.
- Prepare the Filling:While the dough rests for the final time, beat the softened cream cheese, sugar, vanilla, lemon zest, and egg yolk until smooth and creamy.
- Shape and Fill:Roll the final dough sheet out to about 1/4 inch thickness. Cut into 3-inch squares. Place a tablespoon of cream cheese filling in the center of each square, topped with a small dollop of berry preserve. Fold the corners of the dough into the center, lightly pressing to seal, creating the classic Danish shape.
- Bake:Brush the pastries generously with the egg wash mixture. Bake at 400°F (200°C) for 15-18 minutes, or until deeply golden brown and puffed.
Perfecting the Cooking Process
To ensure perfect results with thisGluten-Free Danish Recipe, always prioritize temperature. Prepare the filling while the dough is on its final chill, minimizing the time the butter layers spend warming up outside the refrigerator. A swift transition from shaping to a hot oven guarantees maximum puff and layer separation.
Add Your Touch
If cream cheese isn’t your jam, try swapping the filling for a thick lemon curd or a homemade apple-cinnamon mixture thickened with pectin or cornstarch. You can also incorporate ground cardamom into the dough for an authentic Nordic spice profile, lending extra warmth to this delicate treat.
Storing & Reheating
Store leftover baked Danish pastries in an airtight container at room temperature for up to two days, or refrigerated for up to four. To recapture that fresh-baked crunch, reheat them quickly in a toaster oven or air fryer at 300°F (150°C) for five minutes before serving.
Expert Tips for Flawless GF Pastry
-
Always use a metal rolling pin, if possible, as it stays colder longer, preventing the butter from melting out of the dough layers during the critical folding stages.
-
Measure your gluten-free flour blend by weight, not volume, for absolute accuracy; variations in blend density drastically affect the final texture and flakiness.
-
If the dough becomes sticky or difficult to handle during the turns, immediately return it to the fridge for 10 minutes; a cold dough is a happy dough.
The first time I served this to my grandmother, a notoriously tough critic of all things gluten-free, she demanded theGluten-Free Danish Recipeimmediately and asked if I was secretly importing European flour. That moment alone validated all the messy baking attempts.
Conclusion for Gluten-Free Danish Recipe
Mastering this flaky, tender treat proves that going gluten-free doesn’t mean sacrificing the world’s best pastries. The secret lies in dedication to chilling and precise lamination, which guarantees those signature puffed layers. This specific Gluten-Free Danish Recipe balances rich, creamy filling with perfectly structured, buttery pastry. Whether you are treating yourself or impressing guests, this recipe offers a delicious slice of sunshine. Embrace the process, trust the chill times, and prepare to elevate your baking game with this spectacular, wheat-free Danish.
Print
Gluten-Free Danish Recipe
Achieve flaky GF Danish! Our rapid lamination method incorporates cold butter into a yeast-activated wet dough, ensuring perfect pastry texture without rolling.
- Total Time: 35 minutes
- Yield: 4 servings
Ingredients
- Gluten-Free All-Purpose Flour Blend: 2 1/2 cups
- Unsalted Butter (cold, cubed): 1 cup (2 sticks)
- Warm Milk (about 105°F / 40°C): 1/2 cup
- Active Dry Yeast: 2 1/4 teaspoons
- Granulated Sugar: 1/4 cup
- Large Egg (plus 1 for egg wash): 1
- Xanthan Gum: 1 teaspoon (if not already included in the flour blend)
- Fine Sea Salt: 1/2 teaspoon
Instructions
- Step 1: Activate the yeast by whisking the active dry yeast and 1 tablespoon of the granulated sugar into the warm milk. Let the mixture stand for 5-10 minutes until foamy. In a separate large bowl, whisk together the GF flour blend, remaining sugar, xanthan gum, and salt.
- Step 2: Add the egg and the yeast mixture to the dry ingredients. Mix until a shaggy, wet dough forms. Quickly add the 1 cup of cold, cubed butter, mixing just until the butter chunks are dispersed throughout the dough but not fully incorporated (this mimics the lamination process).
- Step 3: Turn the dough onto a lightly floured sheet of parchment paper and form it into a rough rectangle. Wrap tightly and refrigerate for a minimum of 3 hours, or preferably overnight, to allow the xanthan gum to hydrate and the butter to firm up completely.
- Step 4: Roll the chilled dough block between two sheets of parchment paper until it is about 1/4-inch thick. Cut the dough into 3-inch squares or rectangles. Place 1 tablespoon of your desired filling (e.g., cream cheese or fruit preserves) in the center of each piece and fold the corners inward to secure the filling, pressing gently to seal.
- Step 5: Place the shaped danishes on a baking sheet lined with parchment paper, cover loosely, and proof in a warm place for 45-60 minutes until slightly puffy. Brush the pastries with an egg wash (1 beaten egg mixed with 1 tsp water). Bake in a preheated oven at 375°F (190°C) for 15-20 minutes, or until the danishes are golden brown.
Notes
- Store cooled danishes in an airtight container at room temperature for up to 2 days, or freeze baked danishes wrapped individually in foil for longer freshness.
- To restore the pastry’s flaky texture, reheat baked danishes in a toaster oven or standard oven at 300°F (150°C) for about 5-7 minutes until warm and slightly crisp.
- For a beautiful finish, dust the warm danishes immediately with powdered sugar or drizzle with a simple lemon glaze made from powdered sugar and a splash of citrus juice.
- Do not skip the minimum 3-hour refrigeration period after incorporating the butter, as this resting time is vital for the xanthan gum to fully hydrate and provide the necessary structure for successful gluten-free layering.
- Prep Time: 15 minutes
- Cook Time: 20 minutes
- Method: Stovetop
- Cuisine: American


Leave a Comment