


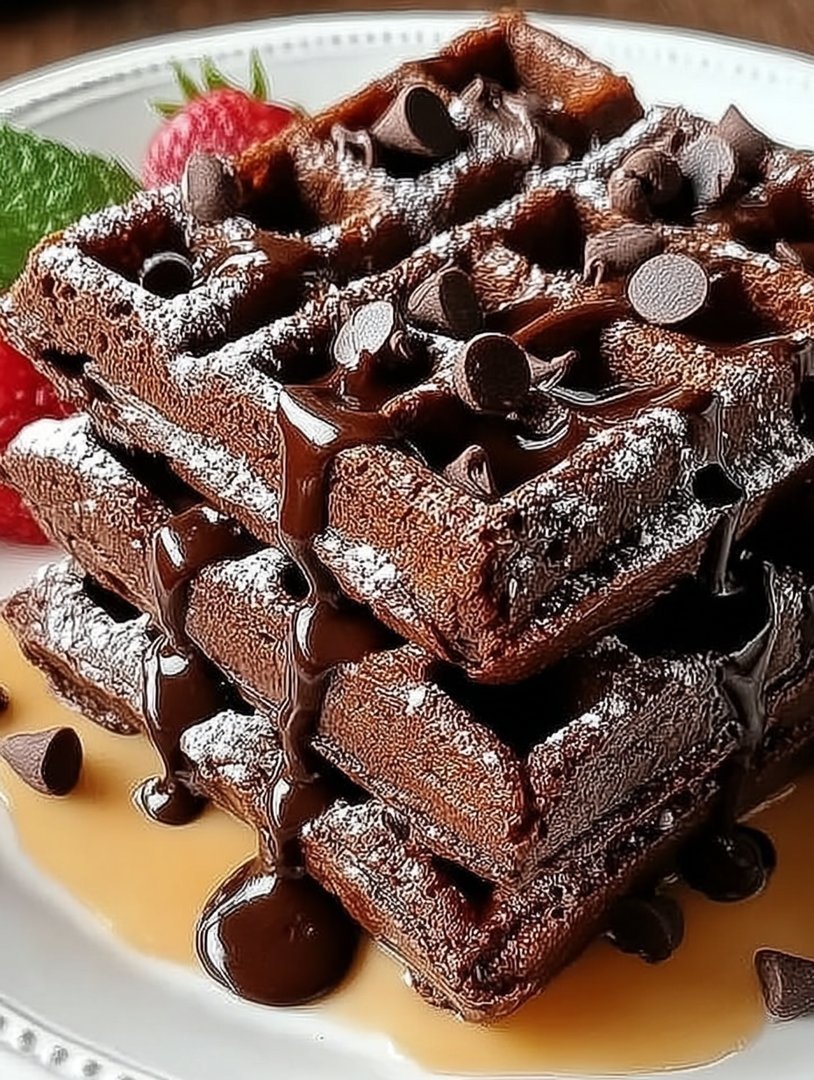
My therapist suggested I find joy in simple things, but honestly, “simple” usually means “boring.” Then I discovered the profound, messy joy of makingBrownie Waffles. They smell intensely rich, taste like pure rebellion, offering fudgy centers trapped inside a crispy, deeply gridded shell. This indulgent yet simple creation is officially my new simple joy.
- This recipe is lightning fast, transforming a 45-minute baking project into a decadent dessert ready in under 10 minutes flat.
- Experience an unparalleled flavor profile that marries the deep intensity of dark chocolate with satisfyingly crisp, buttery edges.
- The distinctive waffle grid creates a visually stunning presentation, perfect for holding generous scoops of vanilla bean ice cream and syrup.
- These versatile treats adapt seamlessly, serving equally well as a rich breakfast treat or an elegant, comforting late-night dessert.
Why Brownie Waffles Are Your New Obsession
You probably think waffles are just for breakfast, reserved for Saturday mornings and drowning in maple syrup. You are only half wrong. While a classic buttermilk waffle is delightful, we are dealing with something far superior here—a revolutionary dessert mashup that will change the way you view baking forever. Imagine the moment you pull a freshly baked, impossibly fudgy brownie from the oven. Now, imagine achieving that exact level of deep, dark chocolate richness, but without waiting an hour for it to cook and then cool. This is the superpower of theBrownie Waffles.
I first invented this masterpiece one terrible Tuesday evening. I had a serious craving for brownies, but absolutely zero patience. The waffle iron sat on the counter, glaring at me, reminding me of all the times I promised to make chicken and waffles and failed. I thought, “What is the worst that could happen?” Spoiler alert: the best thing happened. I quickly whipped up my standard chewy brownie batter, spooned it into the hot iron, and three minutes later, I was holding the perfect combination of crispy exterior and molten, gooey interior. They required minimal cleanup and delivered instant gratification, making them a true culinary miracle for the modern, impatient baker.
The Magic of the Waffle Iron
The waffle iron does more than just cook food quickly; it chemically enhances the brownie experience. When traditional brownie batter hits the high, direct heat of the iron, the edges crisp up immediately, forming those beloved crispy ridges. Meanwhile, the center stays incredibly moist and dense because the short cooking time doesn’t allow the batter to dry out. The geometric design is crucial, too. Those little pockets are not just aesthetically pleasing; they are scientifically engineered reservoirs designed to hold maximum amounts of your preferred toppings, be it homemade caramel sauce, whipped cream, or sprinkles. If you own a waffle iron, you are legally required to try this recipe. If you don’t, congratulations, you just found the perfect excuse to buy one.
Achieving Peak Fudginess
Fudgy brownies require careful ratios. We prioritize melted butter and high-quality cocoa powder to ensure a dense, rich texture that resists getting cakey. Unlike airy, light waffles, we want this batter to feel thick and substantial. The key is controlling the amount of flour and resisting the urge to overmix the ingredients. Overmixing develops the gluten, leading to a tougher, bread-like structure—the very thing we are trying to avoid. We aim for moist crumbs and chew. When incorporating dry ingredients, stir only until barely combined. A few streaks of flour are acceptable; a homogeneous, stretchy paste is a failure. Trust the process, and trust the power of good chocolate chips for those molten pockets of gooey delight.
Ingredients for Brownie Waffles
Here’s what you’ll need to make this delicious dish:
- Unsalted ButterUse good quality butter, melted until liquid, as it provides richness and helps achieve that essential chewy texture.
- Granulated Sugar and Brown SugarThe combination yields both structure (granulated) and moisture (brown sugar), essential for a fudgy interior.
- EggsEggs bind the ingredients together; ensure they are at room temperature for the best emulsification with the melted butter and sugars.
- Vanilla Bean PasteThis enhances the chocolate flavor, adding aromatic depth that prevents the final product from tasting one-dimensional.
- All-Purpose FlourMeasure the flour carefully by spooning it into the measuring cup, as too much will result in cakey rather than fudgy waffles.
- Unsweetened Cocoa PowderUse high-quality Dutch-process cocoa powder for a deep, rich, and mellow chocolate flavor profile.
- Salt and Baking PowderSalt balances the sweetness, while a small amount of baking powder provides just enough lift to cook properly without becoming too fluffy.
- Chocolate Chips or ChunksFold these in at the very end to guarantee pockets of melted chocolate throughout the cooked waffle.
The full ingredients list, including measurements, is provided in the recipe card directly below.
How to Make Brownie Waffles
Follow these simple steps to prepare this delicious dish:
Step 1: Prep the Waffle Iron and Dry Ingredients
Preheat your waffle iron to medium-high heat. If your waffle iron is not nonstick, lightly grease the plates with a cooking spray or a brush of melted butter. In a medium bowl, whisk together the flour, cocoa powder, baking powder, and salt. Set these dry ingredients aside, ensuring they are thoroughly combined to prevent pockets of unmixed baking powder.
Step 2: Melt the Butter and Combine Sugars
In a separate, large, microwave-safe bowl, melt the unsalted butter until fully liquid. Whisk in both the granulated sugar and brown sugar until the mixture is smooth and glossy. This initial mixing is crucial for dissolving the sugar, which contributes to the shiny crust later on. Let this mixture cool slightly for about two minutes before proceeding.
Step 3: Incorporate Wet Ingredients
Add the room-temperature eggs, one at a time, whisking vigorously after each addition until fully incorporated. The mixture should become lighter in color and slightly thickened. Stir in the vanilla bean paste. If your eggs were cold, you might notice the mixture tightening up, but continue mixing until it emulsifies again.
Step 4: Combine Wet and Dry Batters
Gently fold the dry ingredients into the wet mixture using a spatula. Mix only until streaks of flour disappear. Be mindful not to overmix; a slightly shaggy batter is preferred for maximum fudginess. Fold in the chocolate chips now, distributing them evenly throughout the dense batter.
Step 5: Waffle the Brownie Batter
Spoon the batter onto the preheated waffle iron, using about 1/3 to 1/2 cup of batter per waffle, depending on the size of your iron. Do not overfill the iron, as the batter will spread significantly. Close the lid and cook for 3 to 5 minutes. Cooking time varies greatly based on your iron; look for the steam to stop, and the edges to appear firm and crispy.
Step 6: Cool and Finish
Carefully remove theBrownie Wafflesfrom the iron using a fork or tongs. Transfer them immediately to a wire cooling rack. Cooling them on a rack prevents the bottoms from becoming soggy. Serve them warm, dusted with powdered sugar or adorned with your favorite ice cream.
Customizing Your Brownie Waffles
The beauty of this recipe lies not only in its speed but also in its adaptability. You can easily tweak the base batter or the toppings to create entirely new dessert experiences every time you crave them. While the chocolate base is inherently satisfying, a few minor additions can elevate these waffles from simple treat to gourmet indulgence. Consider swirling in a tablespoon of smooth peanut butter into the batter for a peanut butter swirl effect, or replacing half the chocolate chips with toffee bits for an added layer of crunch and buttery flavor. For a citrusy twist, add one teaspoon of orange extract and some finely grated orange zest to the batter.
Mastering the Toppings Game
When it comes to toppings, the waffle grid acts as your personalized delivery system. Do not settle for plain whipped cream! Elevate your dessert with creative additions. For a classic Sunday feel, try a scoop of coffee ice cream and a robust drizzle of thick, homemade caramel sauce. If you prefer something lighter, serve them with sliced strawberries and a dollop of crème fraîche. Since the waffle is already intensely chocolatey, tart fruits like raspberries, or a cherry compote simmered with a splash of apple cider vinegar, provide an excellent counterpoint. For pure decadence, chop up some toasted pecans or walnuts and sprinkle them liberally over hot fudge.
Storage and Reheating Tips
Miraculously, these desserts store incredibly well, meaning you can make a batch ahead of time and freeze them for future, urgent cravings. Allow theBrownie Wafflesto cool completely on the wire rack. Once cooled, stack them with small squares of parchment paper between each one to prevent sticking. Place the stack in an airtight, freezer-safe bag or container. They keep well in the freezer for up to three months. To reheat, you have two excellent options: simply pop them directly into a toaster or toaster oven for 2–3 minutes to restore maximum crispiness, or place them back in the preheated waffle iron for about 60 seconds until heated through.
Frequently Asked Questions
Baking brownies in a waffle iron might seem unorthodox, so here are answers to the most common questions I receive about this culinary hack.
Can I use a boxed brownie mix instead of homemade batter?
Absolutely! If time is a serious concern, a standard boxed brownie mix works perfectly. Just prepare the batter according to the package directions, but aim for a slightly thicker batter consistency if possible, adding perhaps one tablespoon less water or oil than instructed for better results in the waffle iron.
Why are my Brownie Waffles sticking to the iron?
Sticking usually happens for two reasons: insufficient greasing or the waffle iron is not hot enough. Make sure your iron is fully preheated before adding the batter, and always use a nonstick spray, even if your iron claims to be nonstick. Ensure you allow them to cook until the steam stops, indicating the edges are set.
What is the best way to prevent the batter from overflowing?
Use less batter than you think you need. Since brownie batter is denser than traditional waffle batter, it expands sideways more than it rises. Start with half a cup of batter for a standard Belgian waffle maker, then adjust on your second waffle if needed.
Can I make these gluten-free?
Yes, many high-quality 1:1 gluten-free flour blends substitute seamlessly in this recipe. Because the structure relies more on the melted butter and cocoa than the gluten itself, the texture remains wonderfully fudgy.
Life is full of great debates: pineapple on pizza, toilet paper orientation, and, most importantly, should brownies be chewy or fudgy? I’ve spent years pondering these existential dessert quandaries. Then, one Tuesday afternoon, staring mournfully at a pan of cooling, flat brownies while my neglected waffle iron sat silently mocking me, I had a culinary epiphany so blinding it nearly required sunglasses.
Why choose between fudgy and crispy when you could have both? The solution was simple, beautiful, and slightly genius: we were going to force the humble, dark chocolate square into a grid pattern. Friends, welcome to the world ofBrownie Waffles—the ultimate dessert hybrid that delivers a crispy exterior crunch followed immediately by a melting, dense, gooey interior. If you thought waffles were just for breakfast, prepare to have your entire concept of time and dessert rearranged.
The Alchemy of Dessert Hybrids
The beauty of this recipe lies in its sheer audacity. Taking a classic, decadent brownie batter and subjecting it to the extreme heat and compression of a waffle iron changes its entire personality. Instead of the typical dense brick structure you get from oven baking, the batter quickly caramelizes wherever it touches the hot metal plates. This rapid cooking process locks in moisture at the center while creating thin, lacy, crunchy edges that shatter delightfully when you bite into them.
It’s the texture game changer you never knew you needed. Imagine that satisfying crispness followed by the warm, melted chocolate center that we all adore in a traditional fudge brownie. They cook faster, they look cooler, and they hold onto toppings better than any flat dessert could hope to. Plus, the deep pockets are natural reservoirs for vanilla bean ice cream or a drizzle of velvety caramel sauce. These dessert squares are proof that sometimes, ignoring tradition leads to culinary triumph.
Gathering Your Arsenal
You don’t need a fancy diploma from culinary school to master these chocolate grid treats. You just need quality ingredients and a willingness to embrace the fudgy side of life. I recommend using the best cocoa powder you can afford; remember, these waffles rely on intense chocolate flavor, not volume, to impress. Keep a damp cloth handy, as cocoa powder seems to have a magnetic attraction to white surfaces and pristine clothing.
Ingredients for Epic Dessert Waffles
- 1 cup (2 sticks) unsalted butter, melted
- 2 cups granulated white sugar
- 4 large eggs, room temperature
- 2 teaspoons pure vanilla bean paste
- 1 cup high-quality unsweetened cocoa powder
- 1 cup all-purpose flour
- 1 teaspoon baking powder
- 1/2 teaspoon salt
- 1 cup semi-sweet chocolate chips (or chunks for maximum melt)
- Optional: 1/2 teaspoon instant espresso powder (for depth of flavor)
Crafting the Perfect Brownie Waffles Batter
The batter preparation is straightforward, mimicking a classic fudge brownie recipe. The key is controlling the temperature and managing your mixing. Start by melting your butter gently. You want it fully liquid, but not so hot that it cooks the eggs later.
In a large bowl, pour the melted butter. Whisk in the granulated sugar until the mixture is smooth and glossy. Now, incorporate the eggs one at a time, making sure each one is fully mixed before adding the next. Stir in the vanilla bean paste and the optional espresso powder, if using. The mixture should lighten slightly in color and become quite luxurious.
In a separate medium bowl, whisk together your dry ingredients: the cocoa powder, flour, baking powder, and salt. Whisking the dry ingredients ensures that the baking powder and salt are evenly distributed, preventing pockets of unmixed ingredients later on. Now, add the dry mixture into the wet ingredients. Fold them together gently using a spatula. Do not overmix! Stir only until no streaks of flour remain. Overmixing develops the gluten too much, resulting in a tougher, cakey texture, and we are aiming for maximum fudginess here. Finally, fold in those chocolate chips.
Some recipes recommend chilling brownie batter, but for these specific fudgy dessert squares, immediate cooking works best. A warm batter flows more easily into the intricate grooves of the waffle iron, ensuring those perfect crisp edges.
The Recipe Card: From Batter to Brownie Grid
This is where the magic happens. Your standard Belgian waffle maker or classic square iron will work perfectly. The total time for this dessert is significantly shorter than traditional oven baking, which makes this recipe dangerous for late-night chocolate cravings.
Step-by-Step Waffling Success
- Preheat:Plug in your waffle iron and allow it to preheat fully according to the manufacturer’s directions. This is crucial. If the iron isn’t hot enough, the batter will stick and turn gummy instead of crisping up.
- Grease:Even if your iron is nonstick, a quick spray of cooking oil or a brush of melted butter ensures easy release and helps promote that beautiful, dark crust.
- Portion:Scoop about 1/2 cup (or slightly less, depending on your iron size) of the batter onto the center of the iron. Remember, this batter is denser than traditional waffle batter, so it won’t spread as quickly.
- Cook:Close the lid firmly but gently. Cook for approximately 3 to 5 minutes, depending on your desired level of fudginess. For a fully cooked, slightly crispier dessert square, go for the full five minutes. For maximum gooey melt, pull them out closer to three minutes. You may notice less steam escaping than with regular waffles; this is normal due to the high fat content of the brownie batter.
- Serve:Carefully remove the chocolate grid treats using a silicone spatula. Place them on a cooling rack briefly while you prepare the rest of the batch, or better yet, serve them immediately while they are piping hot and melting.
Perfecting the Cooking Process
Start by preheating the waffle iron completely while you finish mixing the batter. Cook the dessert squares immediately after mixing, ensuring you do not overfill the iron. This sequence guarantees maximum crispness and a perfectly fudgy center, delivering that essential contrast in every bite.
The first time I served these, my nephew thought they were burnt charcoal briquettes. Then he tasted one and immediately asked for the recipe. They became an instant family legend.
Expert Tips for Flawless Results
- Do not substitute melted butter for oil; the butter solids are essential for that deep, rich fudgy flavor we are aiming for in the finished product.
- Use quality cocoa powder, preferably Dutch-processed, as it provides a darker color and a far more intense chocolate experience.
- For the ultimate gooey center, slightly undercook the sweet squares in the iron, removing them when they are still soft to the touch.
Add Your Touch
Swap out standard chocolate chips for espresso chips or butterscotch morsels for a twist. A dash of cinnamon in the dry ingredients deepens the flavor profile beautifully. You can also mix in chopped toasted pecans or walnuts for added crunch and texture, elevating the complexity of these fudgy dessert squares.
Toppings: The Summit of Sweetness
A bareBrownie Wafflesis a tragedy. These grid-shaped delights are begging for toppings. Because of the deep valleys created by the iron, they can handle generous amounts of ice cream and sauce without spilling over the plate. Think of the waffle pattern as a sophisticated moat system designed to hold deliciousness.
Here are a few suggestions to take your waffled brownies from great to magnificent:
- The Classic:A scoop of high-quality vanilla ice cream, topped with homemade caramel sauce and a sprinkle of sea salt.
- The Fruity Fix:Fresh raspberries or strawberries paired with a dollop of sweetened whipped cream. The slight tartness cuts through the richness beautifully.
- The Peanut Butter Dream:A generous spread of warmed peanut butter, melted chocolate ganache, and chopped roasted peanuts.
Storing & Reheating
Store cooled dessert squares in an airtight container at room temperature for up to three days. For best results, reheat them briefly in a toaster or air fryer until the edges crisp up again. Avoid the microwave, which turns them rubbery and sacrifices the precious crisp-to-fudge ratio you worked so hard to achieve.
Frequently Asked Questions About Brownie Waffles
Don’t worry, even seasoned bakers have questions when they venture into the delightful land of hybridized desserts. Here are answers to the most common queries about making the perfect chocolate grid treats.
What if my batter is too sticky and dense?
If your batter seems excessively thick and difficult to spread, you may have used slightly too much flour or over-chilled the mixture. Try adding a tablespoon of milk or a cooled, whisked egg white to loosen the consistency slightly before waffling. It should be thick, but spreadable.
Can I use a boxed brownie mix?
Absolutely! If you prefer convenience, a standard boxed brownie mix works great. Prepare the batter exactly as directed on the box, but you might need to slightly reduce the amount of liquid added (by about two tablespoons) to ensure the batter is thick enough to hold its structure in the waffle iron.
How do I prevent the waffles from sticking?
Preheating the waffle iron completely is your best defense against sticking. Additionally, always grease the iron well before the first waffle. If they start to stick midway through the batch, give the iron another light spray of oil.
Are these suitable for freezing?
Yes, these fudgy dessert squares freeze well. Once fully cooled, wrap individual portions tightly in plastic wrap, then place them in a freezer-safe bag. They will keep for up to three months. Reheat directly from the freezer in a toaster or oven for that fresh-baked crispness.
The Culinary Crisis That Created Brownie Waffles
I once hosted a small dinner party where the culinary gods decided to test my resolve. The oven, right as I needed it for the fudgy brownie dessert, staged a dramatic, catastrophic revolt and simply stopped working. There was smoke, a vague burning plastic smell, and absolutely no heat. Panic set in immediately. I desperately needed a quick, impressive dessert, and fast. My eyes landed on the forgotten waffle iron, usually reserved solely for Sunday morning carb loading.
Could I really translate that gooey, rich brownie batter into a waffle? The moment I spooned the chocolate mess into the hot iron, the kitchen transformed into a testing mikrobielles lab. The result, just four minutes later, was nothing short of revolutionary. Crispy edges, warm, soft, fudgy centers, and those perfect little squares ready to hold a mountain of ice cream. That night, the crispy Brownie Waffles were born from sheer desperation, proving that sometimes, appliance rebellion truly yields the best results.
Why the Waffle Iron is Your New Best Friend
Forget the traditional baking dish; the waffle iron is your secret weapon for making quick, high-impact chocolate desserts. It provides intense, dual-sided heat, dramatically reducing the cooking time from 40 minutes to less than five. More importantly, it creates a delightfully crisp exterior crust that traditional oven-baked brownies just cannot replicate. This appliance doesn’t just cook your batter; it maximizes the surface area for toppings and maximizes that highly satisfying, textural contrast between the crunchy shell and the melting interior.
Using the waffle iron transforms a standard pan dessert into a unique, single-serving treat, perfect for entertaining. Plus, cleanup is surprisingly fast, especially if you use a non-stick cooking spray liberally before starting. This quick method means you can satisfy those intense chocolate cravings almost instantly, turning a standard recipe into something truly extraordinary.
Essential Ingredients for Ultimate Brownie Waffles
The success of these beautiful creations relies on using high-quality ingredients and aiming for a thick, deeply flavorful batter. We keep this recipe simple, focusing entirely on a rich, fudgy chocolate base. You must aim for a consistency that is thicker than standard pancake batter but slightly thinner than cookie dough. This ensures they cook thoroughly without becoming overly dry or sticky.
If your standard brownie recipe seems too runny, consider adding an extra spoonful of high-quality cocoa powder to thicken it slightly. The goal is a batter that holds its shape a little bit when scooped onto the hot plates.
- 1 cup (2 sticks) unsalted butter
- 1 cup granulated white sugar
- 1/2 cup packed light brown sugar
- 3 large eggs
- 1 teaspoon pure vanilla bean paste
- 3/4 cup unsweetened cocoa powder
- 1 cup all-purpose flour
- 1/2 teaspoon baking powder
- 1/2 teaspoon salt
- 1 cup dark chocolate chips or chunks
Step-by-Step: Pressing Perfection
Making delicious waffled brownies is surprisingly straightforward, but you need to pay attention to one critical detail: preheating. A cold waffle iron will stick and ruin your endeavor, guaranteed. Start by plugging in your waffle maker and allowing it to heat fully, often indicated by a readiness light.
While the iron heats, melt the butter, then whisk in the sugars until smooth. Beat in the eggs one at a time, followed by the vanilla. In a separate bowl, whisk together the dry ingredients: cocoa powder, flour, baking powder, and salt. Gently fold the dry mixture into the wet ingredients until just combined. Do not overmix; streaks of flour are better than tough, cakey brownies. Finally, fold in those beautiful chocolate chips.
Grease the hot waffle plates thoroughly with non-stick spray or a brush of melted butter. Spoon the batter carefully onto the center of the plates, using about a half cup per waffle, depending on the size of your machine. Use just enough to fill the inner grid without overflowing onto your kitchen counter—a mess that is difficult to clean! Cook the chocolate batter until the steam stops rising, usually between 3 to 5 minutes, depending on how fudgy you like them. When you lift the lid, you should have perfectly sculpted, crispy chocolate squares ready to be served immediately.
Topping Strategies: Going Beyond Powdered Sugar
While a simple dusting of confectioner’s sugar looks elegant, these unique chocolate treats truly beg for more dramatic finishing touches. The texture of the Brownie Waffles demands contrast: think hot and cold, creamy and crunchy. This is where you can let your creativity run wild and really impress your guests.
A classic option is a generous scoop of vanilla bean ice cream nestled into the waffle grids, allowing the cold creaminess to melt slightly against the warmth of the chocolate. Drizzle generously with a homemade caramel sauce or a vibrant raspberry puree, which cuts through the richness beautifully. For those who enjoy a little extra texture, sprinkle toasted walnuts, pecans, or chopped peanuts right after they come off the iron. They stick perfectly while the surface is still hot. You can even experiment with a dollop of sweetened cream cheese frosting for an ultra-decadent presentation. Do not skimp on the toppings; they complete the experience!
Conclusion for Brownie Waffles
The journey to creating the ultimate fudgy and crispy treat ends here. These unique Brownie Waffles provide the perfect solution for anyone craving a decadent dessert without the lengthy oven time. By leveraging the power of the waffle iron, you achieve an ideal balance of a dense, chocolate interior and a delightfully crisp, waffle-patterned shell. This recipe is fast, forgiving, and endlessly customizable with your favorite toppings. Skip the pan, ditch the waiting, and start pressing your way to immediate chocolate gratification with these brilliant, waffled chocolate desserts today.
Print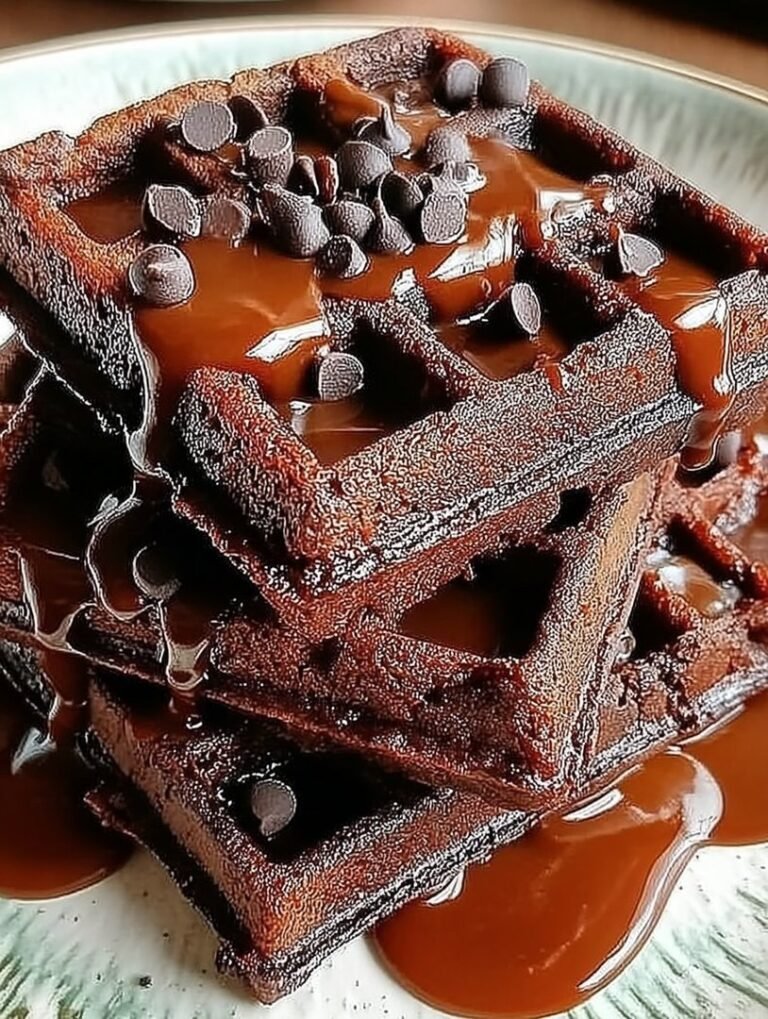
Brownie Waffles
Skip the cakey texture! These Fudgy Brownie Waffles are crafted from a rich, butter-forward batter, pressed crisp. See the full guide for perfect whisking technique and complete nutritional data.
- Total Time: 35 minutes
- Yield: 4 servings
Ingredients
- Unsalted Butter: 1/2 cup (1 stick), melted
- Granulated Sugar: 1 cup
- Large Eggs: 2
- Alcohol-Free Vanilla Extract: 1 teaspoon
- All-Purpose Flour: 1/2 cup
- Unsweetened Cocoa Powder: 1/3 cup
- Salt: 1/2 teaspoon
- Semi-sweet Chocolate Chips: 1/2 cup
Instructions
- Step 1: Preheat a waffle iron to medium-high heat and lightly spray the plates with non-stick cooking spray, as the batter is sticky. In a large bowl, whisk together the melted butter and granulated sugar until fully combined and glossy.
- Step 2: Whisk in the eggs one at a time until they are fully incorporated, then stir in the alcohol-free vanilla extract. The mixture should be smooth and slightly thickened.
- Step 3: In a separate medium bowl, whisk together the all-purpose flour, cocoa powder, and salt, ensuring there are no lumps of cocoa.
- Step 4: Gradually add the dry ingredients to the wet ingredients, mixing only until just combined. Do not overmix. Gently fold in the chocolate chips. The resulting batter will be thick, similar to traditional brownie batter.
- Step 5: Scoop 1/3 to 1/2 cup of batter (depending on your waffle iron size) onto the preheated waffle iron. Close the lid and cook for 3 to 5 minutes, or until the brownie waffle is set around the edges and cooked through.
- Step 6: Carefully remove the brownie waffle and repeat the cooking process with the remaining batter. Serve immediately with desired toppings such as powdered sugar or ice cream.
Notes
- For a truly fudgy center, ensure you mix the dry ingredients only until just combined, stopping as soon as the last streaks of flour disappear to prevent gluten development.
- To bring back that fresh, crisp edge, reheat leftover waffles briefly in a toaster oven or pop them back into the waffle iron for 60 to 90 seconds.
- Elevate these beyond breakfast by serving them warm with a scoop of salted caramel ice cream and a dusting of coarse sea salt to highlight the chocolate flavor.
- For longer storage, freeze cooled brownie waffles in a single layer before transferring them to a zip-top freezer bag; they keep well for up to three months.
- Prep Time: 15 minutes
- Cook Time: 20 minutes
- Method: Stovetop
- Cuisine: American
FAQs
How should I store and reheat leftover Brownie Waffles?
Storing these delicious treats correctly ensures they maintain their delightful texture. Once they have completely cooled to room temperature, stack them with parchment paper squares between each one to prevent sticking. Store them in an airtight container for up to three days at room temperature, though they rarely last that long! To reheat, simply pop the Brownie Waffles back into the toaster or the waffle iron for 30 seconds to one minute. This method perfectly restores the crispness of the exterior edges, making them taste freshly made and wonderfully warm again.
Can I prepare the batter ahead of time for these chocolate waffle treats?
Yes, absolutely. Preparing the batter for your Brownie Waffles ahead of time is a fantastic strategy for quick dessert assembly later. Mix the batter completely and store it securely in an airtight container in the refrigerator for up to 24 hours. When you are ready to cook, let the batter sit at room temperature for about 15 to 20 minutes to soften slightly. This makes it easier to scoop and pour onto the waffle iron. Just give it a quick stir before using, and you can have these crispy delights ready in minutes.
What kind of waffle iron works best for making perfect Brownie Waffles?
For making the best Brownie Waffles, we recommend using a traditional Belgian-style waffle iron, which creates deep pockets. These deep grids are ideal because they hold the thick batter well and result in a thicker, fudgier center while still allowing for plenty of those sought-after crispy edges. While a thinner, classic American-style waffle maker will still work, the Belgian style offers a more satisfying contrast in texture. Ensure whatever model you use is non-stick and fully preheated before adding any batter.
Can I freeze the cooked chocolate waffle squares for later consumption?
Freezing the cooked Brownie Waffles is a wonderful option for meal prepping quick desserts. After cooking, let the waffles cool completely on a wire rack. Once cooled, flash freeze them individually on a baking sheet for about an hour. Once frozen solid, transfer them to a freezer-safe bag or container, removing as much air as possible, and store for up to three months. Reheat them directly from frozen in a toaster oven or the waffle iron until they are hot throughout and crispy again.


Leave a Comment