


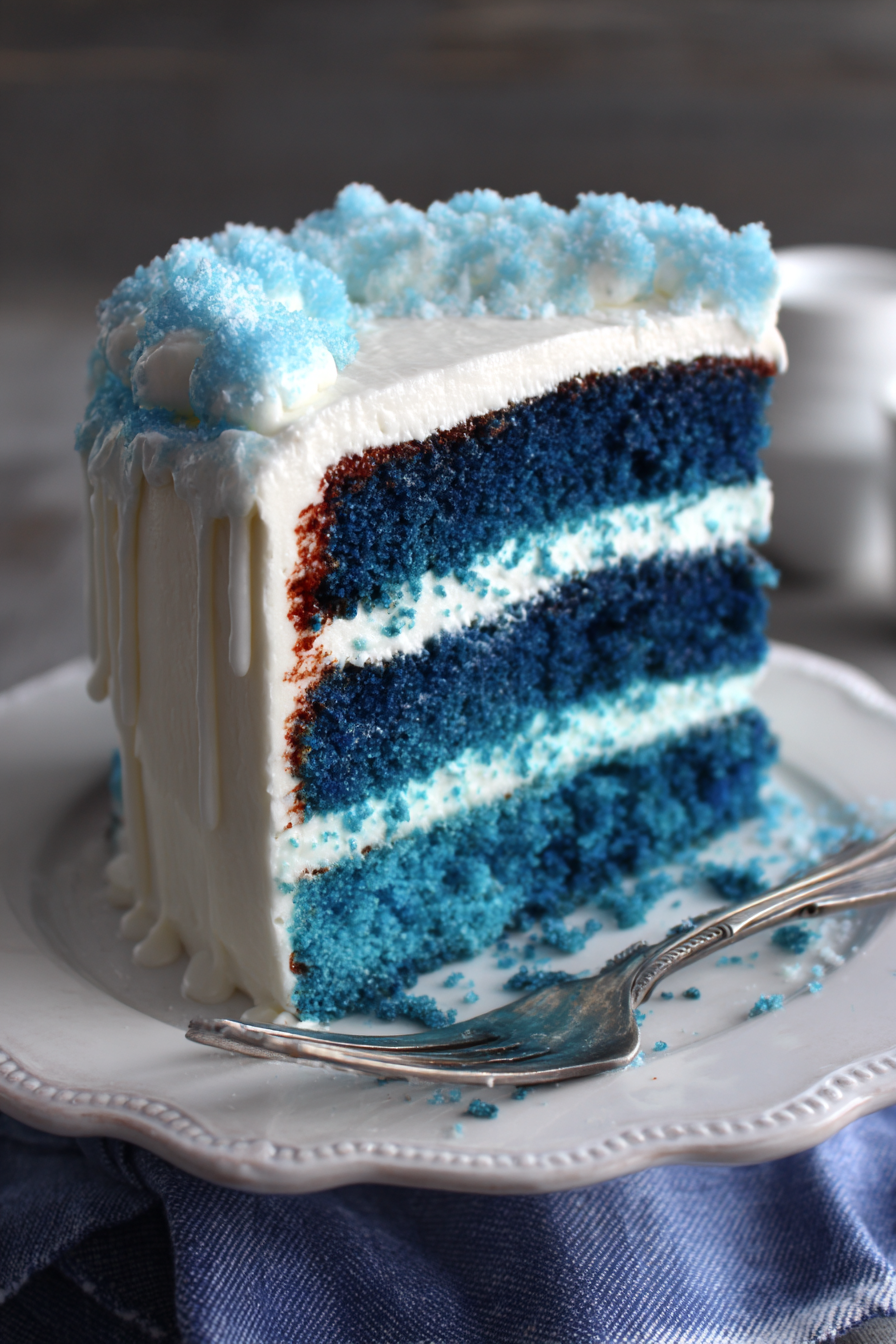
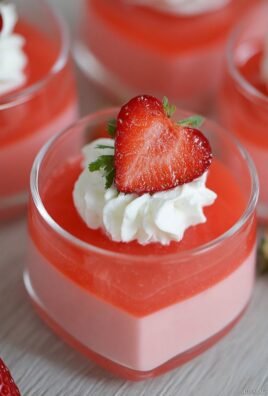
Imagine a cake so vibrant, so enchanting, it feels like a dream. A slice of **Blue Velvet Cake Recipe** offers a taste of pure magic, its soft crumb and ethereal hue transporting you to a realm of sweet delight.
This isn’t just dessert; it’s a captivating experience that turns ordinary moments into extraordinary celebrations. Picture layers of moist cake, complemented by a luscious frosting, creating a symphony of flavors that will make every bite unforgettable.
Here’s why you’ll adore this Blue Velvet Cake:
- This **Blue Velvet Cake Recipe** is surprisingly easy to follow, even for beginner bakers, ensuring a stunning result every time.
- The delicate vanilla flavor with a hint of tang, combined with the creamy frosting, creates a perfectly balanced and irresistible flavor profile.
- Its striking blue color makes this cake a showstopper, perfect for birthdays, holidays, or any occasion that calls for a bit of whimsy.
- Customize this **Blue Velvet Cake Recipe** with different frostings or decorations to suit your personal taste and make it truly your own.
Ingredients for Blue Velvet Cake Recipe
Here’s what you’ll need to make this delicious dish:
The full ingredients list, including measurements, is provided in the recipe card directly below.
How to Make Blue Velvet Cake Recipe
Follow these simple steps to prepare this delicious dish:
Step 1: Prep the Oven and Pans
Preheat your oven to 350°F (175°C). Grease and flour two 9-inch round cake pans. This prevents the cake from sticking and ensures easy removal.
Step 2: Cream Butter and Sugar
In a large bowl, cream together the softened butter and granulated sugar until light and fluffy. This step is crucial for creating a tender cake crumb.
Step 3: Add Eggs and Vanilla
Beat in the eggs one at a time, then stir in the Alcohol-free vanilla extract. Make sure each egg is fully incorporated before adding the next.
Step 4: Combine Dry Ingredients
In a separate bowl, whisk together the flour, baking powder, baking soda, and salt. This ensures even distribution of the leavening agents.
Step 5: Alternate Wet and Dry Ingredients
Gradually add the dry ingredients to the wet ingredients, alternating with the buttermilk and vegetable oil. Begin and end with the dry ingredients, mixing until just combined. Avoid overmixing.
Step 6: Add Food Coloring
Stir in the blue food coloring until you reach your desired shade of blue. Be careful not to add too much at once; you can always add more.
Step 7: Bake the Cakes
Pour the batter evenly into the prepared cake pans. Bake for 25-30 minutes, or until a toothpick inserted into the center comes out clean.
Step 8: Cool the Cakes
Let the cakes cool in the pans for 10 minutes before inverting them onto a wire rack to cool completely. This prevents the cakes from sticking and allows them to cool evenly.
Step 9: Make the Cream Cheese Frosting
While the cakes are cooling, prepare the cream cheese frosting. In a large bowl, beat together the softened cream cheese and butter until smooth and creamy.
Step 10: Add Powdered Sugar and Cream
Gradually add the powdered sugar, beating until smooth. Then, add the heavy cream and Alcohol-free vanilla extract and beat until the frosting is light and fluffy.
Step 11: Frost the Cake
Once the cakes are completely cool, place one layer on a serving plate and spread with a generous layer of cream cheese frosting. Top with the second cake layer and frost the entire cake.
Step 12: Decorate and Serve
Decorate the cake as desired with sprinkles, frosting swirls, or fresh berries. Slice and serve this stunning Blue Velvet Cake Recipe for the perfect finishing touch!
Tips for the Perfect Blue Velvet Cake
Creating a masterpiece like this **Blue Velvet Cake Recipe** requires a few insider secrets. Don’t worry, I’m here to spill the beans (or should I say, the blue dye?). Let’s dive into how to elevate your cake from “meh” to “marvelous!”
Achieving the Perfect Blue Hue
Getting that vibrant blue color can be tricky. Gel food coloring is your best friend here. Liquid food coloring tends to dilute the batter, affecting the cake’s texture. Start with a small amount of gel color and gradually add more until you achieve your desired intensity. Remember, the color will deepen slightly as the cake bakes!
Avoiding a Dry Cake
Nobody wants a dry cake. To ensure your **Blue Velvet Cake Recipe** is moist and tender, don’t overbake it. Start checking for doneness around 25 minutes with a toothpick. If it comes out clean or with a few moist crumbs, it’s ready! Also, using buttermilk and vegetable oil in the recipe helps retain moisture.
The Importance of Room Temperature Ingredients
Using room temperature ingredients is not just a suggestion; it’s a game-changer. Room temperature butter and eggs emulsify better, creating a smoother batter and a more even crumb. Take your butter and eggs out of the fridge about an hour before you start baking.
Leveling Your Cake Layers
Uneven cake layers can lead to a lopsided cake. Use a serrated knife to trim the tops of your cake layers to create a flat surface. This will make stacking and frosting much easier.
Chilling Your Cake
Before frosting, wrap your cooled cake layers in plastic wrap and chill them in the refrigerator for at least 30 minutes. This makes them easier to handle and prevents them from crumbling while frosting.
Variations on the Blue Velvet Cake Recipe
Want to put your own spin on this **Blue Velvet Cake Recipe**? Here are a few fun and creative ideas:
Different Frosting Flavors
While cream cheese frosting is classic, feel free to experiment with other flavors. A vanilla buttercream, a lemon frosting, or even a white chocolate ganache would all be delicious.
Add-Ins
Fold in some white chocolate chips, chopped nuts, or even a swirl of raspberry jam into the batter for added flavor and texture.
Blue Velvet Cupcakes
Transform the cake batter into cupcakes for a fun and portable treat. Simply fill cupcake liners about two-thirds full and bake for 18-20 minutes.
Ombre Effect
Create a stunning ombre effect by dividing the batter into three bowls and using different amounts of blue food coloring in each. This will give you varying shades of blue for each cake layer.
Blue Velvet Cake Pops
Crumble the baked cake, mix it with frosting, and roll it into cake pops for a bite-sized treat. Dip them in melted chocolate and decorate with sprinkles.
Storing Your Blue Velvet Cake
If you happen to have any leftovers (which is unlikely), here’s how to store your **Blue Velvet Cake Recipe** to keep it fresh:
Room Temperature
An unfrosted cake can be stored at room temperature for up to 2 days, wrapped tightly in plastic wrap or in an airtight container.
Refrigerator
A frosted cake should be stored in the refrigerator to prevent the frosting from melting. It will keep for up to 5 days in an airtight container.
Freezer
For longer storage, you can freeze the cake layers (frosted or unfrosted) for up to 3 months. Wrap them tightly in plastic wrap and then in foil before freezing. Thaw in the refrigerator overnight before serving.
Frequently Asked Questions About Blue Velvet Cake
Got questions? I’ve got answers! Here are some frequently asked questions about making this **Blue Velvet Cake Recipe**:
Can I use red food coloring instead of blue?
Absolutely! If you prefer a Red Velvet Cake, simply substitute the blue food coloring with red. The rest of the recipe remains the same.
Can I make this cake gluten-free?
Yes, you can! Substitute the all-purpose flour with a gluten-free flour blend. Be sure to use a blend that contains xanthan gum for the best texture.
Can I use a different type of milk?
While buttermilk is ideal for its tangy flavor and tenderizing properties, you can substitute it with regular milk mixed with a tablespoon of lemon juice or vinegar. Let it sit for a few minutes before using.
My cake sank in the middle. What went wrong?
Sinking in the middle can be caused by several factors, including overmixing the batter, using too much leavening agent, or opening the oven door too frequently during baking. Make sure to follow the recipe carefully and avoid these common mistakes.
Can I make the frosting ahead of time?
Yes, you can make the cream cheese frosting a day or two in advance. Store it in an airtight container in the refrigerator. Before using, let it soften slightly and whip it again to restore its light and fluffy texture.
The Final Slice
There you have it – a comprehensive guide to making the most enchanting **Blue Velvet Cake Recipe** you’ve ever tasted. This cake isn’t just about the striking color; it’s about creating a moment of joy and wonder with every slice. Whether you’re celebrating a special occasion or simply want to brighten up a gloomy day, this cake is guaranteed to bring a smile to your face.
So, grab your mixing bowls, preheat your oven, and get ready to embark on a baking adventure. With these tips and tricks in hand, you’ll be whipping up a stunning **Blue Velvet Cake Recipe** that will impress everyone who takes a bite. Happy baking!
Perfecting the Cooking Process
To nail this stunning dessert, organization is key. First, prep all your ingredients before you even think about turning on the mixer. Then, cream the butter and sugar until light and fluffy, ensuring everything is evenly incorporated for that perfect velvety texture.
Add Your Touch
Want to make it your own? Try swapping out the buttermilk for yogurt for a tangier flavor. Or, infuse the cake layers with a hint of citrus zest for a brighter, more vibrant twist. Don’t be afraid to experiment with extracts too!
Storing & Reheating
If you happen to have leftovers (a rare occurrence, trust me!), store the cake in an airtight container in the refrigerator. When you’re ready for another slice, let it sit at room temperature for a few minutes to soften the frosting for optimal enjoyment.
Here are some tips from the kitchen to yours for a guaranteed delicious outcome:
- Measure your flour accurately; spoon it into your measuring cup, then level it off with a knife to avoid a dense, dry cake.
- Don’t overmix the batter once you add the dry ingredients; overmixing develops gluten and can result in a tough cake.
- Let the cake layers cool completely before frosting to prevent the frosting from melting and sliding off.
(Personal anecdote formated as paragraph subheading (very important! don’t write any title for this paragraph))
I remember when I first made this for my friend’s birthday. The look on her face when she saw the vibrant blue was priceless! It’s become a tradition ever since.
The world of baking is often viewed as a precise science, and while there’s definitely some truth to that, sometimes you just need a recipe that’s as fun and whimsical as it is delicious. That’s where the **Blue Velvet Cake Recipe** comes in. It’s not your average cake; it’s a statement piece, a conversation starter, and a guaranteed crowd-pleaser. But before you grab your apron and start preheating that oven, let’s dive into why this particular cake has become so beloved and how you can create a masterpiece in your own kitchen.
What Makes Blue Velvet Cake Recipe So Special?
The beauty of the **Blue Velvet Cake Recipe** lies in its unexpected color. While red velvet has its charm, there’s something undeniably captivating about a bright blue cake. It’s like a party in every slice! But it’s not just about the looks. A truly exceptional **Blue Velvet Cake Recipe** combines a moist, tender crumb with a subtle cocoa flavor and a tangy buttermilk kick. The frosting, typically a cream cheese frosting, adds the perfect creamy counterpoint, balancing the sweetness and adding a touch of richness.
The Essential Ingredients for the Best Blue Velvet Cake Recipe
Okay, let’s talk ingredients. You’ll need the usual suspects: flour, sugar, eggs, butter (or a suitable substitute for those avoiding dairy), and baking powder. But the magic of a **Blue Velvet Cake Recipe** lies in a few key components.
- **Buttermilk:** This ingredient adds a crucial tanginess and helps to create a tender crumb. If you don’t have buttermilk on hand, you can make a substitute by adding a tablespoon of lemon juice or vinegar to a cup of milk.
- **Cocoa Powder:** A small amount of cocoa powder adds a subtle chocolatey flavor that complements the other ingredients beautifully. Don’t overdo it, though; you want the blue color to shine through.
- **Blue Food Coloring:** This is where the fun begins! Use a high-quality gel food coloring for the most vibrant and even color. Liquid food coloring can work, but you might need to use more, which can affect the consistency of the batter.
- **Vinegar and Baking Soda:** This dynamic duo creates a chemical reaction that helps to leaven the cake and adds to its characteristic texture. Don’t skip these!
Step-by-Step: Baking Your Blue Velvet Masterpiece
Alright, enough talk! Let’s get baking. Here’s a simple yet effective **Blue Velvet Cake Recipe** to get you started:
**Ingredients: **
- 2 1/2 cups all-purpose flour
- 2 cups granulated sugar
- 1 teaspoon baking soda
- 1 teaspoon baking powder
- 1 teaspoon salt
- 1/4 cup unsweetened cocoa powder
- 1 cup buttermilk
- 1/2 cup vegetable oil
- 2 large eggs
- 2 teaspoons Alcohol-free vanilla extract
- 1 tablespoon white vinegar
- 2 ounces blue food coloring (gel is best)
**Cream Cheese Frosting: **
- 8 ounces cream cheese, softened
- 1 cup (2 sticks) unsalted butter, softened
- 4 cups powdered sugar
- 2 teaspoons Alcohol-free vanilla extract
**Instructions: **
1. **Preheat and Prep: ** Preheat your oven to 350°F (175°C). Grease and flour two 9-inch round cake pans.
2. **Combine Dry Ingredients: ** In a large bowl, whisk together the flour, sugar, baking soda, baking powder, salt, and cocoa powder.
3. **Combine Wet Ingredients: ** In a separate bowl, combine the buttermilk, oil, eggs, Alcohol-free vanilla extract, and blue food coloring. Mix until well combined.
4. **Mix Batter: ** Gradually add the wet ingredients to the dry ingredients, mixing until just combined. Be careful not to overmix.
5. **Add Vinegar: ** In a small bowl, combine the vinegar and baking soda. It will fizz! Quickly add it to the batter and mix until just incorporated.
6. **Bake: ** Divide the batter evenly between the prepared cake pans. Bake for 25-30 minutes, or until a wooden skewer inserted into the center comes out clean.
7. **Cool: ** Let the cakes cool in the pans for 10 minutes before inverting them onto a wire rack to cool completely.
8. **Make Frosting: ** While the cakes are cooling, make the frosting. In a large bowl, beat the cream cheese and butter until light and fluffy. Gradually add the powdered sugar, mixing until smooth. Stir in the Alcohol-free vanilla extract.
9. **Frost: ** Once the cakes are completely cool, frost the top of one layer, then place the second layer on top. Frost the entire cake with the remaining frosting.
10. **Enjoy: ** Slice and serve! Prepare for compliments.
Tips and Tricks for the Perfect Blue Velvet Cake Recipe
Now that you have the basic recipe, here are some tips to take your **Blue Velvet Cake Recipe** to the next level:
- **Use Quality Ingredients:** This might seem obvious, but it makes a huge difference. Splurge on good-quality butter, Alcohol-free vanilla extract, and food coloring.
- **Don’t Overbake:** Overbaking is the enemy of moist cake. Start checking for doneness a few minutes before the recommended baking time.
- **Cool Completely:** I cannot stress this enough. Frosting a warm cake is a recipe for disaster. The frosting will melt, and the cake will slide around. Be patient!
- **Get Creative with Decorations:** The blue color provides a fantastic canvas for decorations. Consider fresh berries, chocolate shavings, or edible glitter.
Troubleshooting Your Blue Velvet Cake Recipe
Even the best bakers encounter challenges from time to time. Here are some common issues and how to fix them:
- **Cake is Dry:** You may have overbaked it, used too much flour, or not enough liquid. Double-check your measurements and baking time.
- **Cake is Dense:** This could be due to overmixing the batter. Mix until just combined, and avoid overworking the gluten.
- **Cake is Not Blue Enough:** Use a high-quality gel food coloring and add more if needed until you achieve the desired shade.
- **Frosting is Too Soft:** Make sure your cream cheese and butter are softened but not melted. You can also add a bit more powdered sugar to stiffen it up.
Variations on the Classic Blue Velvet Cake Recipe
The **Blue Velvet Cake Recipe** is a great starting point, but don’t be afraid to experiment! Here are a few ideas to get your creative juices flowing:
- **Blue Velvet Cupcakes:** Simply bake the batter in cupcake liners instead of cake pans. Adjust the baking time accordingly.
- **Blue Velvet Cake Pops:** Crumble the baked cake, mix it with frosting, and roll it into balls. Dip them in melted chocolate for a fun and festive treat.
- **Blue Velvet Cheesecake:** Combine the blue velvet cake batter with a cheesecake filling for a decadent dessert.
- **Different Frosting Flavors:** While cream cheese frosting is traditional, you could also try vanilla buttercream, chocolate ganache, or even a lemon glaze.
The Magic of Blue Velvet Cake Recipe and its Visual Appeal
Ultimately, the **Blue Velvet Cake Recipe** is about more than just the taste; it’s about the experience. It’s about the joy of creating something beautiful and delicious, and the delight of sharing it with loved ones. The vibrant blue color makes it a showstopper for any occasion, and the moist, flavorful cake is sure to impress. So go ahead, embrace your inner baker, and whip up a **Blue Velvet Cake Recipe** that will leave everyone saying, “Wow!”
Conclusion for Blue Velvet Cake Recipe :
This blue velvet cake isn’t just a recipe; it’s an adventure. From achieving that perfect, natural blue hue to mastering the tangy-sweet flavor balance, you’re creating something truly special. Remember to embrace the process, don’t be afraid to experiment with the frosting, and most importantly, have fun! Whether it’s for a birthday bash or just a “treat yourself” kind of day, this cake is guaranteed to bring a smile (and maybe a few envious glances) to everyone who tastes it. Now go forth and bake something amazing!
Print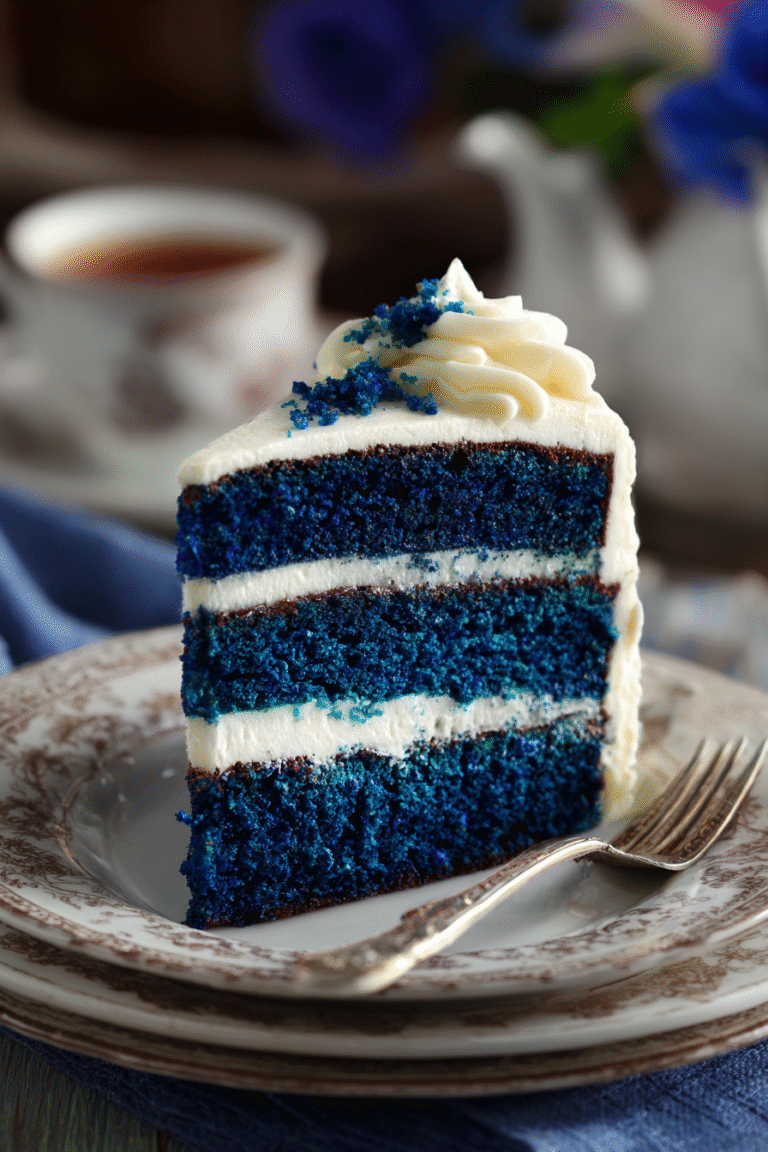
Blue Velvet Cake Recipe
Delicious blue velvet cake recipe recipe with detailed instructions and nutritional information.
- Total Time: 35 minutes
- Yield: 4 servings
Ingredients
- All-purpose flour: 2 1/2 cups
- Granulated sugar: 1 3/4 cups
- Unsweetened cocoa powder: 2 tablespoons
- Baking soda: 1 teaspoon
- Salt: 1 teaspoon
- Buttermilk: 1 cup
- Vegetable oil: 1/2 cup
- Eggs: 2 large
- Blue food coloring: 1-2 tablespoons
- White vinegar: 1 teaspoon
- Vanilla extract: 2 teaspoons
Instructions
- Step 1: Preheat oven to 350°F (175°C). Grease and flour two 9-inch round cake pans.
- Step 2: In a large bowl, whisk together flour, sugar, cocoa powder, baking soda, and salt.
- Step 3: In a separate bowl, combine buttermilk, oil, eggs, blue food coloring, vinegar, and vanilla extract.
- Step 4: Gradually add the wet ingredients to the dry ingredients, mixing until just combined. Do not overmix.
- Step 5: Divide the batter evenly between the prepared cake pans.
- Step 6: Bake for 25-30 minutes, or until a wooden skewer inserted into the center comes out clean. Let cool in pans for 10 minutes before inverting onto a wire rack to cool completely. Frost with your favorite frosting (cream cheese frosting is recommended).
Notes
- To keep your Blue Velvet Cake moist, store it tightly covered at room temperature for up to 3 days, or in the refrigerator for up to a week.
- For a warm, comforting treat, gently microwave a slice of Blue Velvet Cake for 10-15 seconds.
- Serve your Blue Velvet Cake chilled with a dollop of whipped cream and fresh berries for a truly decadent dessert.
- Don't skip the vinegar; it reacts with the baking soda to create a light and airy texture and enhances the cake's subtle tang.
- Prep Time: 15 minutes
- Cook Time: 20 minutes
- Method: Stovetop
- Cuisine: American
FAQs :
What makes this Blue Velvet Cake Recipe so special?
Okay, picture this: You’re at a potluck. Tables groan under the weight of the usual suspects – brownies, cookies, maybe a sad-looking fruit salad. Then BAM! You unveil a vibrant blue velvet cake. Heads turn. Jaws drop. This isn’t just a cake; it’s a statement. It’s moist, fluffy, and boasts a unique flavor profile that dances on your tongue. The secret? We ditch the boring and embrace the bold with natural coloring and a touch of tangy buttermilk. Trust me, your baking reputation will skyrocket faster than a soufflé in a hot oven.
Can I make this blue velvet cake recipe ahead of time?
Absolutely! In fact, I highly recommend it. Baking the cake layers a day in advance and letting them chill in the refrigerator makes frosting them so much easier. The cold layers are less likely to crumble or tear. Wrap each layer tightly in plastic wrap before refrigerating. You can even make the frosting ahead of time too! Just store it in an airtight container in the fridge. When you’re ready to assemble, let the frosting come to room temperature and give it a good whip to restore its fluffy glory. Time saved is happiness earned, right?
How do I get that vibrant blue color in this blue velvet cake recipe?
Forget artificial dyes! We’re going au naturel here. The trick is using a good quality blue spirulina powder or butterfly pea flower powder. Start with a small amount and gradually add more until you achieve your desired shade of blue. Remember, a little goes a long way! Keep in mind that the color might deepen slightly as the cake bakes. And if you’re feeling extra adventurous, you can even experiment with different shades of blue by mixing the powders. Just remember to document your experiments; nobody wants a green velvet cake unless it’s March celebration!
What kind of frosting goes best with this Blue Velvet Cake Recipe?
Honestly, the sky’s the limit! But my personal favorite (and the one I’ve included in the recipe) is a classic cream cheese frosting. The tanginess of the cream cheese perfectly complements the subtly sweet and tangy flavor of the blue velvet cake. It’s like they were made for each other! Alternatively, a stabilized whipped cream frosting is delicious and lighter option, or a Swiss meringue buttercream for a silky smooth and sophisticated finish. Experiment and find your perfect match; your taste buds will thank you.
Leave a Comment