

The air crackles with excitement, a symphony of sugary sweetness and tart apple aroma promising a delightful Autumn celebration treat. Imagine biting into a crisp, juicy apple encased in a shimmering, hard candy shell.
These aren’t just any apples; these are **Candied Apples for Autumn celebration**, a nostalgic trip back to childhood, reimagined with a touch of spooky fun and bursting with irresistible flavor.
Here are a few reasons why you absolutely NEED to make these **Candied Apples for Autumn celebration** this year:
- They are surprisingly easy to make, requiring only a few simple ingredients and minimal effort for a show-stopping dessert.
- The combination of tart apple and sweet candy coating creates a flavor explosion that will tantalize your taste buds.
- Their vibrant colors and glistening finish make them a visually stunning centerpiece for any Autumn celebration celebration.
- You can easily customize them with different toppings like sprinkles, nuts, or chocolate drizzle for a personal touch.
Ingredients for Candied Apples for Autumn celebration
Here’s what you’ll need to make this delicious dish:
- Apples Choose firm, tart apples like Granny Smith or Honeycrisp for the best flavor and texture.
- Granulated Sugar This is the base for the candy coating, providing sweetness and structure.
- Light Corn Syrup It helps prevent crystallization, ensuring a smooth and glossy candy coating.
- Water Used to dissolve the sugar and create the syrup for the candy coating.
- Red Food Coloring Adds a classic Autumn celebration red hue to your candied apples (optional, but festive!).
- Apple Cider Vinegar A touch of acidity balances the sweetness and enhances the apple flavor.
- Candy Sticks Wooden sticks for easy handling and dipping of the apples.
- Sprinkles, Nuts, or Chocolate (Optional) For decorating and adding extra flavor and texture to your candied apples.
The full ingredients list, including measurements, is provided in the recipe card directly below.
How to Make Candied Apples for Autumn celebration
Follow these simple steps to prepare this delicious dish:
Step 1: Prepare the Apples
Wash and thoroughly dry the apples. Remove the stems and insert a candy stick firmly into the core of each apple.
Step 2: Make the Candy Coating
In a heavy-bottomed saucepan, combine the granulated sugar, light corn syrup, water, apple cider vinegar, and red food coloring (if using).
Step 3: Cook the Candy
Bring the mixture to a boil over medium-high heat, stirring until the sugar is dissolved. Once boiling, stop stirring and insert a candy thermometer. Cook until the mixture reaches 300°F (149°C), or the hard-crack stage.
Step 4: Dip the Apples
Remove the saucepan from the heat and carefully dip each apple into the hot candy coating, swirling to ensure even coverage. Lift the apple and allow any excess coating to drip off.
Step 5: Decorate and Cool
If desired, immediately sprinkle the dipped apples with your favorite toppings like sprinkles, chopped nuts, or chocolate shavings. Place the apples on a parchment-lined baking sheet to cool and harden.
Step 6: Enjoy!
Once the candy coating is completely hardened, your **Candied Apples for Autumn celebration** are ready to be enjoyed! These are the perfect spooky treat for any Autumn celebration celebration.
Perfecting the Cooking Process involves streamlining your movements like a culinary ninja. First, prep all your ingredients. Then, get your caramel bubbling before attaching sticks to the apples. Finally, dip and decorate immediately while the caramel is still pliable.
Add Your Touch by making these treats uniquely yours. Swap out regular apples for tart Granny Smiths. Consider a sprinkle of sea salt to balance the sweetness. Or, get wild with chopped nuts, shredded coconut, or even mini chocolate chips.
Storing & Reheating these beauties is simple, but crucial. Store leftover Candied Apples for Autumn celebration in an airtight container at room temperature. Unfortunately, reheating is not an option. They are best enjoyed fresh, lest the caramel get melty and sad.
Here are some tips to make your Candied Apples for Autumn celebration the best on the block:
- Ensure your apples are completely dry before dipping. This helps the caramel adhere properly, avoiding sticky mishaps and ensuring a smooth, even coating.
- Use a candy thermometer for the caramel. This removes guesswork and guarantees the perfect consistency for a crisp, not chewy, candied shell that holds its shape.
- Prepare your toppings in advance. Having everything ready means you can quickly decorate the apples before the caramel sets, adding that extra flair to your Autumn celebration treats.
(Personal anecdote formated as paragraph subheading)
Last year, my attempt at homemade caramel resulted in a brick. Lesson learned: always use a candy thermometer and don’t multitask while molten sugar is involved! It’s now a cautionary tale in our family.
Unleash Your Inner Candy Artist with Candied Apples for Autumn celebration
Okay, folks, let’s talk about Candied Apples for Autumn celebration. Not just any candied apples, mind you. We’re talking about those gloriously shiny, temptingly crunchy, and devilishly delicious orbs that scream autumn, spooky season, and “gimme, gimme, gimme!”
Forget store-bought versions that taste like they’ve been sitting in a warehouse since last Autumn celebration. We’re diving headfirst into making our own. Why? Because you deserve better. And because, frankly, it’s ridiculously fun. I mean, who doesn’t want to play mad scientist with sugar and apples?
This isn’t your grandma’s boring caramel apple recipe. We’re going to elevate this classic treat to a whole new level. We’ll explore flavor combinations that will make your taste buds sing, learn tips and tricks for achieving that perfect crackly shell, and discover how to decorate these beauties like a pro. Get ready to become the ultimate Candied Apple for Autumn celebration aficionado.
Why Candied Apples Reign Supreme During Autumn celebration
Let’s be honest, Autumn celebration is all about the candy. But amidst the mountains of chocolate bars and sugary gummies, the Candied Apple stands tall like a beacon of autumnal deliciousness. It’s a treat that transcends generations, evoking childhood memories and sparking joy with every bite.
There’s something inherently magical about the combination of a crisp, juicy apple and a sweet, crunchy coating. It’s a textural symphony that dances on your tongue. And let’s not forget the visual appeal. A perfectly Candied Apple for Autumn celebration, glistening under the dim glow of a porch light, is a sight to behold.
Plus, making Candied Apples for Autumn celebration is a fantastic activity for the whole family. It’s a chance to bond, get creative, and maybe make a little bit of a mess (but hey, that’s part of the fun!). So, ditch the store-bought candy this year and embrace the joy of homemade Candied Apples for Autumn celebration. Your taste buds (and your family) will thank you.
The Anatomy of a Perfect Candied Apple
Before we dive into the recipe, let’s break down the key components of a truly exceptional Candied Apple for Autumn celebration. It’s not just about dipping an apple in caramel (though, let’s be real, even that is pretty great). It’s about achieving a harmonious balance of flavors and textures that will leave you craving more.
The Apple: The Foundation of Flavor
Choosing the right apple is crucial. You want something that is firm, slightly tart, and can stand up to the heat of the caramel. Granny Smith apples are a classic choice for Candied Apples for Autumn celebration because their tartness provides a delightful contrast to the sweetness of the caramel. Honeycrisp or Fuji apples also work well.
Make sure your apples are fresh, unblemished, and thoroughly washed and dried. Any wax coating on the apple can prevent the caramel from adhering properly. A little elbow grease and a clean towel will do the trick.
The Caramel: The Sweet Seduction
Ah, the caramel. This is where the magic happens. Forget those pre-made caramel squares. We’re making our caramel from scratch, using a combination of sugar, corn syrup, butter (or a butter substitute for our dairy-free friends), and a touch of salt.
The key to perfect caramel is patience and a candy thermometer. You want to cook the caramel to the “hard-crack” stage, which is around 300-310°F. This ensures that the caramel will harden into a crisp, glossy shell that shatters with each bite. Trust me, it’s worth the effort.
The Toppings: The Crowning Glory
This is where you can really let your creativity shine! The toppings are what transform a simple Candied Apple for Autumn celebration into a masterpiece. Think chopped nuts, sprinkles, shredded coconut, mini chocolate chips, crushed cookies, or even a drizzle of melted chocolate.
Don’t be afraid to experiment! Try different flavor combinations and see what you come up with. Just remember to have your toppings ready to go before you start dipping, as the caramel sets quickly.
The Ultimate Candied Apples for Autumn celebration Recipe (No Tricks, Just Treats!)
Alright, enough chit-chat. Let’s get down to business and make some Candied Apples for Autumn celebration that will blow your mind. This recipe is foolproof, easy to follow, and guaranteed to impress.
**Ingredients: **
- 6 medium apples (Granny Smith, Honeycrisp, or Fuji)
- 6 wooden sticks (craft sticks or popsicle sticks)
- 2 cups granulated sugar
- ½ cup corn syrup
- ½ cup water
- ¼ cup butter (or butter substitute)
- ¼ teaspoon salt
- Your favorite toppings (chopped nuts, sprinkles, shredded coconut, mini chocolate chips, etc.)
**Equipment: **
- Candy thermometer
- Large saucepan
- Baking sheet lined with parchment paper
- Small bowls for toppings
Instructions: A Step-by-Step Guide to Candied Apple Perfection
1. **Prepare the Apples: ** Wash and thoroughly dry the apples. Remove the stems and insert a wooden stick into the core of each apple. This makes them easier to handle and eat.
2. **Prepare the Toppings: ** Place your chosen toppings in separate small bowls. This will make it easy to decorate the apples quickly.
3. **Make the Caramel: ** In a large saucepan, combine the sugar, corn syrup, water, butter (or butter substitute), and salt. Stir over medium heat until the sugar dissolves.
4. **Cook the Caramel: ** Once the sugar has dissolved, stop stirring and insert a candy thermometer into the saucepan. Cook the caramel over medium heat until it reaches the hard-crack stage (300-310°F). This may take 15-20 minutes. Be patient and don’t rush it!
5. **Dip the Apples: ** Remove the saucepan from the heat. Carefully dip each apple into the hot caramel, swirling to coat completely. Use a spoon to help coat the apple if needed.
6. **Decorate the Apples: ** Immediately after dipping, roll the caramel-coated apple in your chosen toppings. Press gently to ensure the toppings adhere to the caramel.
7. **Cool and Enjoy: ** Place the decorated apples on the prepared baking sheet lined with parchment paper. Let them cool completely before serving. This will take about 30 minutes.
Troubleshooting Your Candied Apple Creations
Sometimes, even with the best intentions, things can go a little sideways in the kitchen. Here are some common problems and their solutions when making Candied Apples for Autumn celebration:
- **Caramel is too soft:** This means the caramel didn’t reach the hard-crack stage. Unfortunately, there’s no real fix once it’s cooled. You’ll have sticky apples. Try again, making sure to use a candy thermometer.
- **Caramel is too hard:** You overcooked the caramel! The apples might be difficult to bite into. Next time, watch the thermometer closely and remove from heat right at 300-310°F.
- **Toppings won’t stick:** This usually happens if the caramel has cooled too much. Work quickly and have your toppings ready to go. If the caramel starts to set, you can gently reheat it over low heat.
- **Apples are slippery:** Ensure your apples are completely dry before dipping. Any moisture will prevent the caramel from adhering properly.
Tips for Avoiding Candied Apple Catastrophes
- **Use a heavy-bottomed saucepan:** This helps to distribute the heat evenly and prevent the caramel from burning.
- **Don’t stir the caramel after the sugar has dissolved:** Stirring can cause sugar crystals to form, resulting in grainy caramel.
- **Work quickly:** The caramel sets quickly, so have everything ready to go before you start dipping.
- **Have fun!** Making Candied Apples for Autumn celebration should be a fun and enjoyable experience. Don’t stress too much about perfection.
Alternative Twists on Classic Candied Apples for Autumn celebration
Want to get a little more adventurous with your Candied Apples for Autumn celebration? Here are some fun and creative variations to try:
- **Chocolate Caramel Apples:** Dip the apples in caramel as directed, then drizzle with melted chocolate (milk, dark, or white).
- **Salted Caramel Apples:** Add a sprinkle of sea salt to the caramel before dipping for a sweet and salty treat.
- **Spice it Up Apples:** Add a pinch of cinnamon, nutmeg, or ginger to the caramel for a warm and cozy flavor.
- **Candy Corn Apples:** Decorate the apples with candy corn for a festive Autumn celebration look.
Healthier Options for the Conscious Candy Lover
Okay, let’s be real. Candied Apples for Autumn celebration are a treat, not a health food. But if you’re looking to make them a little bit healthier, here are a few ideas:
- **Use natural sweeteners:** Replace some of the sugar with honey or maple syrup.
- **Choose healthier toppings:** Opt for nuts, seeds, or dried fruit instead of candy and sprinkles.
- **Go for smaller apples:** Portion control is key!
Vegan Candied Apples for Everyone
Making vegan Candied Apples for Autumn celebration is easier than you might think! Simply substitute the butter with a vegan butter substitute. Ensure your chosen toppings are also vegan-friendly. The rest of the recipe remains the same!
Candied Apples for Autumn celebration: More Than Just a Treat
Candied Apples for Autumn celebration are more than just a delicious treat. They’re a symbol of autumn, a reminder of childhood, and a chance to create lasting memories with loved ones. So, gather your ingredients, put on some spooky tunes, and get ready to make some Candied Apples for Autumn celebration that will be the talk of the town! Enjoy!
Conclusion for Candied Apples for Autumn celebration:
So, there you have it – your ticket to becoming the coolest ghoul on the block with these Candied Apples for Autumn celebration. We’ve covered everything from perfecting the coating to preventing the dreaded slide-off. Remember, use quality ingredients, don’t be afraid to get creative with your toppings, and most importantly, have fun! Autumn celebration should be a scream and creating these treats is sure to impress all the monsters and princesses. Now go forth and conquer that candy apple kingdom!
Print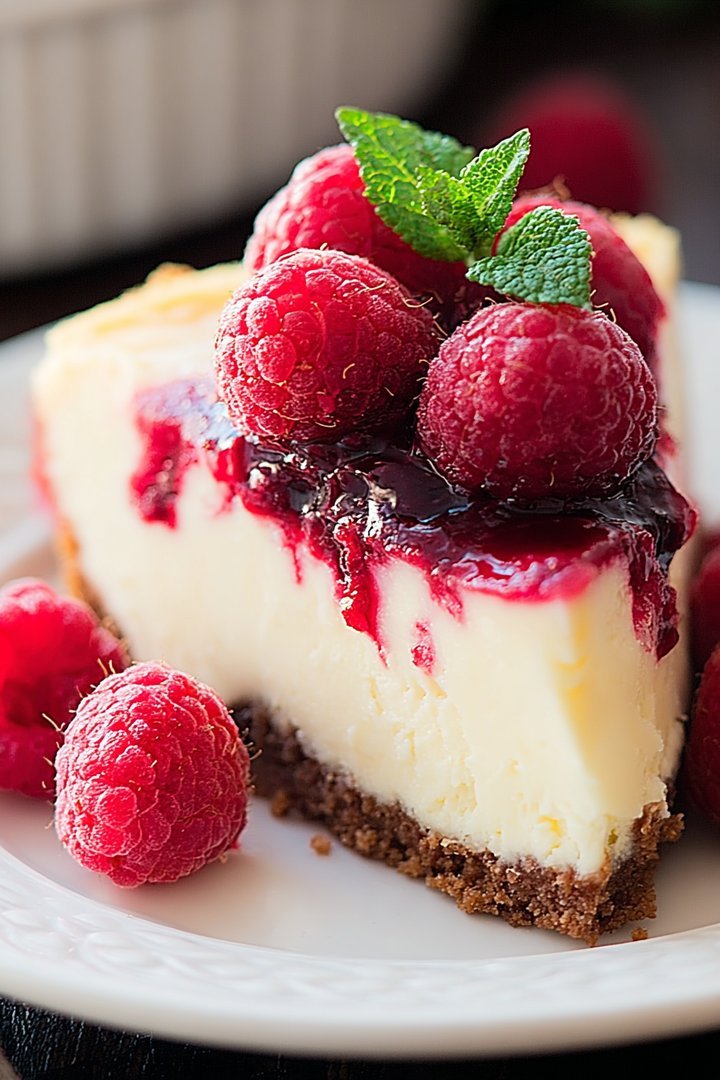
Candied Apples for Halloween
Delicious candied apples for halloween recipe with detailed instructions and nutritional information.
- Total Time: 35 minutes
- Yield: 4 servings 1x
Ingredients
- 6 medium apples (Granny Smith, Honeycrisp, or Fuji)
- 3 cups granulated sugar
- 3/4 cup water
- 1/2 cup light corn syrup
- 1 teaspoon red food coloring (optional)
- 1 teaspoon vanilla extract
- 6 wooden candy sticks or skewers
- Parchment paper
Instructions
- Step 1: Wash and dry the apples thoroughly. Remove the stems and insert a candy stick or skewer firmly into the stem end of each apple.
- Step 2: Line a baking sheet with parchment paper.
- Step 3: In a medium, heavy-bottomed saucepan, combine the sugar, water, and corn syrup. Stir until the sugar is mostly dissolved.
- Step 4: Cook over medium-high heat, without stirring, until the mixture reaches the hard-crack stage (300-310°F or 149-154°C) on a candy thermometer. If using, stir in the red food coloring and vanilla extract *after* the mixture has reached the correct temperature. Be careful, as the syrup is extremely hot.
- Step 5: Remove the saucepan from the heat. Quickly dip each apple into the hot syrup, swirling to coat evenly. Lift the apple and let any excess syrup drip off.
- Step 6: Place the coated apples on the prepared parchment paper. Let cool completely before serving, about 30 minutes.
Notes
- Store leftover candied apples individually wrapped in plastic wrap in the refrigerator for up to 3 days.
- Reheating isn't recommended, as the candy coating may become sticky, but they're best enjoyed at room temperature after storing.
- Serve these spooky treats with a scoop of vanilla ice cream for a delightful contrast of textures and temperatures.
- For a smoother candy coating, avoid stirring the sugar mixture after it comes to a boil – just let it do its thing until it reaches the hard-crack stage!
- Prep Time: 15 minutes
- Cook Time: 20 minutes
- Method: Stovetop
- Cuisine: American
FAQs:
Can I prepare Candied Apples for Autumn celebration a day in advance?
Listen, we’ve all been there – staring down a to-do list longer than a toddler’s tantrum. While fresh is best for that ultimate crisp-meets-sticky experience, you *can* make these ahead of time. Wrap each finished apple individually in cellophane or parchment paper and store them in the fridge. Just know that the candy coating might get a tad sticky from the moisture, so try to make them only a day ahead and let them come to room temperature before serving for the best “wow” factor. No one wants a soggy surprise!
What are some fun variations for these Autumn celebration Candied Apples?
Oh, honey, the sky’s the limit! Think of your candied apple as a blank canvas for your spooky masterpiece. Roll them in crushed cookies for a graveyard vibe. Drizzle with melted white chocolate and add edible candy eyes for a ghostly gaze. Or, get super fancy and create a spiderweb design using dark chocolate. Remember, Autumn celebration is all about embracing the fun and the fright, so let your imagination run wild. Just try not to scare yourself!
How do I prevent the candy coating from sliding off my Candied Apples for Autumn celebration?
Ah, the dreaded slide! Fear not, my friend. First, make sure you’re using good quality apples that are cold and dry. Second, gently scrub the apples with hot water to remove any wax coating. And most importantly, make sure your sugar syrup reaches the hard crack stage (around 300-310°F or 149-154°C) for a sturdy, reliable coating. A candy thermometer is your best friend here; guessing is a recipe for sugary disaster! With these tricks, you’ll achieve candied apple perfection.
How long will Candied Apples for Autumn celebration last?
Real talk? Not very long, especially if you’re surrounded by hungry ghouls and goblins (aka your family). Seriously, they’re best enjoyed within 24-48 hours of making them. After that, the candy coating starts to get sticky and soft, and the apple itself can start to weep (eww). So, make ’em, share ’em, devour ’em! Don’t let these tasty treats become forgotten relics in the back of your fridge.


Leave a Comment